did you buy the battery to match your car?
You are using an out of date browser. It may not display this or other websites correctly.
You should upgrade or use an alternative browser.
You should upgrade or use an alternative browser.
Tork Tech Terminator Install
- Thread starter tobynt
- Start date
feel free to clutter up the thread with arbitrary and irrelevant trolling comments or questions. :bash:
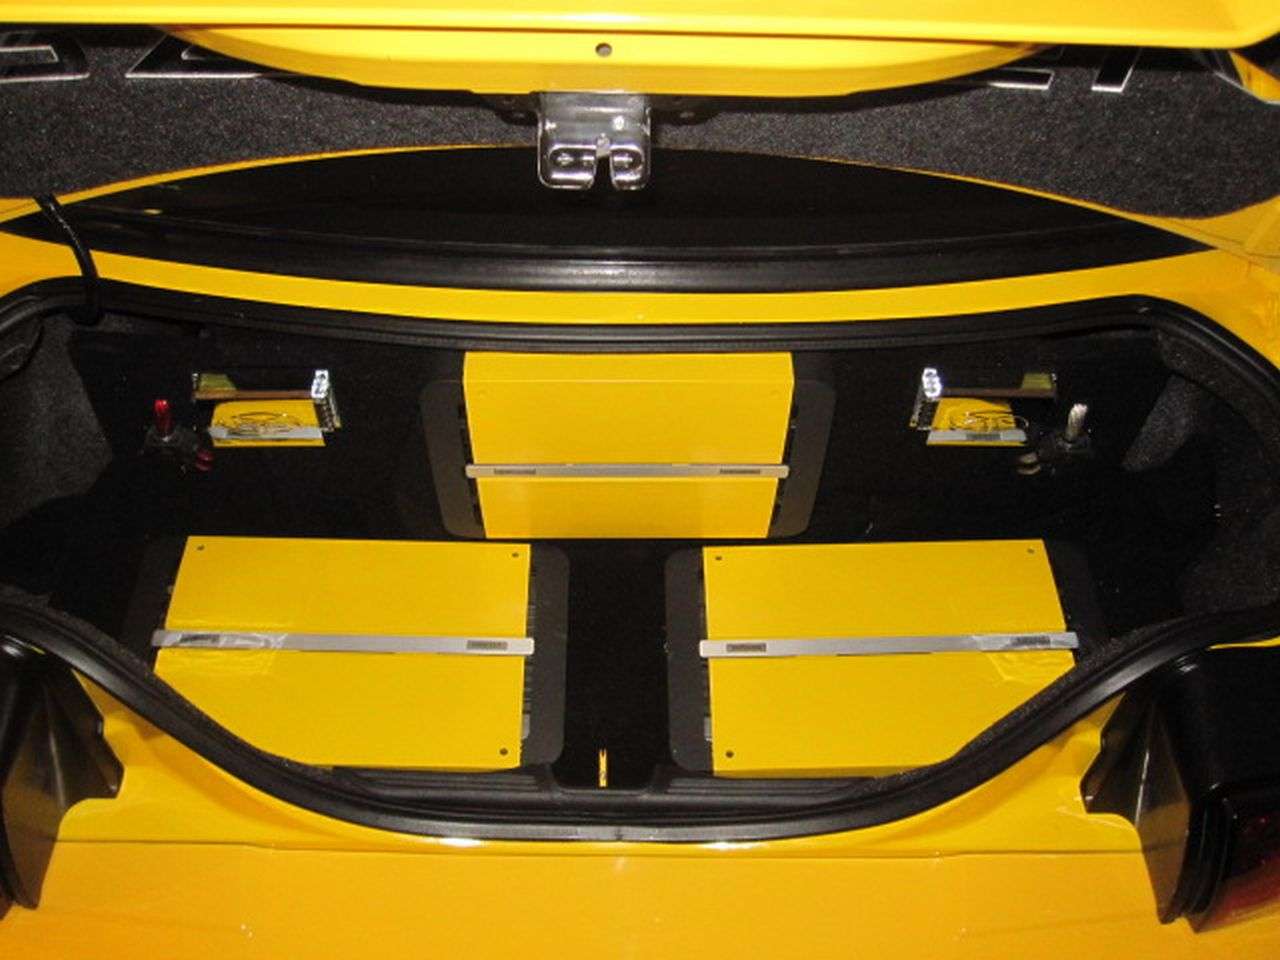
However, to answer your question...no, just so happens that the deep cycle battery that Optima makes is yellow. Kind of helps maintain the 2200 watt (4400 peak) audio system.
Oh...........Yes, I did go out of my way to paint the Polk Audio amp cover the same color as my car.
However, to answer your question...no, just so happens that the deep cycle battery that Optima makes is yellow. Kind of helps maintain the 2200 watt (4400 peak) audio system.
Oh...........Yes, I did go out of my way to paint the Polk Audio amp cover the same color as my car.
Great work on your Mustang its amazing!! :beer: My question is what was the reason for going with the Meziere Intercooler pump? Was it because of the dual pass h/e? Its making me rethink my stock used 03/04 Cobras Bosch unit. I pretty much have close to the same build T/Tech build in regards to the Stieg Stage 6 port (no chrome), AFCO dual pass h/e with fans, egr delete, Cobra tank, but went with a Dragon t/b, Accufab elbow, and 48lb injectors. When things get better here it will get finished.
I will have to say that I am very interested in your tube design and have been trying for some time to get a different system fabricated up. I never liked the way the Tork Tech kit was set up.....If you do end up making it I would certainly be willing to help offset some of your cost if you were to make two.QUOTE]
^^^ I totally agree. I have had this kit for some time now and that sloppy hose set up always makes me cringe when I see pictures of it. Looks really unprofessional. I also just did not like that heavy h/e that came with the kit and where the thermostat was located. Just hanging right there out in the open.
Last edited:
I mainly went with it because it was easier to mount and I felt more confident about the longevity of the pump. I personally did not buy it for a "higher" cooling ability.
Also....it just looks bad ass.
Also....it just looks bad ass.
Looks beautiful. Thanks again for your help in getting my TorkTech build moving. Good to see there are a few of us out there.
You should think about selling those bitchin' coolant cross-over. I know I'd buy one from you. :beer:
You should think about selling those bitchin' coolant cross-over. I know I'd buy one from you. :beer:
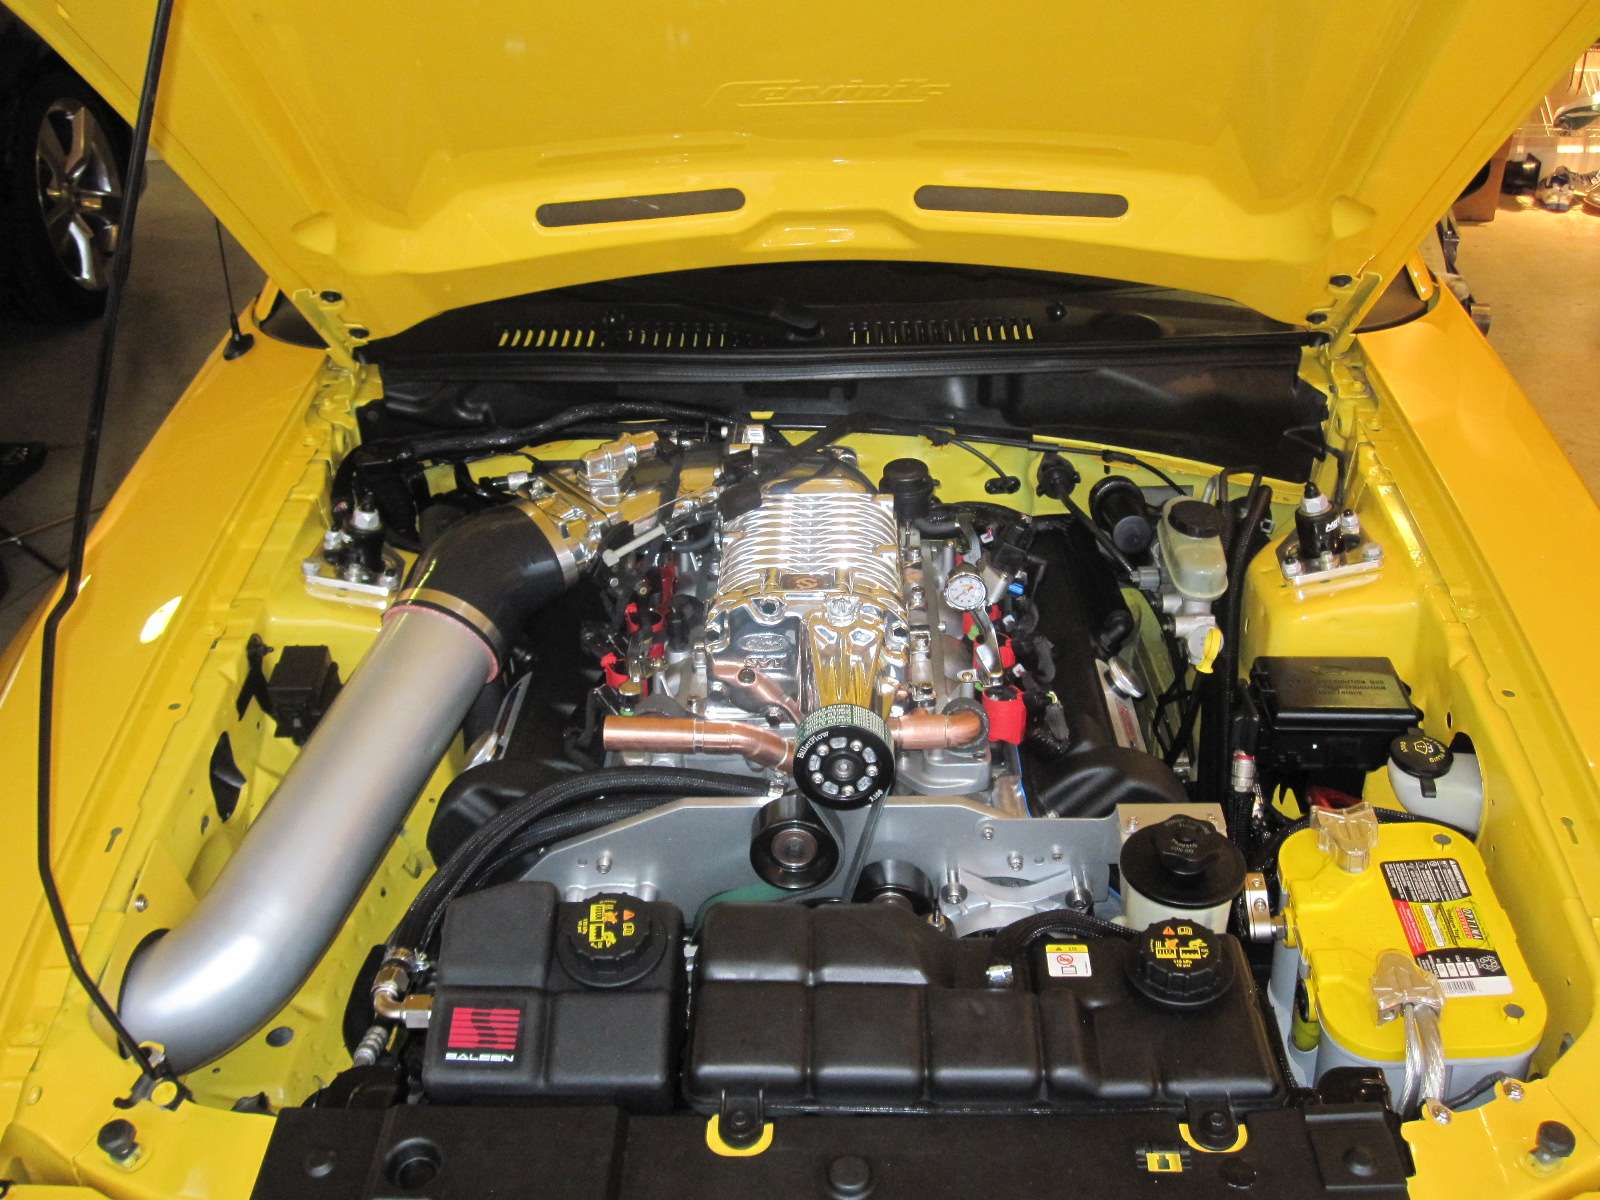
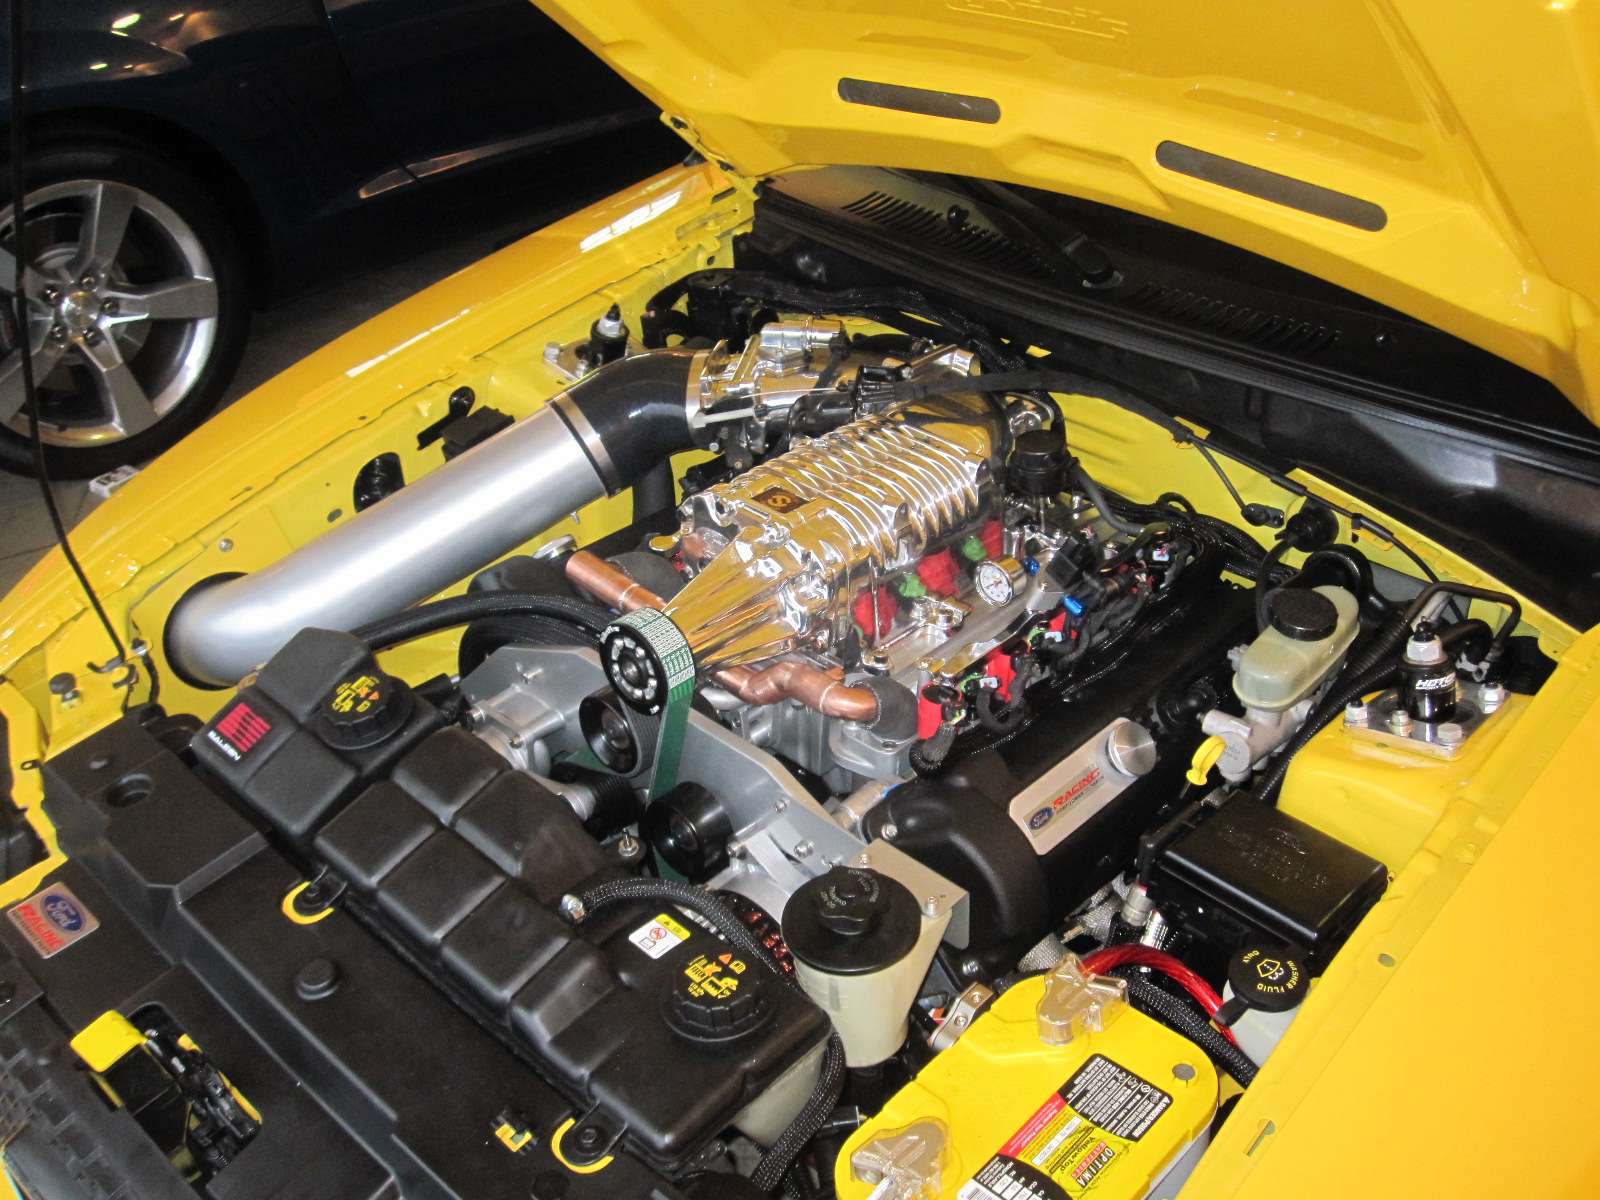
Coolant Crossover Tork Tech Terminator install
Finished the coolant crossover pipe. Turns out, I had to fab one up myself instead of having one made. The few quotes I got back were around $1,500-$2,500. Needless to say, it was not worth that amount of money.
So, I printed a copy of my drawing layout to scale size and headed to Lowes. Got all of the fittings I needed to make the crossover tube out of copper fittings and copper tubing from the plumbing department. Went home and started mocking things up and soldering them together.
I have access to a TIG welder and will make a more permanent one later. But, for now the prototype part will work until I get around to making one better down the road (probably next fall).
This was by no means a cheap venture working on this crossover tube. The copper fittings ran about $80.00, I also went ahead and purchased another in-line stat housing that was made for 1 1/4" hose. I then took the original 1 1/2" housing and only used one side of it to connect to the other side of the 1 1/4" housing. This became the simplest solution to go from 1 1/4" hose up to 1 1/2" hose for the radiator.
Here are a few pictures of the in process mock up and final install of the (for now) prototype crossover tube.
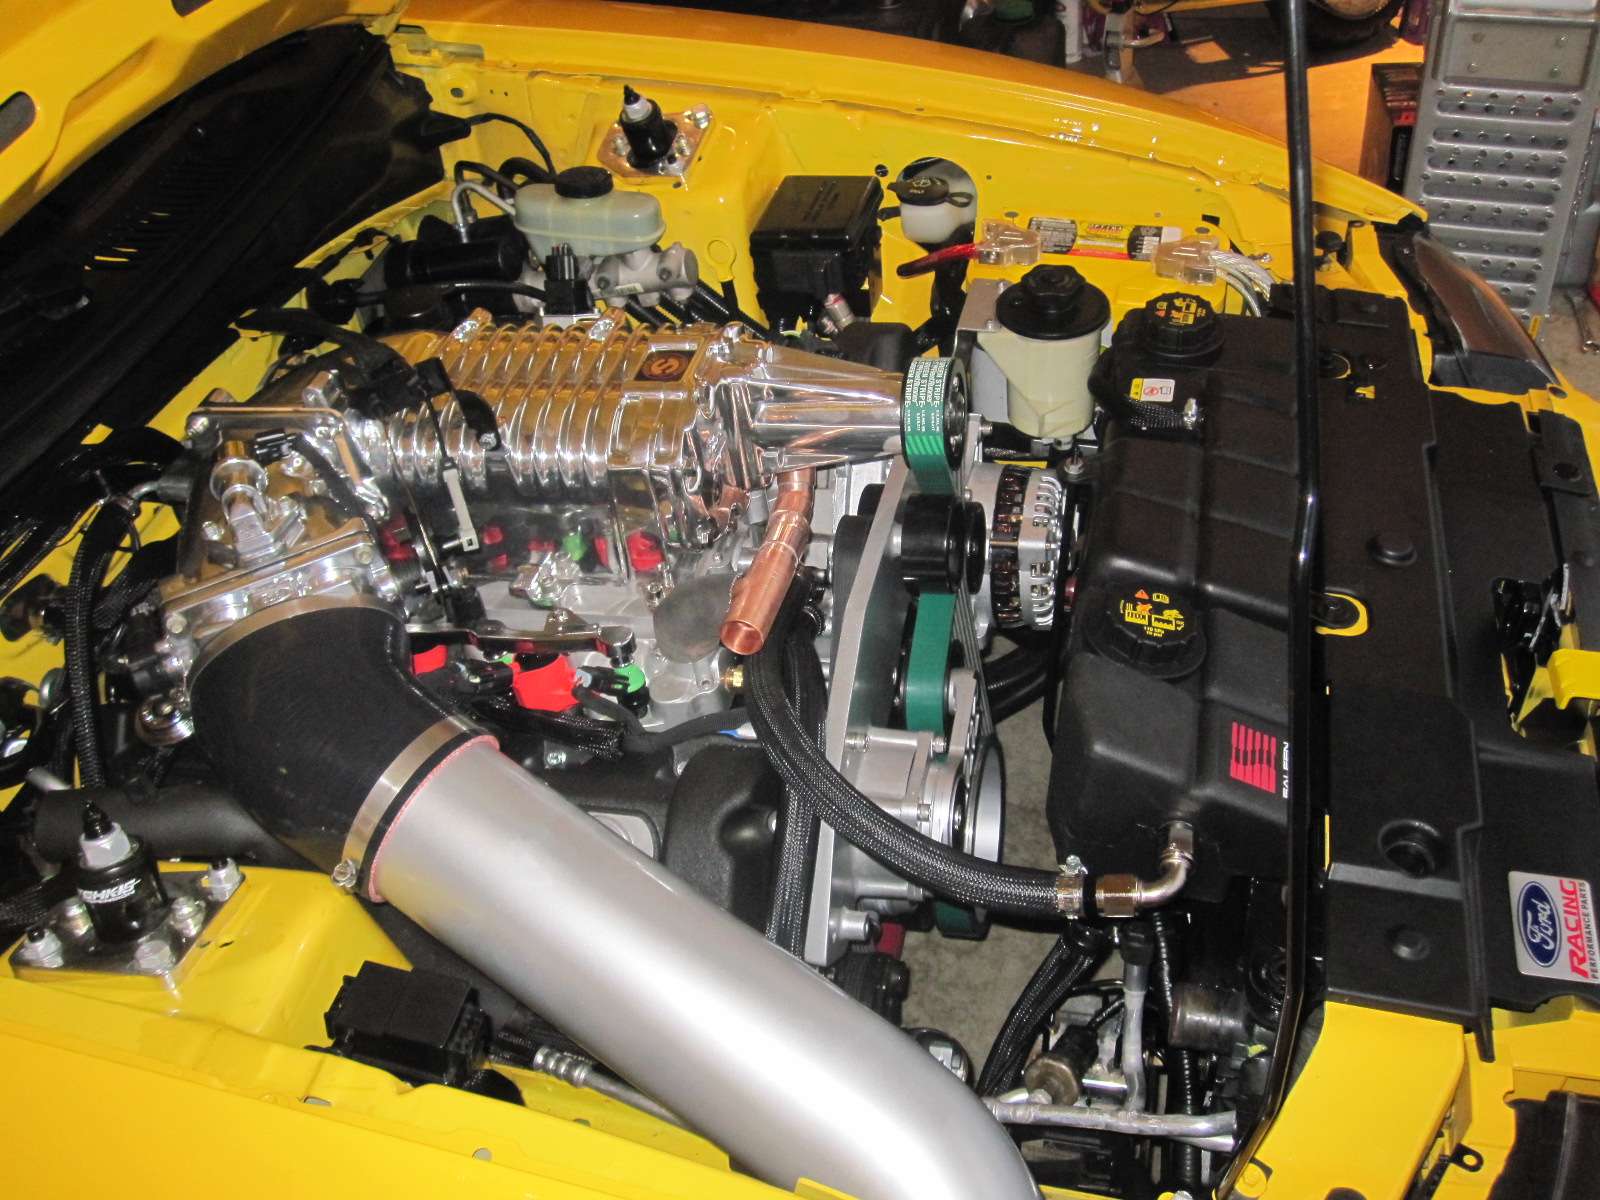
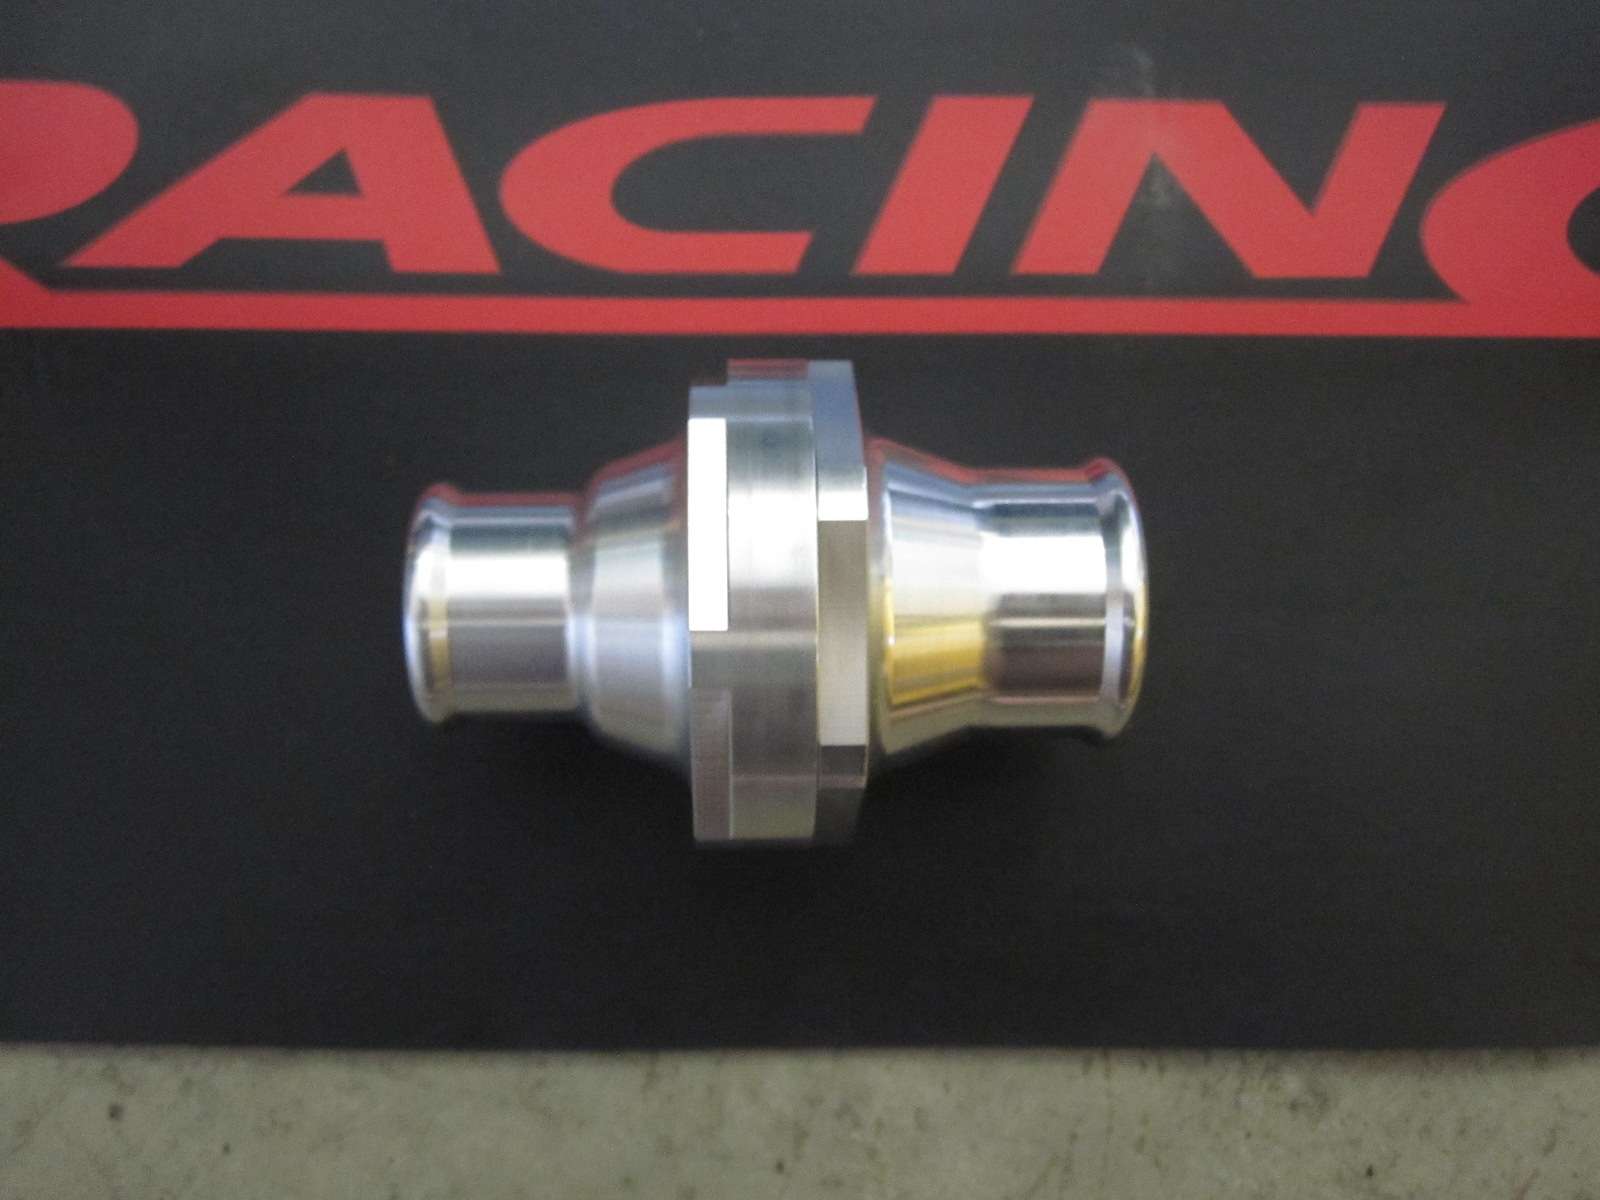
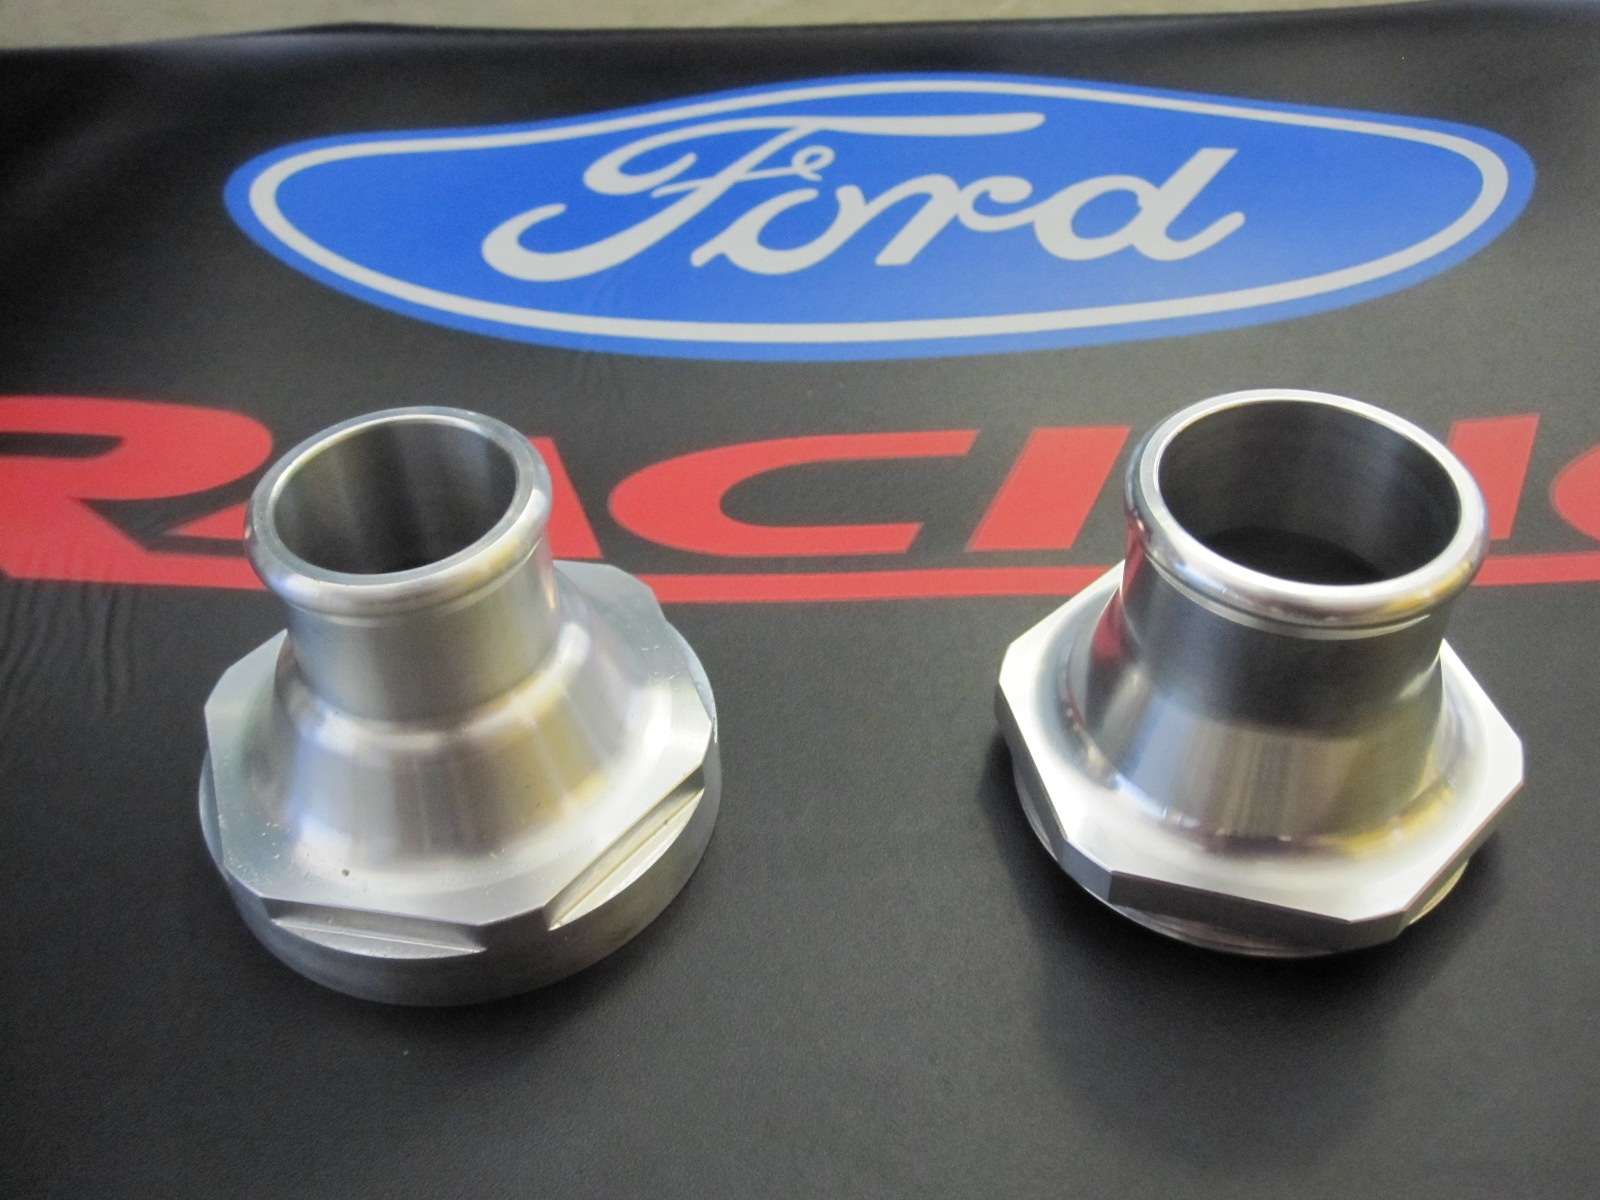
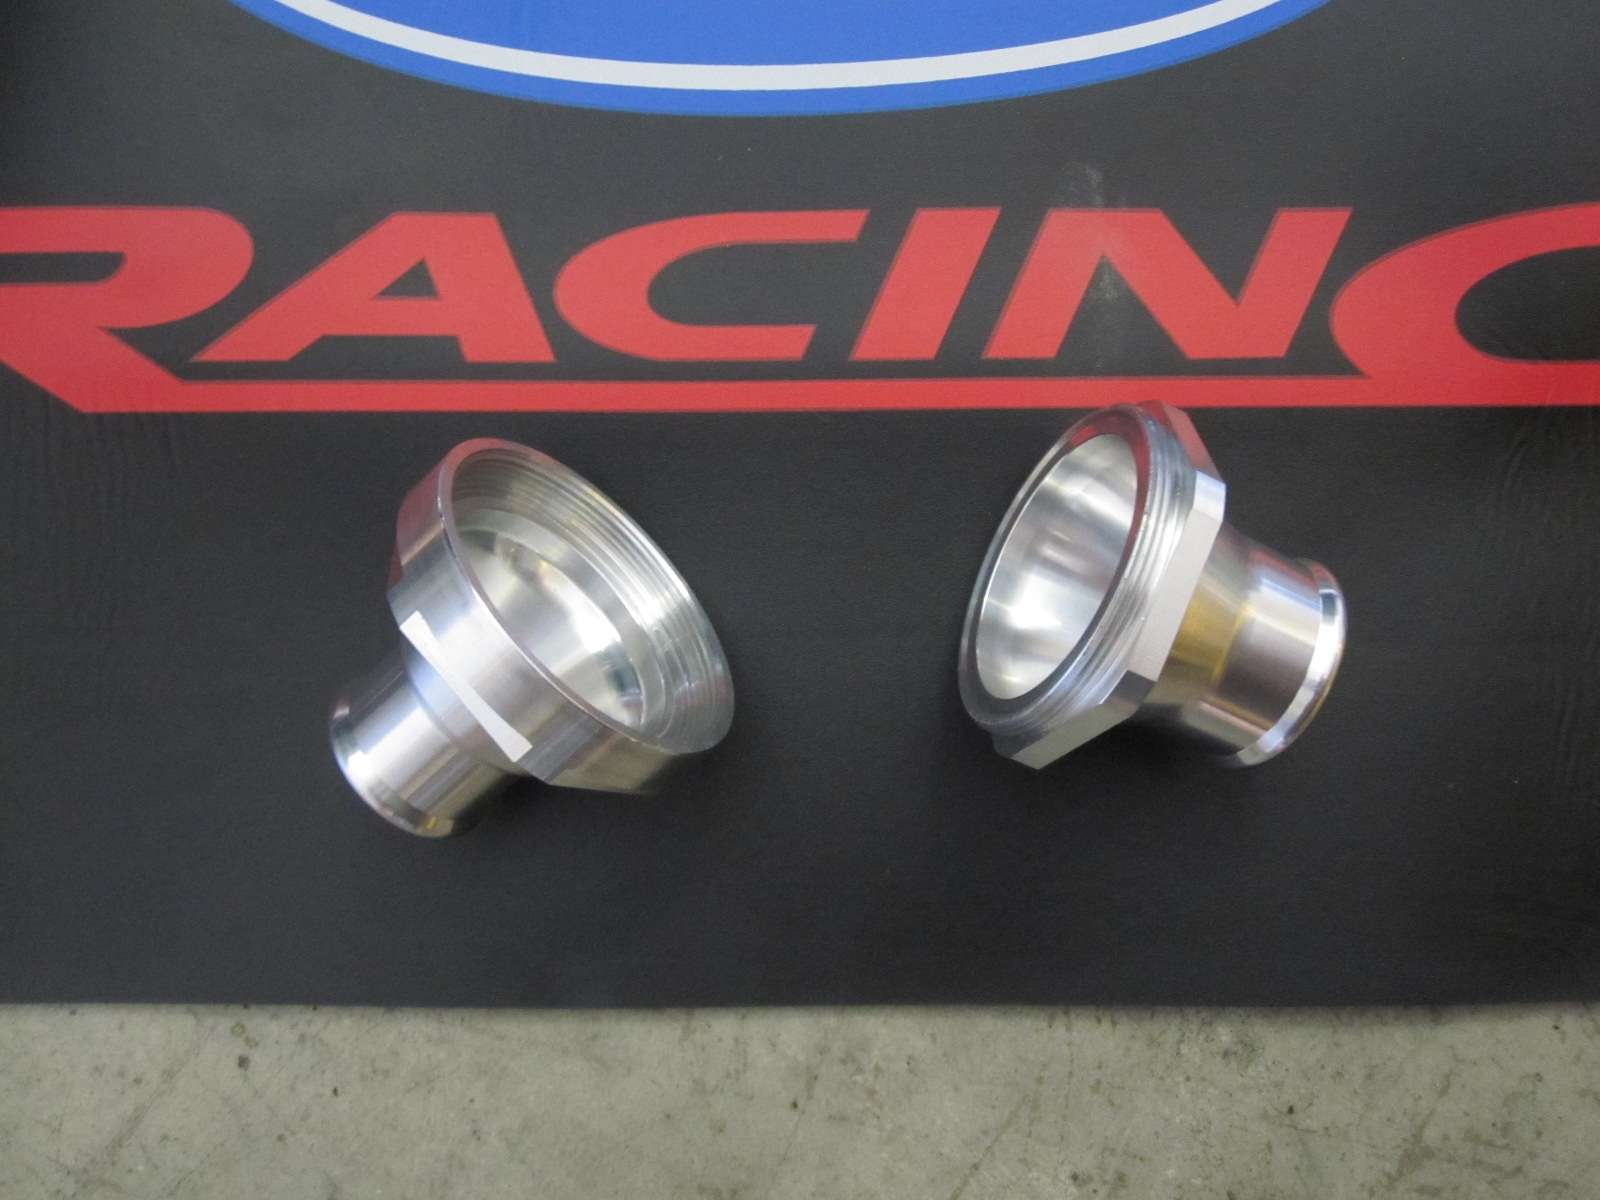
Few Pictures of the inline housing for the thermostat.
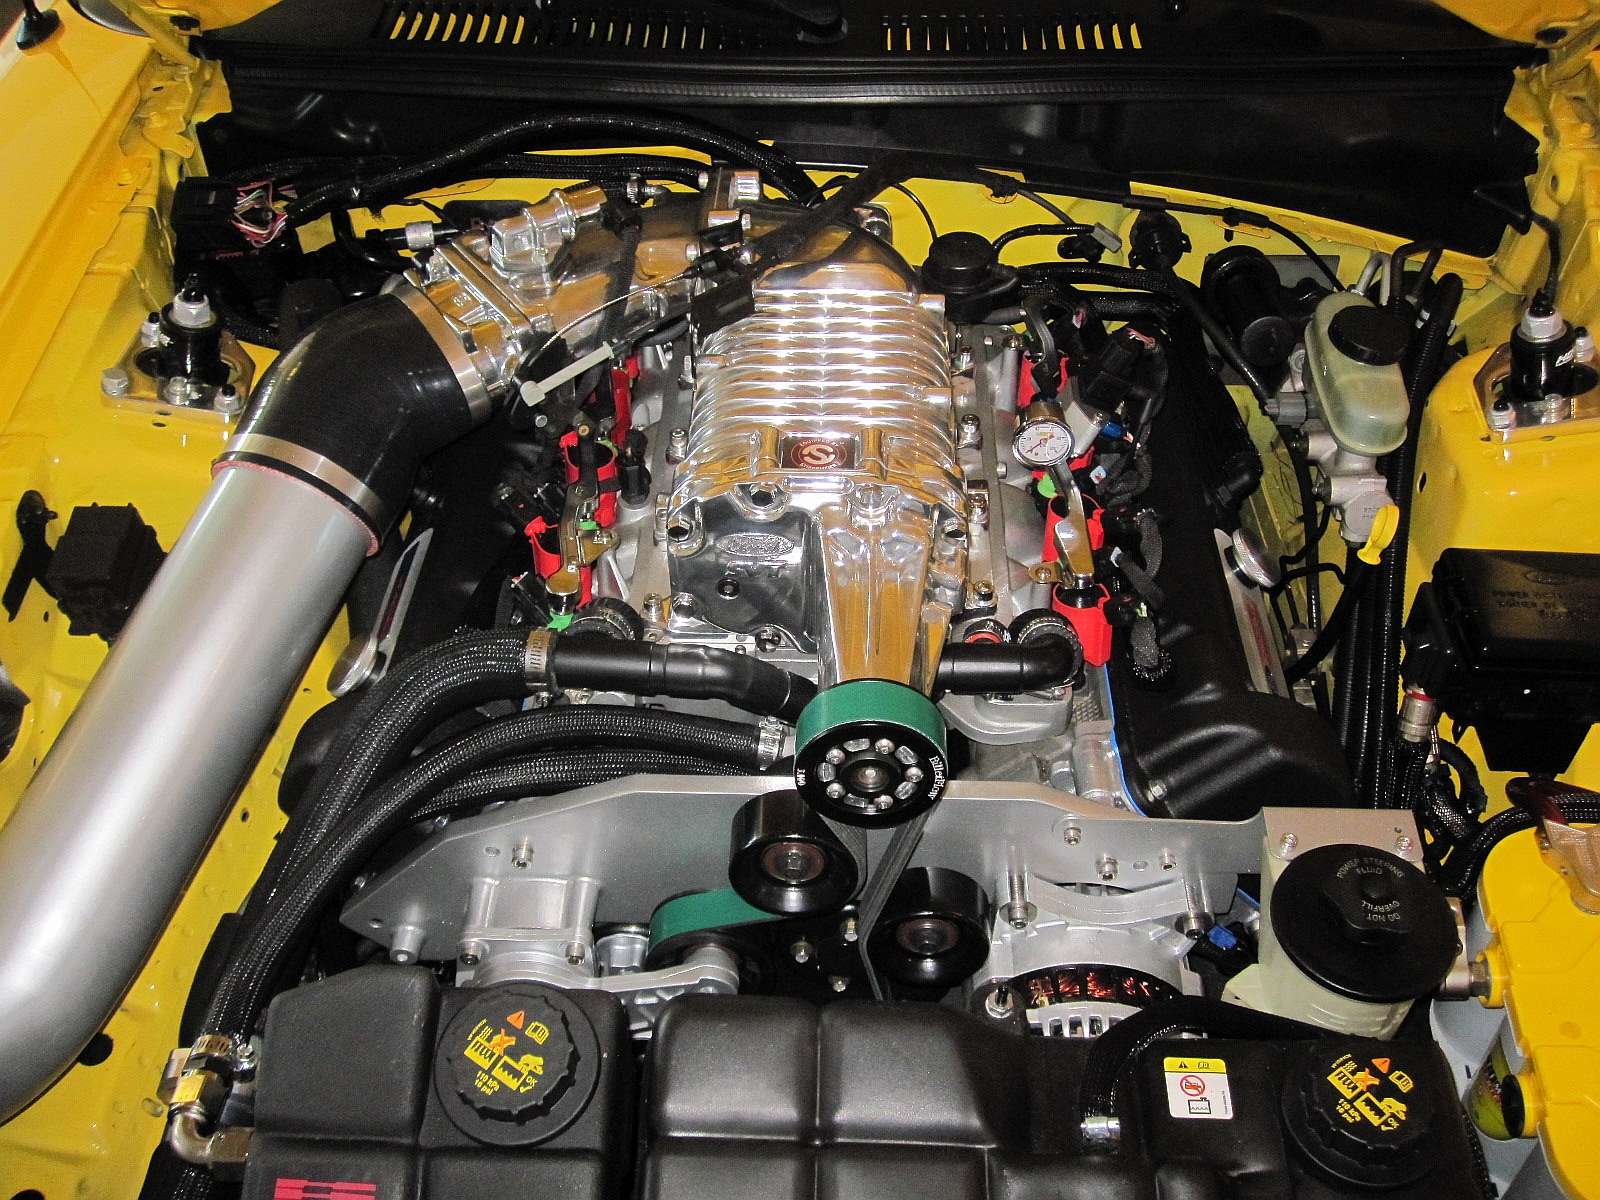
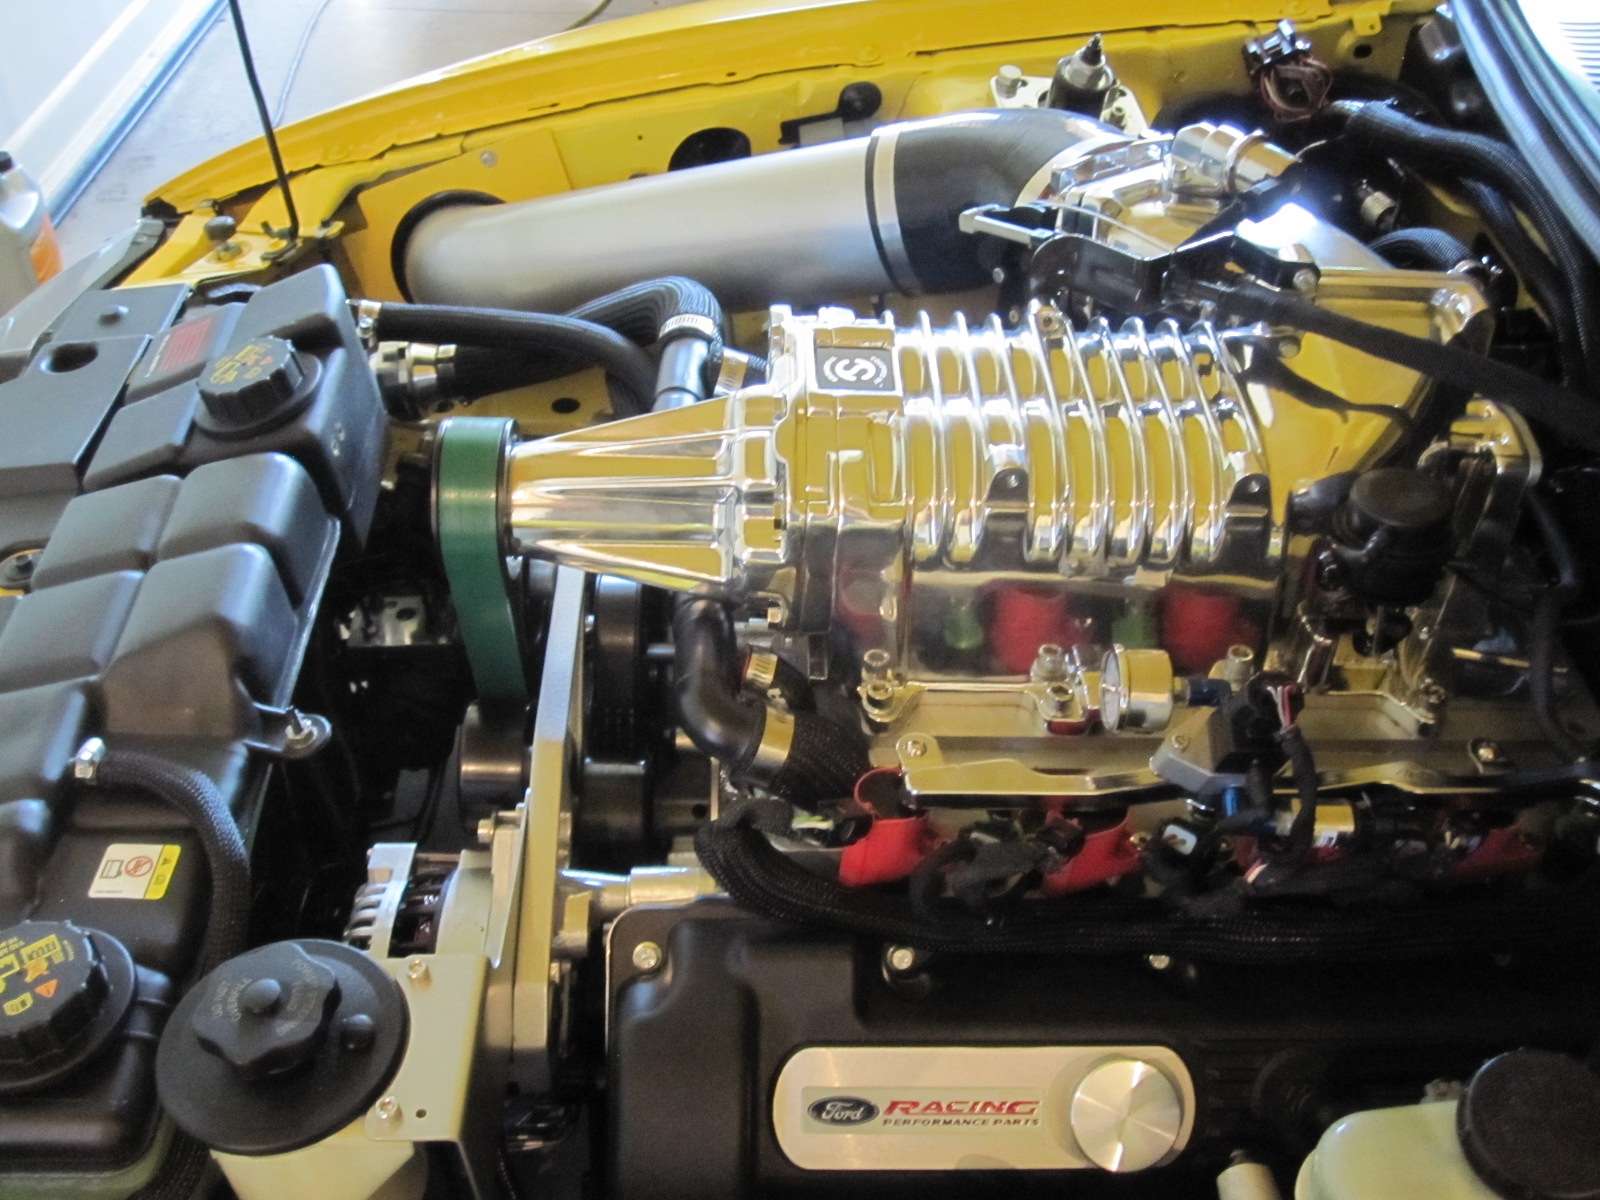
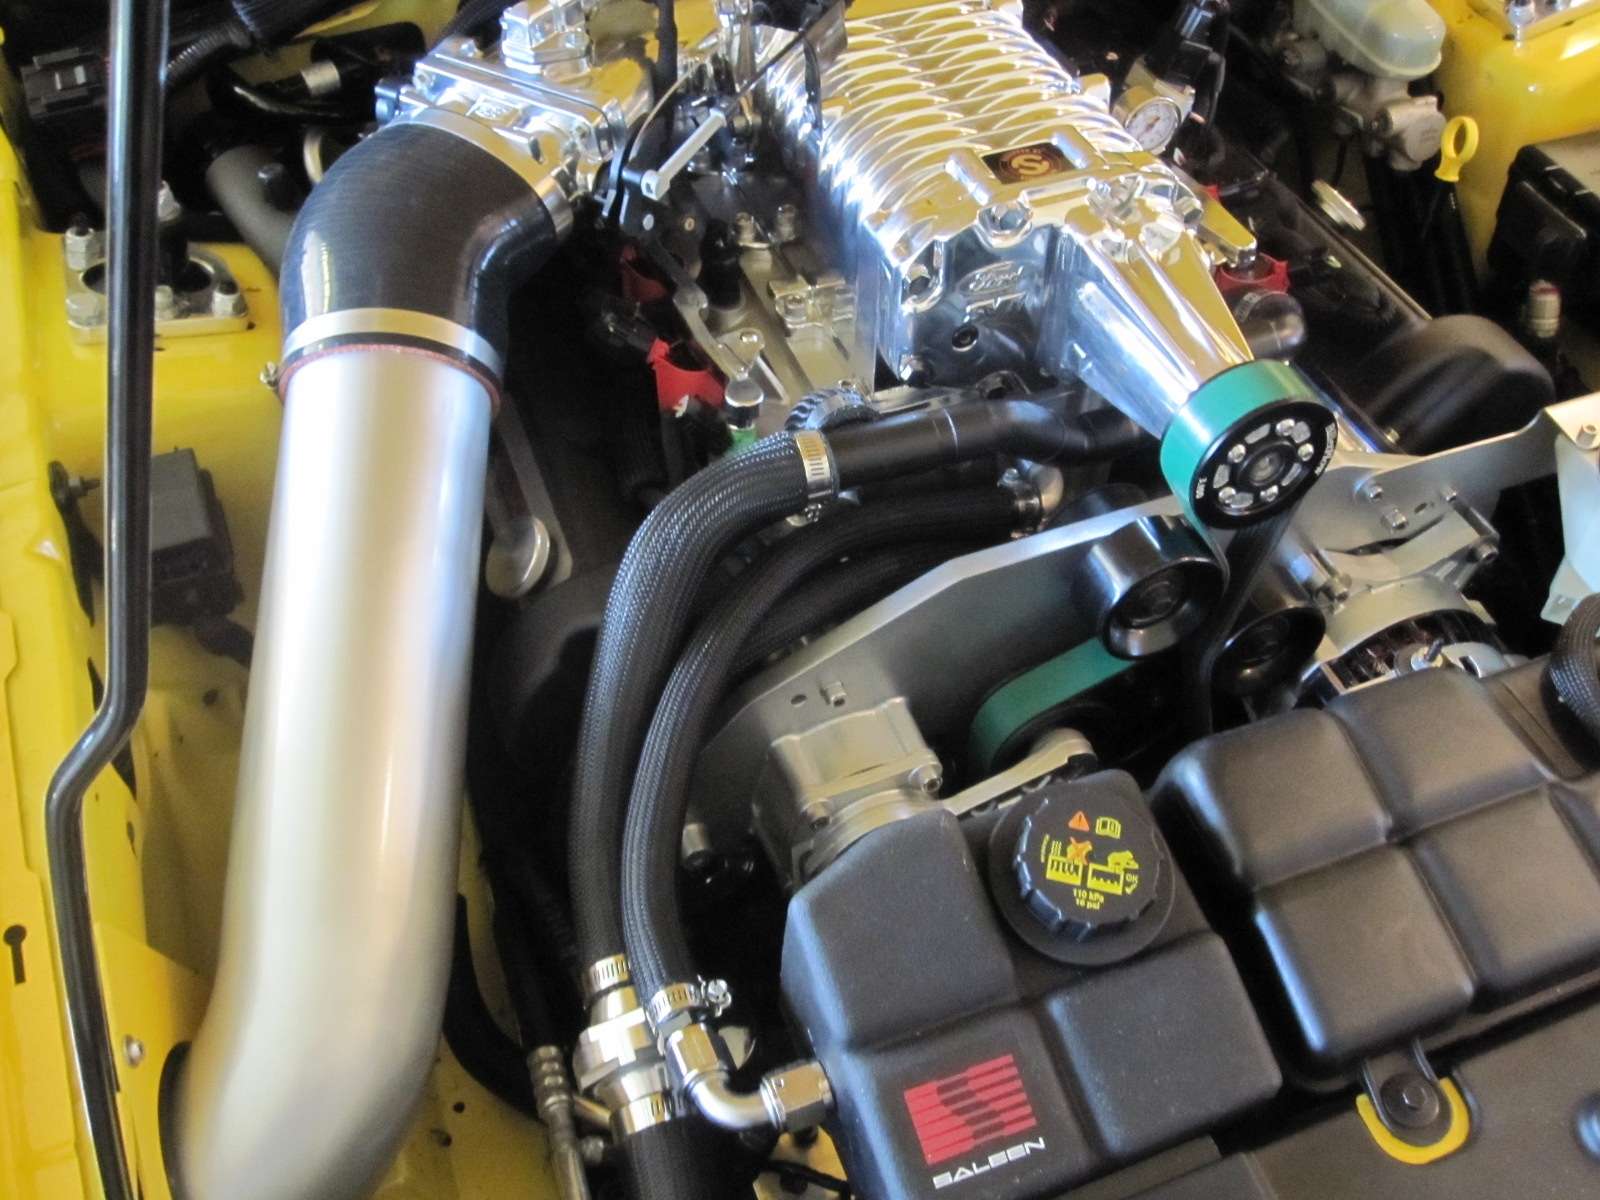
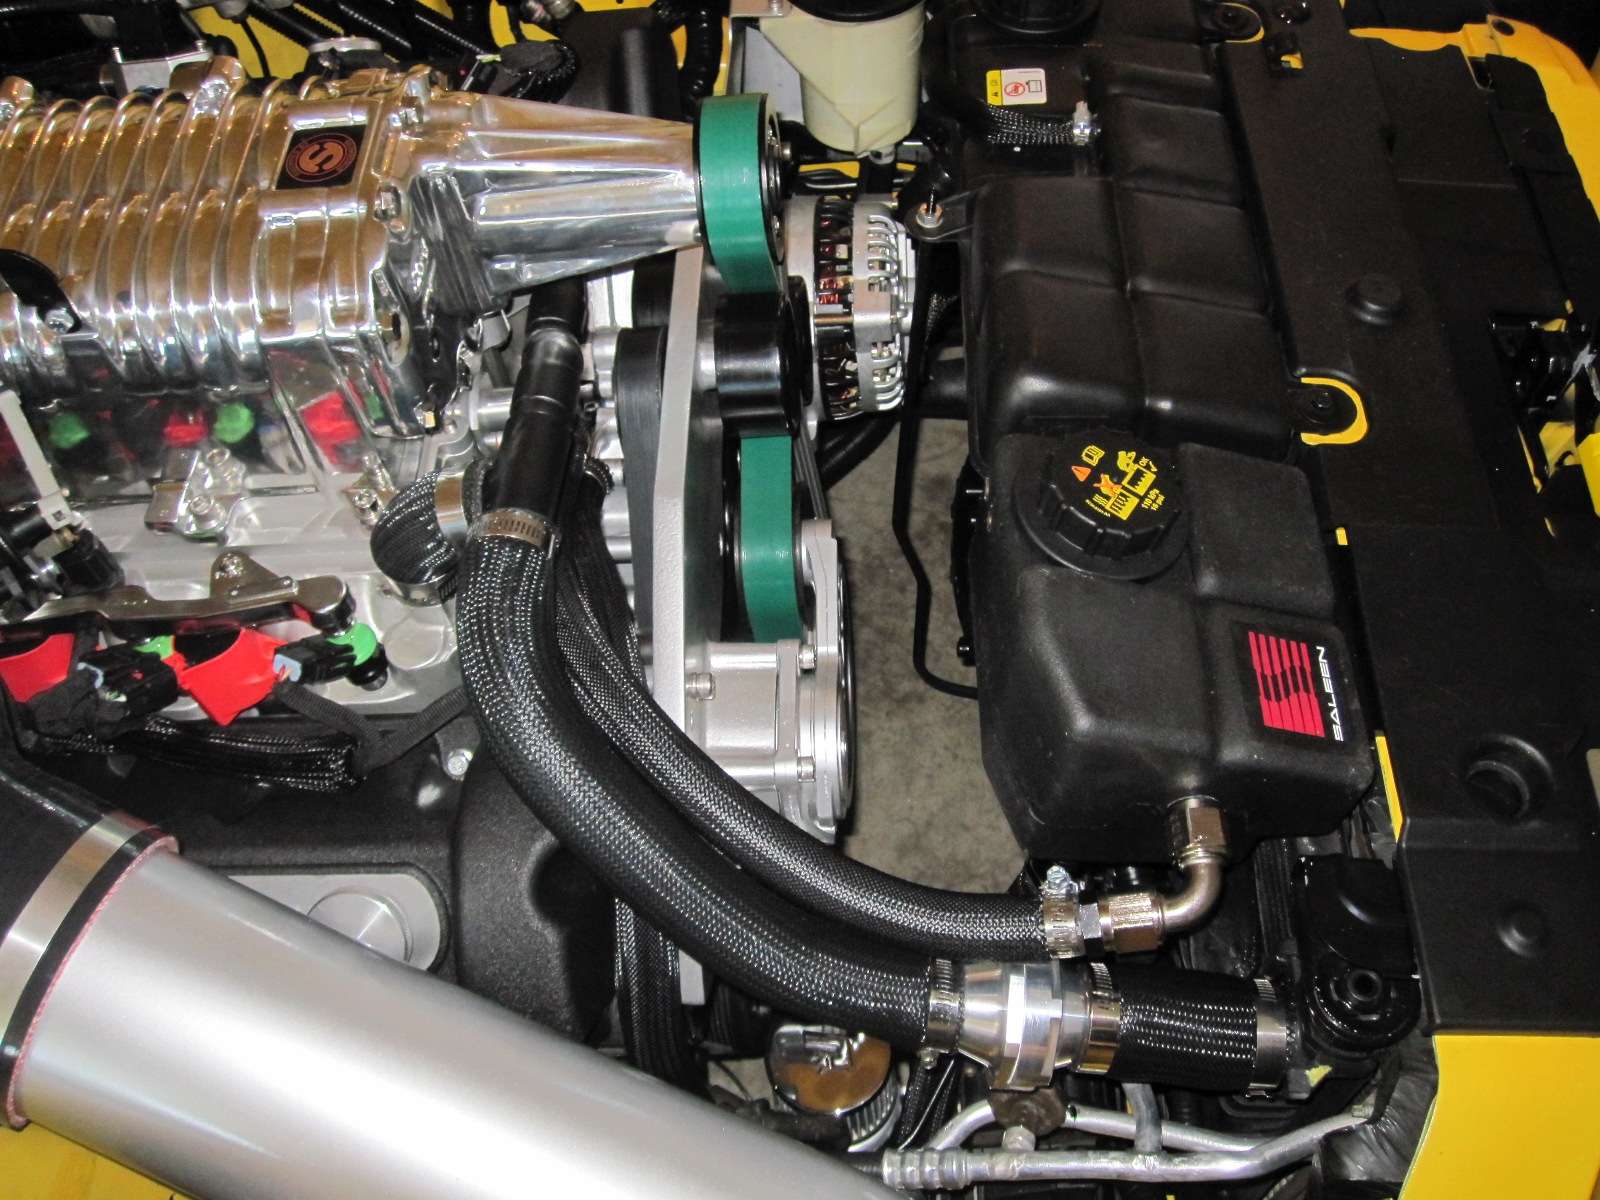
Few Pictures of the finished tube installed on the car
Finished the coolant crossover pipe. Turns out, I had to fab one up myself instead of having one made. The few quotes I got back were around $1,500-$2,500. Needless to say, it was not worth that amount of money.
So, I printed a copy of my drawing layout to scale size and headed to Lowes. Got all of the fittings I needed to make the crossover tube out of copper fittings and copper tubing from the plumbing department. Went home and started mocking things up and soldering them together.
I have access to a TIG welder and will make a more permanent one later. But, for now the prototype part will work until I get around to making one better down the road (probably next fall).
This was by no means a cheap venture working on this crossover tube. The copper fittings ran about $80.00, I also went ahead and purchased another in-line stat housing that was made for 1 1/4" hose. I then took the original 1 1/2" housing and only used one side of it to connect to the other side of the 1 1/4" housing. This became the simplest solution to go from 1 1/4" hose up to 1 1/2" hose for the radiator.
Here are a few pictures of the in process mock up and final install of the (for now) prototype crossover tube.
Few Pictures of the inline housing for the thermostat.
Few Pictures of the finished tube installed on the car
Last edited:
i really like the cross over cause i hate how it is set up on my car. do you think you could give me a parts list cause i want to do the same with mine?
I finished the vacuum hose's this past weekend and did a start-up. I will post the vacuum routing later when I have more time. A few good things to note; the intercooler does not leak and operates as it should. The coolant crossover tube did not leak.
The Bad; I believe I have a short in my harness. The car ran extremely rich and threw a "Hard Fault Code for the FRPS". The code that was thrown was P0193 (High voltage code). I would suspect that the FRPS might have gone bad but it did this right out of the gate when I bumped the key over. Given the fact I had my hands in the wiring harness.....I suspect a short is causing my issue. So, I ordered another wiring harness instead of trying to fix this one. I had made a small start-up tune for it. Using "stock SCT" values in the "SCT Pro Racer" software for 42# injectors and Lighting 90mm mass air. Given everything I have done to the car...I can't say the tune was at fault. However, at this point to get it running properly, I am going to connect a non-modified harness to the car and order a start-up tune to see if this resolves some of the issue. To give you an idea of how rich it was running...........It shot out about an 1/8th of a tank of fuel in about 10 minutes. I had black smoke rolling out of the exhaust along with raw fuel and idle hanging around 1800 rpm's. Some may ask why I let it run for 10 minutes when it was clearly not running good. I was also data logging at the same time. I can currently rule out a few sensors as being the problem based off of the datalog and all of the data compiled along with the fault code....and diagnostic procedures in guidelines with the Ford service manual point it back to a short with the FRPS. In theory at the moment, because of the short....the FRPS was sending a "high voltage" signal that was commanding the injectors to run wide open. That's the best theory I have at the moment.
Few things I'm waiting on. I ordered a few more belts for the car so I can run the 3.625 pulley and the 3.4 pulley. I will post the belt sizes that are needed later for the 2.93, 3.1, 3.4, 3.625
I also called Delks Performance (located just down the road from me). To get a start up tune that will be written with a bit more expertise in the matter. I have personally always had a great experience with them in the past. Especially the dyno tune that was done on the car when it was N/A.
I was hoping to be able to make a start-up tune myself that works and post the values that are needed. But, with the current issues at hand and deciding to order a tune from someone else so I can hopefully diagnose and get the car running properly in a reasonable time. I will not be able to release those values. Companies that write tuning files and perform chassis dynos, hang their hats on development time, through trial and error. So they can make a living based off of the knowledge gained from those countless hours of "un-paid" labor.
I just can't in good conscience hand out information obtained from them....that in turn was developed with the sole purpose of being able to make a living.
I will on the other hand. Go back and load the value files that come with the SCT pro racer software after I get the car running correctly. At that point I will post whether or not the files that come with the software would work for a start-up tune.
i really like the cross over cause i hate how it is set up on my car. do you think you could give me a parts list cause i want to do the same with mine?
I will when I have a little more time to sit down and gather all of the part numbers.
i really like the cross over cause i hate how it is set up on my car. do you think you could give me a parts list cause i want to do the same with mine?
+1
I really like the look of your car with the re-routed coolant line. Looks much cleaner and gets the hose away from the blower belt. Please keep us posted if you start selling these.
Gosh man im still loving this thing! It puts mine to shame! did you order your start up tune through tork tech? just recieved mine yesterday and also just started the car. you can tell its a little rich, and everything seemed to be running good on mine. But im running into one of the same issues you are the hanging idle. My idles wanting to hang about 1600rpms then after about 10 or so seconds it idles down. Where did you get your green belt from? I love the way that thing looks, and i know for a stock pulley and stock crank pulley a 56" belt is the right size. Im definitely looking forward to you posting all the other sizes though for reference. Keep it up man!
I tried my hand at making my own...but because of other issues I had to ditch that thought and order one. I am getting mine from Delk Performance. Its a local Mustang speed shop here in Middle TN. Here is the website.
Delk Performance Lebanon, TN 37090
The Green Belt is a Gates Belt. It's from the "Fleet Runner" side. If you want to know if its made in a belt size you need. Just add "HD" to the end of a gates belt part number.
Delk Performance Lebanon, TN 37090
The Green Belt is a Gates Belt. It's from the "Fleet Runner" side. If you want to know if its made in a belt size you need. Just add "HD" to the end of a gates belt part number.
Tomorrow is the big day...........Belts and wiring harness will be in. I got my startup tune today from Brent over at Delks Performance. If all goes well, she will bump over and at the least be drivable for a cruise to the dyno.
Hopefully, I will be able to get in on the dyno Friday or Saturday but it might be next week. Two years of collecting parts and taking 4 months to do the install all comes down to this point. Finally starting to get a little amped up about it.
Hopefully, I will be able to get in on the dyno Friday or Saturday but it might be next week. Two years of collecting parts and taking 4 months to do the install all comes down to this point. Finally starting to get a little amped up about it.
Really Clean install. If you ever decide to sell that cross over tube PM me, I'll take it off your hands. I'm planning on installing the same kit on my GT during winter this year.
I got the replacement harness on and the new tune loaded up. It still runs rich but nothing like before. Only thing left now is to iron out the tune a bit more and take it for the dyno.
Delks Performance sent the tune in less then 24 hours. They even contacted me to check on my progress of getting the tune loaded up. You absolutely have to love that!
Delks Performance sent the tune in less then 24 hours. They even contacted me to check on my progress of getting the tune loaded up. You absolutely have to love that!
Vacuum Routing Tork Tech Terminator install
Vacuum Routing can be seen below. I have deleted my EGR system and eliminated my PVC system. So, you will not see any of those indicated on the graph below.
The routing for the Vacuum lines i have are as follows.
1. Fuel Rail pressure sensor = lower "boost" (Below rotors) vacuum.
2. Upper port on bypass valve = Lower "boost" (Below rotors) vacuum.
3. Vac/Boost Gauge = Lower "boost" (Below rotors) vacuum.
4. Small Diameter canister vacuum line coming out of the passenger fender rail = upper (above blower rotors) vacuum.
5. AC line coming out of the "bulk head" or "fire wall" is also upper (above rotors) vacuum.
Note: Two things to comment on.
A) The lower port of the boost bypass valve can be left open (Tork Tech recommends this). I have left this open for now. Just remember to plug the port on you air induction pipe that has a connection for this port.
B) the 3/8" vacuum hose coming from the canister vacuum in the passenger side fender well will still need to be connected somewhere between the throttle body and rotors. The throttle body plenum has an ideal port for this but some may choose to use the larger diameter port on the back of the blower. Just wanted to add that for good measure. It should go without saying but you never know.
Last edited:
Coolant Pipe Parts List
My Coolant Pipe Parts List.
Below is a list of parts I used to construct the coolant pipe that I am currently running. I have stated before and will reiterate again. This is not a cheap solution but it is one of the cheaper solutions I came up with.
Coolant hose needed:
MasterPro Hose
Part Number: 21994
(Purchased from O'Reilly AUto Parts. Fits a 1992 GMC Typhoon Base V6 - 4.3L vin Z 262ci - TBI GAS OHV...)
Link----> O'Reilly AUto Parts Master Pro Hose 21994
HPS 1/2"-5/8" (13mm-16mm) 90 degree Elbow Reducer Silicone Hose Black
Part Number: HTSER90-050-062-BLK
Link----> HPS 1/2" - 5/8" (13mm - 16mm) 90 degree Elbow Reducer Silicone Hose Black
Thermostat Housing and Thermostat
You have options in this area. Just need to find something you will be happy with.
Meziere WN0073 - Meziere Inline Thermostat Housings 1-1/2'' Hose to 1-1/4'' Hose
Link----> Meziere Inline Thermostat Housings 1-1/2 to 1-1/4
(Thanks "califsp")
Meziere WN0070170 - HI-FLOW Thermostat - 170 DEGREE
Link----> Meziere Thermostat 170 Degree
Copper Fittings needed:
Wrot Pressure Tee 1" C X 1" C X 1" C (Only Need ONE of these)
Link----> Lowes Wrot Pressure Tee 1" C X 1" C X 1" C
NIBCO 1" x 1" x 1/2" Copper Pressure Tee (Only Need ONE of these)
Link----> Lowes NIBCO 1" x 1" x 1/2" Copper Pressure Tee
Wrot Pressure Close Rough 90-Degree Street Elbow 1" Ftg X 1" C (Only Need ONE of these)
Link----> Lowes Wrot Pressure Close Rough 90-Degree Street Elbow 1" Ftg X 1" C
Wrot Pressure 45-Degree Elbow 1" C X 1" C (Only Need ONEof these)
Link----> Lowes Wrot Pressure 45-Degree Elbow 1" C X 1" C
Wrot Pressure 45-Degree Street Elbow 1" Ftg X 1" C (You Need THREE of these)
Link----> Lowes Wrot Pressure 45-Degree Street Elbow 1" Ftg X 1" C
Cerro 1" x 24" Type L Copper Pipe (Only Need ONEof these)
Link----> Lowes Cerro 1" x 24" Type L Copper Pipe
Total cost (not including shipping and tax).
MasterPro Hose $11.99
HPS 90 degree Reducer Silicone Hose $23.55
Meziere Inline Thermostat Housings 1-1/2" $59.99
Meziere Inline Thermostat Housings 1-1/4" $59.99
Meziere Thermostat 170 Degree $17.99
Wrot Pressure Tee 1" C X 1" C X 1" C $11.23
NIBCO 1" x 1" x 1/2" Copper Pressure Tee $11.52
Wrot Pressure Close Rough 90-Degree Street Elbow 1" Ftg X 1" C $7.57
Wrot Pressure 45-Degree Elbow 1" C X 1" C $7.19
Wrot Pressure 45-Degree Street Elbow 1" Ftg X 1" C $9.67 each (need three for a total of $29.01)
Cerro 1" x 24" Type L Copper Pipe $13.47
Grand Total: $253.50
I will try and take better pictures of the pipe and post how I made it when I have a little more time.
Last edited:
Awesome Toby!
I actually just ran out to Lowe's and bought the fittings. I'm guessing that you need to shorten the driver's side T-fitting?
Not trying to pre-empt your explanation.
Thanks. :beer:
Edit: Paint is drying on my Toby Custom cross over. Looks great man! Learned how to Solder pipes too!
I'm going to try to find a cheaper alternative to that 90 degree silicone hose today. :beer:
Last edited:
Very nice! Vids when you can please sir.
Users who are viewing this thread
Total: 3 (members: 0, guests: 3)

