Out of the ashes, a Phoenix is born (Boss 302 teardown and rebuild)

ford20

Member
Established Member
Joined
Aug 18, 2012
Messages
735
Location
New York
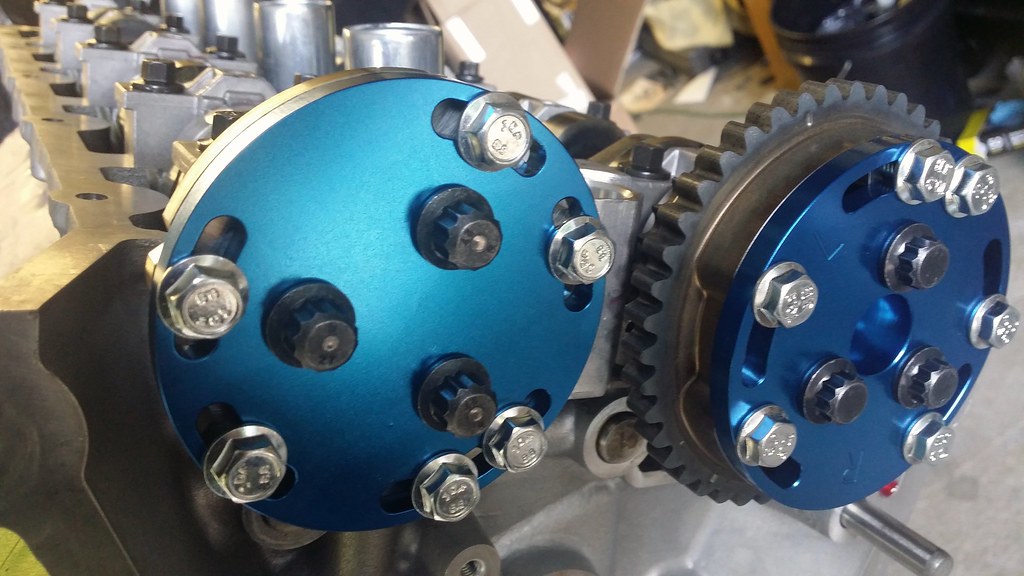
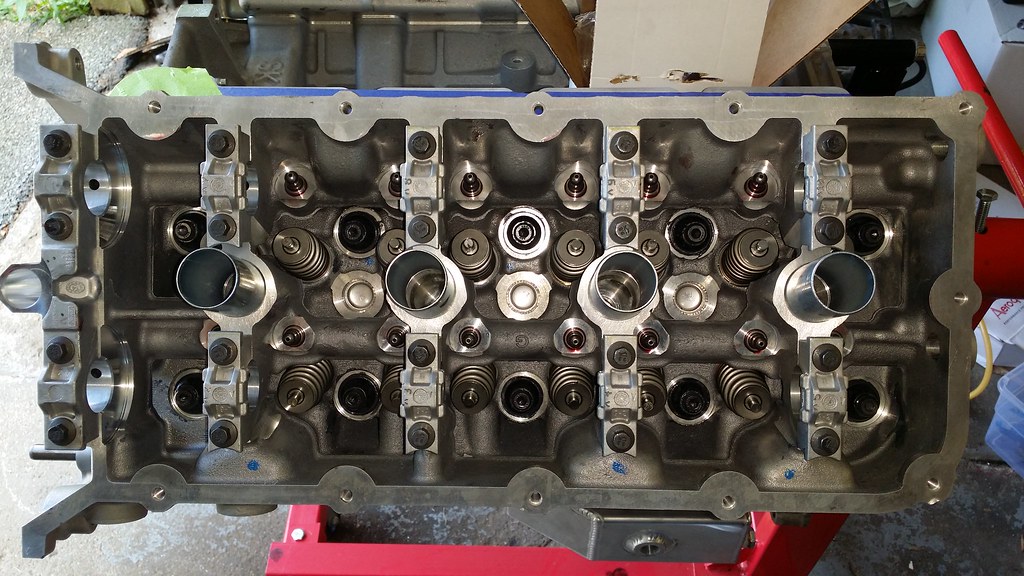
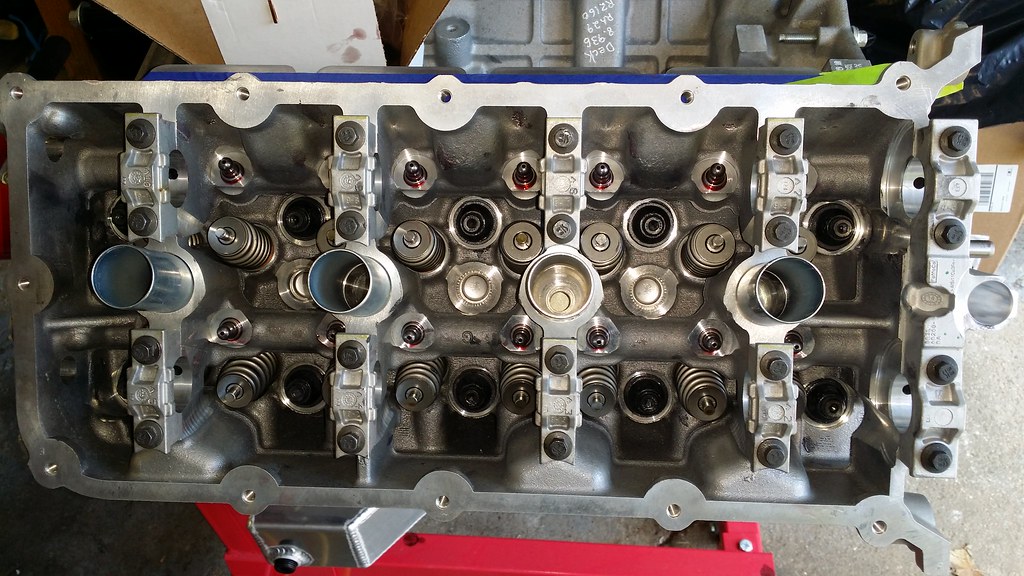
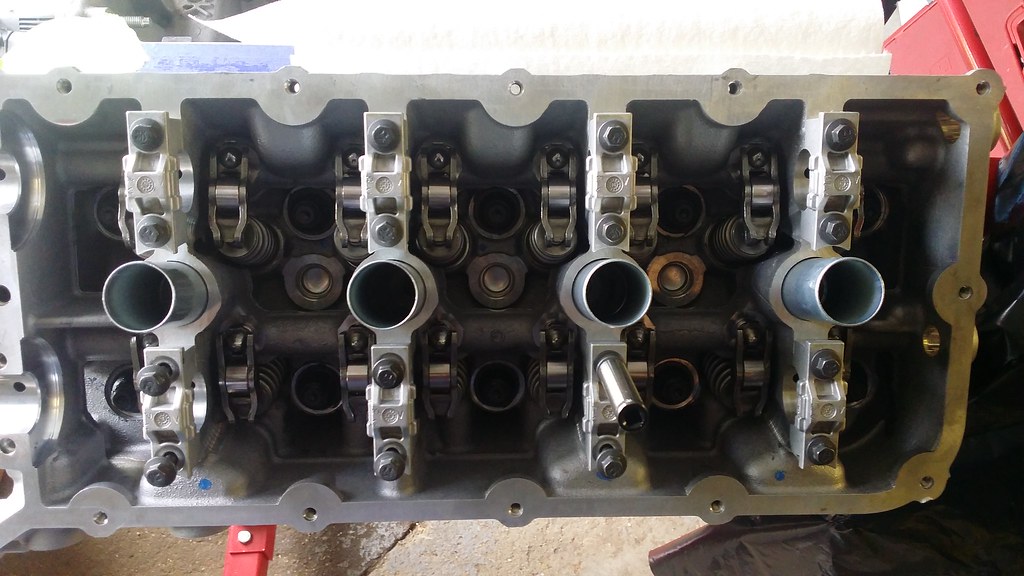
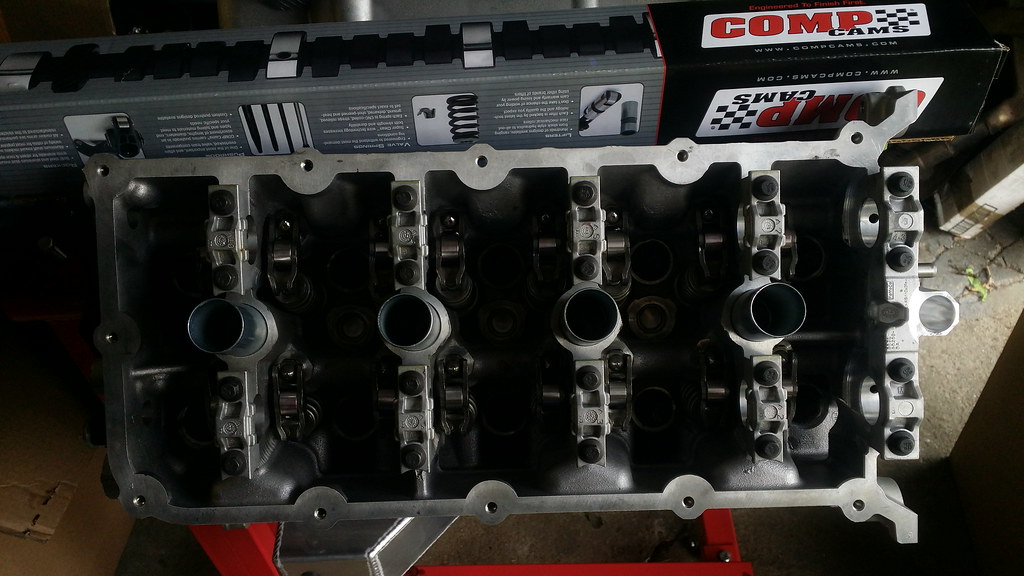
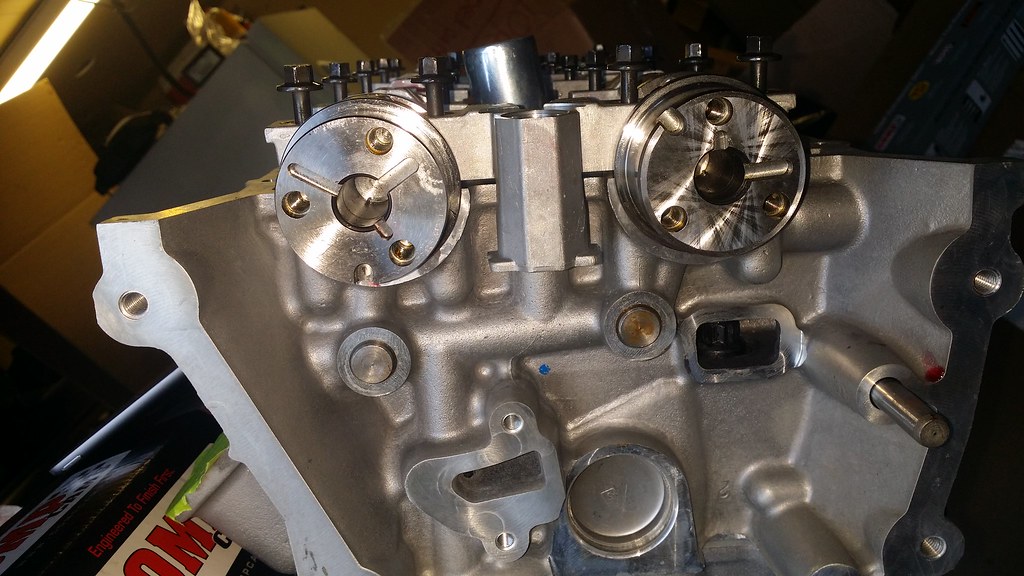
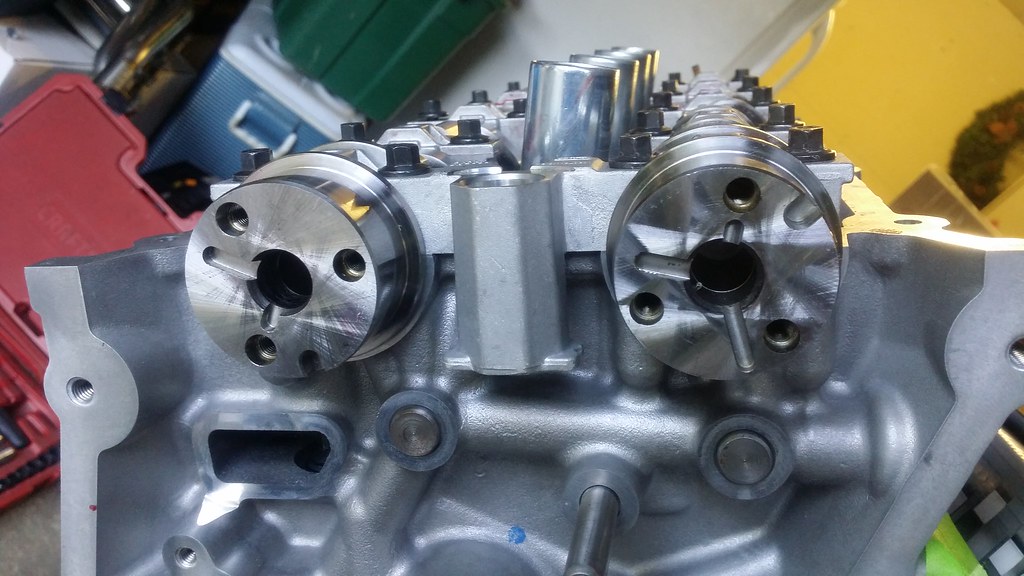
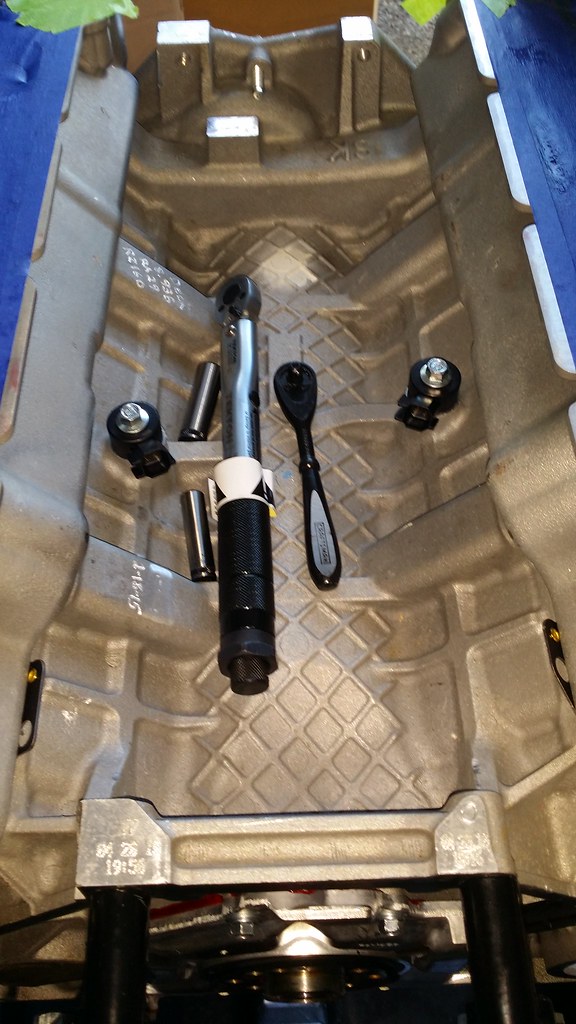
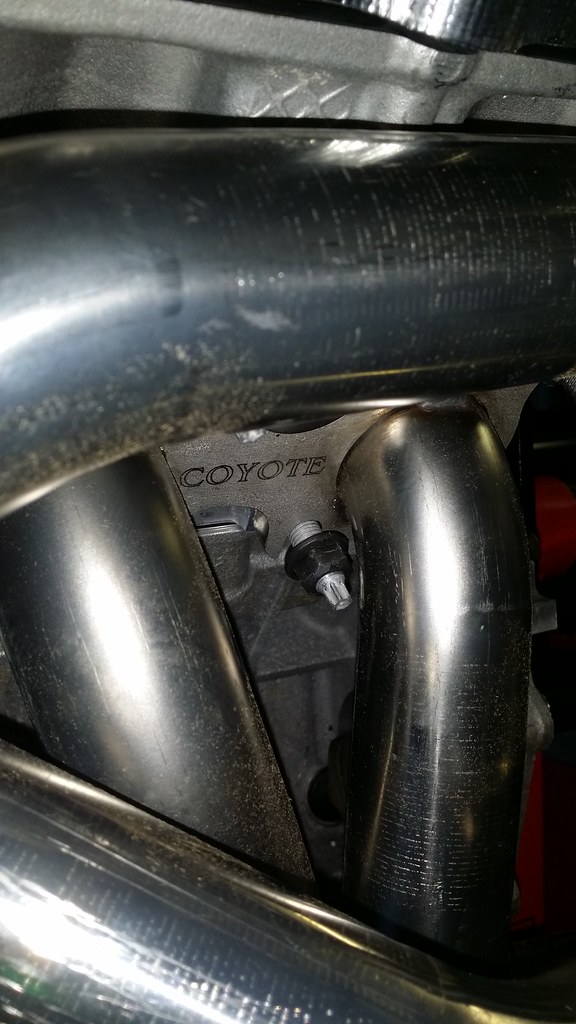
Sweet looking heads Sean. Once you get this beast up and running you should compile all your posts into a wiki for the good of mankind. You've really taken the time to share all the details of your build. Part numbers and all. My hats off to you! Bravo.:rockon:

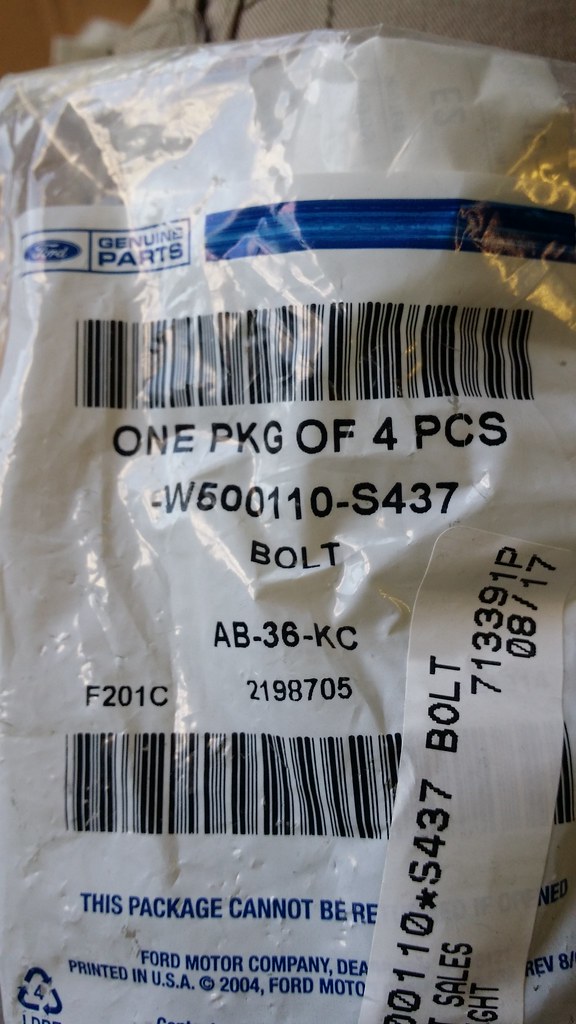
That is a Badass idea Darren! I will probably do that once I get the car up and running. Ran into a few snags this weekend degreeing the cams unfortunately:/. So I should be able to update this up until that point tomorrow.
 

ford20

Member
Established Member
Joined
Aug 18, 2012
Messages
735
Location
New York
I just wanted to show some of the parts that I am getting along with updating my parts list.

I ordered a couple of non Ford parts and have been getting them in slowly and just stockpiling them until recently.

BMR A-Arm support brace - AAS-001

In talking with Kelly about these he had mentioned that for guys who are going to be drag racing their cars, they wouldn't need this as you aren't exactly putting a lot of stress on the A-Arms. For people who are going to be using their cars for road course or autocross or street driving this would make sense as you are tying the two A-arms together making them stronger and stiffer. There would be less deflection on the A-arms for improved handling.

MPR Racing Engines Billet Lower Crankshaft sprocket

20844761425_d800dc1883_b.jpg


This is made out of billet steel and is FAR stronger than the cast piece that Ford offers. On high boost applications, the factory sprocket has been known to break on cars with superchargers or turbochargers and will destroy your engine. Once this breaks, there is nothing holding the timing chains onto the crankshaft and thus your primary chains will have the potential to skip a bunch of teeth along the sprocket and will throw the timing off.

MPR Racing Engines heavy duty secondary timing chains

20799828720_f38bac844e_b.jpg


The problems with going with aftermarket cams and springs is that you may get a larger lift along with increased duration camshaft that the engineers at Ford never designed the secondary chains for. With these aftermarket cams, most will replace the valve springs that have increased spring pressure and seat pressure which will put some added stress on the secondary chains. For the most part, I think you will be ok to run the factory units but with the added RPM's and extended higher RPM's that the engine would see on a road course, I thought this would have been a good idea. I know I would have kicked myself if the cams broke on me. They feature thicker pins holding the chain links together along with thicker plates.

RGR/JPC Stage 2 heads - 1295

RGR lightweight phaser deletes - 01520

20853611356_b0bf11db5c_b.jpg


These are going to delete the internals of the VCT phasers which is going to end up saving a lot of rotating mass off of your cams and timing system. While not expressly heavy, you can certainly feel the difference when you hold a stock phaser along with one of these phasers in your hand, especially with the exhaust phasers. If you are locking out the phasers, you might as well go the extra step and get these as well. Anything to gain an edge against your competition right?

RGR custom grind camshafts - ????

Well, these I can't really say much about these as the cam grinds don't belong to me. I will say however that in researching cams for the coyote in N/A form, it seems that the lift, isn't the important part. The thing you want to focus on here is the duration, as this is what is going to be making the most power with these motors. If you think about it, you are only at your maximum lift for a fraction of a second but the longer you have your valves open, the more air and fuel you can get into the combustion chamber as well as the exhaust gases out of the chamber.

Just as a point, it is possible to make cams lope in these cars. These aren't RGR cams, but I just want to point that out but it is too badass not to share haha.

https://www.youtube.com/watch?v=Q45KS7boguk

JPC Revised OAP - FDVA00002T

With the over axle pipes you are obviously removing the factory resonators but you are also gaining some power. With these you are going to gain somewhere around 7-15HP and when playing the N/A game, every little bit helps.

JPC Underdrive alternator pulley - 02020

19849374954_810f96d805_b.jpg


This is a lightweight pulley and I can tell you that when they say lightweight, they mean LIGHTWEIGHT!!! This thing feels like a feather to be honest. Anyway, this replaces the pulley on your alternator which will slow down the alternator and increase the longevity of the alternator. JPC says that they see about a 2-4HP increase with these and on a coyote stock car these would be some BIG numbers when you have to run the same equipment as everyone else. As previously stated on a N/A build, just like with the 3V every little bit counts. You are going to need a bigger belt that is 70 7/8" belt which should be NAPA 25-060703 according to JPC. I haven't had a chance to measure this so once I do, I will confirm.

JPC Black Clutch line upgrade - CLK-B

JPC -12AN PCV fittings - 02017

Recently, Darren (the car in the video above) had been posting asking about some blowby issues and one of the suggestions was to go with larger AN lines from the valvetrain to the catch can so you aren't choking the motor and getting rid of the blow by fast enough. with this in mind, I said **** it. I might as well get these and prevent any future issues. If it works cool, if not, no biggie right? Not to mention, this is MUCH cheaper than going with the 3 vane vacuum pump setup that you would need for road race applications.

Amazon.com: Aeroquip FCU1206 #4 Startlite Racing Hose: Automotive

The startlite hoses are 45% lighter than similar stainless steel hoses and IIRC they were something like 30g per foot lighter than the AQP Stainless steel hoses that Aeroquip sells. In the spirit of MattD ... weight savings bitch

Phenix Industries -12AN Compression Swivel Hose End Straight - J1200-3

Phenix Industries -12AN 90 degree compression swivel hose - J1290-3

Injector Dynamics ID100 Injectors - ID1000

20319539246_cbeea8a848_b.jpg


I know that these are way overkill for my setup but if I ever wanted to go bigger and badder with the car I will be setup injector wise, not to mention I have been talking about getting an actual fuel system for the car so this is once less thing I would have to get when I go down that route.

VMP plug and play 40amp voltage booster -VMPAMPPNP

This makes wiring the voltage booster stupid simple! Just plug everything in and you are all set and I am all about convience here! Comes with everything you see here and is stupid simple.

Ford Racing Cobra Jet Setup

Cobra Jet Cold Air Intake - M-9603-M50CJ
Super Cobra Jet Monoblade throttle body - M-9926-SCJ
Cobra Jet Intake Manifold - M-9424-M50CJ

Kooks Green Catted H-Pipe - 11413610

Since I have to comply with emissions for NYS I decided to go with the Kooks green cats H-Pipe system which will tie into the existing Kooks side pipes I have. As is, the Kooks side pipes make the car ****ing loud as shit and sound amazing so I am really dying to hear how they sound with the long tubes. The important part here is that these are 49 state legal so I should be all good to go with emissions.

ARP Head studs - 256-4702


ARP Harmonic Balancer Bolt Kit - 156-2502

ARP Flywheel Bolt Kit - 156-2801

I think that is everything for now but I am almost positive that I am missing things on this list so once I can find them I will update
this.
 
Last edited:

darreng505

New Member
Established Member
Joined
Dec 28, 2012
Messages
1,314
Location
Washington, DC
Sean....frickin badass man. What a setup!

One thing about the BMR A-arm brace. I use it, but it doesn't exactly fit with the moroso race oil pan. Steve at blowfish racing custom fab'd a billet relo angle bracket to rotate the brace 90 degrees so it safely clears the oil pan drain plug. Just FYI. Wasn't sure what pan you're running.

I'm gonna steal some of your parts list!

EDIT: Are those lightweight phaser deletes a combo lockout/delete?
 
Last edited:

ford20

Member
Established Member
Joined
Aug 18, 2012
Messages
735
Location
New York
Shoot :/ ... I have the Moroso Race Pan as well. I guess I will have to talk to Steve and see if he can do one for me without the car there or at least making one over the winter. Thanks for the heads up though, I appreciate that!

As for the phaser deletes, I believe so. Without the internals, I'm not certain how the cams would move so essentially they are locked out. Here are the internals without the plate on top of it.

20477805840_9fcdac791e_b.jpg

This is what they look like without the phasers deleted. So I'm pretty sure it is a delete/lockout combo.

20477787390_e23ec666b9_b.jpg
 
Last edited:

ford20

Member
Established Member
Joined
Aug 18, 2012
Messages
735
Location
New York
Very interesting, I will have to talk to Steve about getting a set. Thanks again Darren!
 

ford20

Member
Established Member
Joined
Aug 18, 2012
Messages
735
Location
New York
I just went ahead kept my attenion on the heads. As I said eariler, the heads come bare without followers of lash adjuters. In pricing them out, I found it cheaper to go with the newly released FRPP kits rather than buy them separately. So I went ahead and grabbed the boxes for my parts pile.

I started with the lash adjusters and put a very small amount of Comp assembly lube #103 on the lash adjuster and plopped them in their respective holes.

20658050939_8b72d032a3_b.jpg


20044891503_7d3367f3a5_b.jpg


20477822038_6b78592edf_b.jpg


20479083599_1669c903b8_b.jpg


Next thing was to grab the followers and get those into place. They are pretty easy to install, just roll them on the lash adjusters until you hear them click. Before you put them on, always remember to clean your parts even if they are brand new. As you can see here, these are straight out of the box and they are dirty.

20656787278_89a759f326_b.jpg


Followers are in now.

20222167454_e933b0f068_b.jpg


20656725270_3a0b2d4e70_b.jpg


Parts List
  • Comp Cams Assembly Lube #103 - CCA-103
  • Lash adjuster assembly - M-6500-M50
  • 5.0L Coyote Roller Finger Follower Kit - M-6465-M50
 
Last edited:

ford20

Member
Established Member
Joined
Aug 18, 2012
Messages
735
Location
New York
Now that I have the heads on and assembled I turned my attention towards the RGR lockouts. Now, I know there is a huge amount of what the hell are you doing when it comes to going with lockouts versus going with limiters but in talking with JPC, they didn't feel that I would be losing a lot of power with them and I could lock the cams in for higher RPM power on the race track. I have trusted them this far and I think performing as well as they do shows what they they know. Me being a complete noob at this, I have 120% faith in them on the decision. Plus they look pretty cool.

So, I grabbed the phasers out of the FRPP timing kit and went to work on them. First thing I did was mark my right & left timing marks with a magic marker. White out or scribing them probably would have been the easier and better thing to do but as long as you can mark them, thats all that matters. I found it easier to take the snap ring off first and then take the torx bolts off but don't take the last bolt out all of the way, only a couple of threads and then place it on a flat surface.

20477796428_6c0c99fd22_b.jpg


From there you can now take the last bolt off all of the way from the housing, and take off both plates.

20477800598_85a55a744e_b.jpg


20477787390_e23ec666b9_b.jpg


The next thing to do would be to remove the plastic piece along with the spring

20477789090_15a82427b2_b.jpg


From there you want to dispose of the "guts" of the phaser. You might want to grab a towel or a plastic bag and put it over the phaser and seperate the bottom part with the middle section and let the internals come out.

20477805840_9fcdac791e_b.jpg


Now you can put the phasers on. For your exhaust phaser, you take the middle section and the bigger delete plate and put those together to make the exhaust phasers. For the intake phasers, you grab the back plate and the small delete plate and put those together.

20043245594_a79e1de0ae_b.jpg


20672529911_07459cccc7_b.jpg


From here, you can now begin to put the cams in.

Parts List
  • RGR Lightweight Phaser Deletes
 

ford20

Member
Established Member
Joined
Aug 18, 2012
Messages
735
Location
New York
The next thing on the list was to put the cams in. First things first, make sure you have new cam filters and make sure that you have new cam bolts as these are TTY bolts and you might not realize that. Now that we have that out of the way, we can go ahead and start with our cams. Make sure that you have them correct. The comp cams are labled RI, RE, LI & LE right on the boxes so it is pretty easy to identify which is which.

I just want to take the time to say that I have heard a couple of times that the aftermarket cams are no gun barrel drilled like the factory or CJ cams are. I'm not sure what that means but it appears that my cams are driled out in the center. I don't know if this is what is meant by that or not, but I figured I would throw that out there.

20223783363_5d606bb234_b.jpg


When you put the cams in you want to make sure that they are in the nutral position with the D hole in the following positions.

Left side

20835202482_415b7a79b4_b.jpg


Right side

20656765898_c544324ba0_b.jpg


From there you can put the new cam filters in, but remember to clean out the bores of them so they are nice and clean. This is a picture before I cleaned them. As you can see it is slightly dirty haha.

20851896501_828a75cf5f_b.jpg


Cam bolts get torqued down now once you have both cams in the heads. Don't forget to put the Comp Assembly lube on the cam journals and cam caps.

20799977518_6df9b363e2_b.jpg


This is the torque sequence for both left and right heads.

21017307129_bf8c501c03_o.jpg


Parts list
  • JPC Racing Custom grind cams - ????
  • Coyote Camshaft Drive kit - M-6004-A504 (Cam Filters)
  • N806183-S437 - Cam Cap Bolts ( You need 40 of these)- 10mm

[Torque Specs]
  • Step 1 - 53lb-in
  • Step 2 - additional 45 degrees

This is where I ****ed up. I snapped 2 bolts because I was looking at the torque specs for the head bolts, not the cam cap bolts so make sure you follow the specs listed and don't do something tupid like I did. I bothered Eric over at JPC about it when I realised my mistake so thank you to him for tolerating my stupidity.
 

ford20

Member
Established Member
Joined
Aug 18, 2012
Messages
735
Location
New York
I wanted to go ahead and take a break from the top end and get the little things out of the way that the service manual says to do.

So, I went ahead and grabbed my oil filter adapter with new gasket already installed and the three bolts and torqued them down. I went ahead and grabbed my new Boss oil cooler out of the box and went ahead and installed that as well.

20749287588_9f5477f313_b.jpg


Parts List
  • Oil Filter adapter bolt x2 - 10mm - W714974 (Sorry, I don't have the last digits on this one right now)
  • Oil Filter adapter bolt x1 - 10mm - W503306 (Sorry, I don't have the last digits on this one right now)
  • Ford Racing Boss 302 oil cooler - 14mm allen key - M-6642-MB

Torque Specs
  • Step 1 - 177lb-in
  • Step 2 - Additional 60 degree turn
  • Step 3 - Put oil cooler threaded fitting in and tighten to 43 lb-ft


Next thing I did was grab the crankshaft position sensor and put that into place. This appears to be the revised one with the new O-ring installed that was addressed by the TSB.


NOTICE: The Crankshaft Position (CKP) sensor must be positioned into the fitting on the crankshaft rear seal retainer plate and be flush against the boss on the engine block before the bolt is installed. If the CKP (Crankshaft Position) sensor is installed incorrectly, the CKP (Crankshaft Position) sensor can be damaged.

20937260805_5f9fbe4c44_b.jpg


20749205450_f952d5b4ba_b.jpg


20937264275_bdd5f354aa_b.jpg


Parts List
  • Crankshaft Position Sensor - 8mm - DY-1293 (Comes with a new bolt)

Torque Specs
  • 89 lb-in


I went back to the top of the motor and grabbed the new knock sensors and went ahead and put those in as well. These point towards the rear of the engine.

20750515179_954ba4ff79_b.jpg


20937267645_d9ec7d6e24_b.jpg


20749298988_6060a0f334_b.jpg


Parts List
  • Knock Sensors - x 2 AL3Z-12A699-BA
  • Knock Sensor Bolts - x 2 - W500110-S437

Torque Specs
  • 177lb-in
 

ford20

Member
Established Member
Joined
Aug 18, 2012
Messages
735
Location
New York
I worked my way down to the exhaust now as per the manual's instructions. So I went ahead and grabbed my long tubes out of the boxes.

20316238363_fc397fb52a_b.jpg


First thing I did was grab the exhaust studs. Mind you, these are 2015 heads so I am not 100% certain if the studs are interchangable or if they have the same part number as the 11-14 heads.

20937269035_e88accfce9_b.jpg


Then I went ahead and grabbed the gaskets for 2015 heads. Just a quick shot of the exhaust valves before I put them on. Very nice looking :D

20937275385_bf5d2892fa_b.jpg


20911009456_f7539ca10a_b.jpg


I put the long tubes on followed by the nuts for the studs.

20911017526_e186a5b83a_b.jpg


20937288075_5908f15a11_b.jpg


20937284035_f55fe33980_b.jpg


Parts List
  • Kooks 1 7/8 x 3 - 11412400
  • Exhaust Manifold Studs 2015 - 6mm - W714869-S431
  • Exhaust Manifold Nuts - 15mm - W714870-S430
  • Exhaust Gaskets - BR3Z-9448-A

Torque Specs
  • Exhaust Studs - 18lb-ft
  • Exhaust Nuts - 2 Steps
  • Stage 1 - 18lb-ft
  • Stage 2 - 24lb-ft


Shit, I don't know what you guys are bitching about. Installing headers is ****ing cake, bunch of pansy's .....
shiftyeyesxg7.gif
 

ford20

Member
Established Member
Joined
Aug 18, 2012
Messages
735
Location
New York
If anyone is still interested in this, I figured I would share what has transpired up until this point. This was where I left off

21418364916_405cd4e5b5_k.jpg

Anyway, after being corrected the proper way to degree my exhaust cam I was all excited that I know had the intake and exhaust came degreed so I moved on to the intake cam on the #6 piston and there I ran into some issues which resulted in me having to take everything off and start at the very beginning again with the intake cam on #1 piston. When I went to degree the cam I ran into some binding issues and then the motor wouldn't turn over any more so I said **** it and talked to Aaron over at JPC about sending the motor down there to be rebuilt. At some point I have to talk to them and see if they wouldn't mind taking the entire car and just finishing everything off for me. I feel that would probably be the easiest and best thing to do.

After owning the car for 2 years and 3 months a year and a 2 months, the car has been without an engine and 8 months prior to that it was barely driveable with CPS issues and VCT actuator issues and random misfires and phantom CEL's so I just want it done and over with to be honest.
 

ford20

Member
Established Member
Joined
Aug 18, 2012
Messages
735
Location
New York
You've done an amazing job so far. Let the pros bring it home. It'll be a BEAST!

For sure buddy! I will know that the motor is in amazing hands and they will get it running strong for me and get it running right even if it takes all winter i dont care haha

Damn. So close!

That was my thinking ..... minus a few choice curse words hahaha. Once i got the exhaust cam dialed in i couldn't tell you how ecstatic i was thinking i was just about to cross the finish line .... so close, yet so far.
 

302 Hi Pro

New Member
Established Member
Joined
Nov 23, 2011
Messages
8
Location
nj
Hi Ford20:

Glad I caught up here with you as I was wondering how your build was going. I have to tell you, I think you did an amazing job. Not just on the wrenching part, but all of the research you have done boggles my mind.

These are not your average DOHC engines to build, cam phasers and electronics add a whole new element to engine building.

I think you made a good decision, and you have BIG money invested, too much to take a chance now, right?

Keep us posted on how the build goes, and don't forget to post pics of the birth on the Dyno stand.

Kind Regards,
302 Hi Pro
 

ford20

Member
Established Member
Joined
Aug 18, 2012
Messages
735
Location
New York
I guess I will just make this my general build thread from here on out. As I said before, I think that I can break just about anything. When I went to go put on my blowfish tow hook I ended up breaking one of the bolts from the Laguna Seca bracket while taking it off the car. It looks like someone replaced it at one point since I only had 3 out of 4 bolts installed and the 3rd bolt that I broke was a different kind of bolt all together.

22265275163_a1405ed03a_b.jpg


If you look at the bolt heads, you will see that 2 of them are painted that brown primer color while the broken one isn't and even the bolt itself is different. I'm not sure if that is by design but it looks like the bracket was replaced at one point.

The install is pretty straight forward, you basically center the bracket up and line them up in the recesses in the bumper bar and you can bolt the two halves together.

22467816439_472c0fe533_b.jpg


Since I have a 2012 I had to use the supplied spacer along with the longer carriage bolts.

23426559185_5002d4ce5e_b.jpg


Oh, and I ended up braking a bolt from the blowfish hardware -_-

22468088798_d4d4939554_b.jpg


I sent a message to Steve and within like 4 minutes he sent me a message and we talked about and said he was going to send new hardware out on Monday. I got the in hardware in a couple of days and I was back in business. He even sent me two new bolts and inserts for the top of the mount which was very nice. The customer service from my side of things is absolutely excellent with Steve, I would HIGHLY recommend the blowfish bracket. It appears to be very well constructed and the hardware seems to be of pretty good quality (despite me breaking one) and the powder coating on this is very nice! I bolted everything up and used Blue Loctite #242 on all of the bolts for a little bit of extra security.

On the 2010-2012 with the Boss 302 front valance you have to cut a hole in it so that the tow hook assembly can fit through the bumper. It is pretty easy though so no big deal here.

23130865700_ac6902dc06_b.jpg


Parts Used

While I had the bumper off I figured I would take the old turn signals out and put some new blackout ones in which was a pretty simple mod. Just remove these two plastic nuts, pop the old one out and put the nuts back on.

23016956566_d9ea4a914e_b.jpg


Old vs. New

22650769629_afab825fd9_b.jpg


Finished product

22624680627_b2834d178c_b.jpg


ford20

Member
Established Member
Joined
Aug 18, 2012
Messages
735
Location
New York
I wanted to change up the front end a little bit and I remembered seeing a set of headlights that AM and LMR had sold so I went looking for them. I found them on LMR, or so I thought. They were supposed to look something like this according to their webpage:

sdt-mst10sm_9450.jpg


When I received them they looked just a wee bit different:

22950475715_49f783a59e_b.jpg


Not only were the lenses black black, they didn't properly fit! Notice the large gap between the headlight and the grill -_-

Anyway, I figured I would pull the black lens off and swap it with my factory clear lens since the internals are all black with clear turn signal lenses. So I pulled out the factory headlights and turned the oven on and set the temperature to 235 degrees. While I was waiting for the oven to preheat I removed the rubber gasket for the headlights.

23475086125_08d8814637_b.jpg


Once I removed those, I ended up putting the headlight in the over for 10 minutes. I was wearing my work gloves but you could still feel the heat as you were prying off the lens. I ended up putting it in for 2 cycles at 10 minutes each and finally the lens popped off to reveal the lights.

22421821993_af0a7590a8_b.jpg


In order to get all of the rubber out, I threw it back in the oven for another 10 minutes and it all easily came out without issue. I grabbed the rubber butyl I bought and began putting it in the recess where I removed the old rubber. Granted this stuff is a little thick at 3/8" but if you stretched it a little and pinched the bottom it went in without issues not to mention I have so much left over. This is what I used:

81ma8ekEWJL._SL1500_.jpg


Made in America
usflag.gif


23475126695_deb8bc65fc_b.jpg


From this point I grabbed my factory headlight and turned the oven up to 275 and put that one in there. After 3 rounds of 15 minute intervals I was able to get the lens off and put it on the new headlight housing. After squeezing it in together by hand I put it in the oven at 275 for 7 minutes and took it out again and clamped it down.

As you can see I only had one pair of vice grips so I had to improvise a little.

22592121963_7ffdb11469_b.jpg


Anyway, as I let that one sit for 45 minutes I went to work on the second factory light. Remember when I said I can break anything
emotions33.gif


22847960043_6254540f57_b.jpg


I had the entire lens off except for that one corner .... ****

I bought a factory lens off of ebay with a tab missing for $55 shipped and went along my way. I got the second headlight a few days later and without much, if any difficulty it popped out and went back on easy peasy.

22987062939_5c70ae7054_b.jpg


23449210846_367c210295_b.jpg


It looks like with the factory lenses in there the gap is smaller so I think I am ok with it now and it isn't going to drive me crazy. Maybe it will but who knows. After about 3 going on 4 days of rain, the headlights have held up and I don't see any fogging inside of the housings so I think I am pretty good on this setup. I like them, they add a small distinct touch and a bit of the blackout look without going overboard IMO. Now I just need to get Amber turn signal lenses.

Parts Used
Tools Used
  • 10mm socket wrench x3 bolts per headlight
 

ford20

Member
Established Member
Joined
Aug 18, 2012
Messages
735
Location
New York
In the mean time I spent about 3 weeks tracking down the bolts for the Laguna Seca splitter. When you look up the kit that FRPP sells it lists them as 20 M8x25mm bolts. I went around looking for M8 fine thread x 25mm countersunk bolts and was sort of laughed at when I kept asking because turns out nobody has them. I went to one place who did have them, but they said they had to order them from the UK and it could take 2 or 3 weeks to get them. So I turned to Amazon and found some! I ordered 20 of them and in a couple of days I checked the tracking. It turns out that they are shipping from the UK as well
thud.gif


2 weeks go by and I get the bolts ... turns out they are WAY too big.
banghead.gif


So, I run to The Home Depot and look at their selection of bolts and I think I found them in 1/4" x 28 x 1" using their little bolt measuring thing. I go to my local hardware store since they have just about every bolt in SAE and grab 20 of those. I get home and wouldn't you know it, they don't fit. Wrong thread size
kself.gif
****ing piece of junk bolt measuring crap never works. I even threaded it in 98% of the way down by hand without issue.


Well I run down to work and dig through our boxes of spare hardware from all of the European furniture and low and behold M6 x fine thread x 20mm bolts. So I grab them and head home hoping that they are the right thread size!!!!! Hallelujah!!!!! I put everything together and now the car looks complete finally! For the first time since like Last November the car finally looks like it is complete.


22847619764_5b4b48e931_b.jpg


badger_1.gif


I ordered some brake cooling duct hose from Pegasus Auto Racing since the old one got chewed up something fierce by the splash shields so that should be here before the weekend hopefully. I also got some new Vinyl for the grill since I did a horrible job on it the first time which is another weekend project :). I will have to pull one of them out and run to Metrix and grab the correct bolts and replace all of them but at least I have everything correct except for the length which will be corrected soon hopefully!
 

Users who are viewing this thread


Top