SVTPerformance Installs Bob's Auto Sports Rear Axle Reservoirhttp://www.svtperformance.com/forum...lls-bobs-auto-sports-rear-axle-reservoir.htmlhttp://www.svtperformance.com/forum...lls-bobs-auto-sports-rear-axle-reservoir.htmlhttp://www.svtperformance.com/forum...lls-bobs-auto-sports-rear-axle-reservoir.html
If you're tired of your Mustang's rear axle being covered in oil the Bob's Reservoir may be just what you need.
http://www.svtperformance.com/forum...lls-bobs-auto-sports-rear-axle-reservoir.htmlIf you're tired of your Mustang's rear axle being covered in oil the Bob's Reservoir may be just what you need.
If there’s one thing that annoys me about certain cars, it’s the factory cutting a corner just to save a buck. On the 2012 SVTP Mustang GT 5.0's 8.8-inch rear axle I can quickly point out two such shortfalls, the unpainted finish of the axle itself (we’ll be taking care of that in a future article) and the gear oil spewing axle vent. We tend to drive the SVTP GT in a spirited manner fairly often in journalistic endeavors. This has resulted in a somewhat significant amount of gear oil being emanated from the wholly inadequate axle vent.
Tiring of the sight of our unintentionally lubed axle we turned to Bob’s Auto Sports (“BAS”) for a solution. Bob’s sent us their BAS Axle Reservoir kit. The kit includes a machined expansion tank and all the hose and fittings you need to install it. We are not new to BAS components, you may recall that we covered the BAS Headrest Camera Mount in an earlier article.
BAS parts have a reputation for quality and the axle reservoir kit is no exception. The catch-can with integrated brackets is nicely machined, and the included hose and hardware are good quality. I particularly like the "hammered" finish of the reservoir itself. The BAS tank works by giving the oil that would otherwise be vented a volume of space to fill. Once the pressure in the differential decreases the oil returns to the axle. No longer will you have to tolerate a grease covered under-carriage.
Installation of the BAS Axle Reservoir is straightforward and simple with the use of common hand tools. Follow along below and we’ll walk you through it.
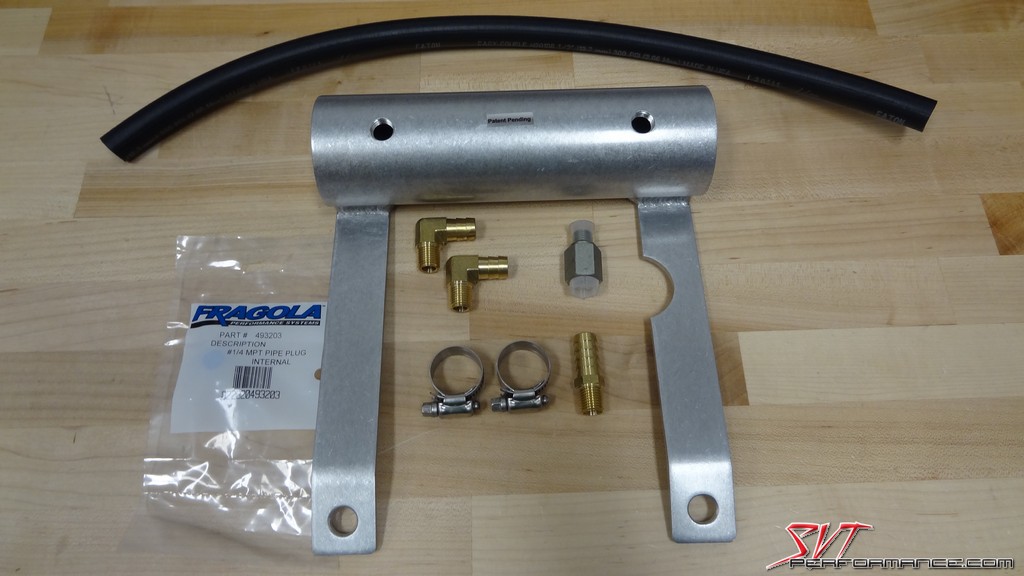
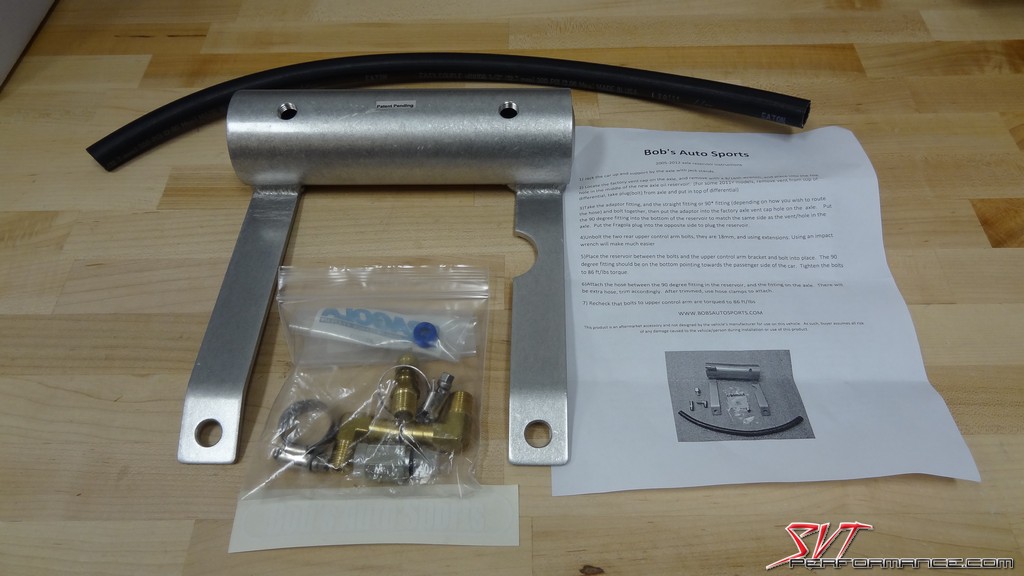
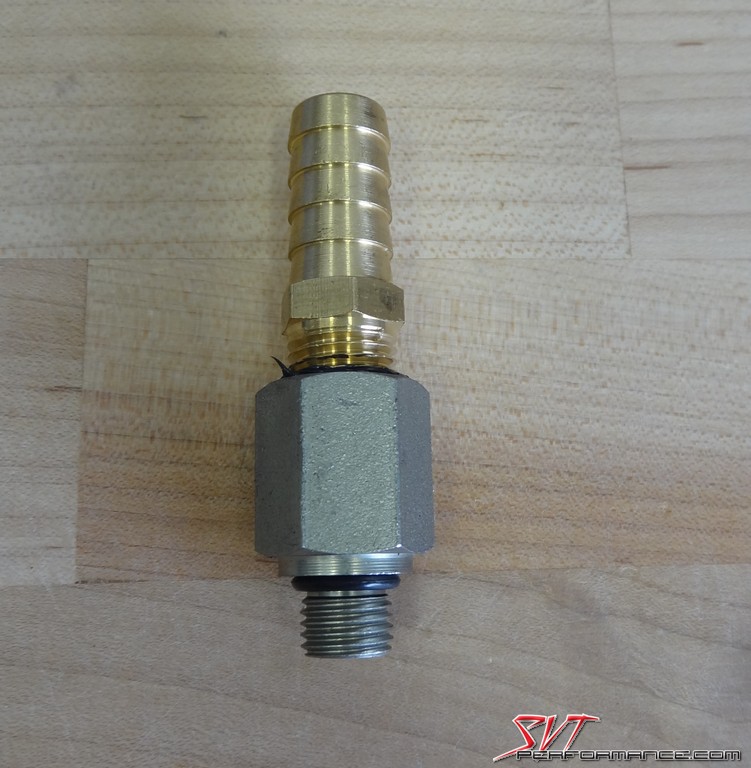
When you open the box, this is what you're greeted with. The title photo shows the contents of the hardware packet.
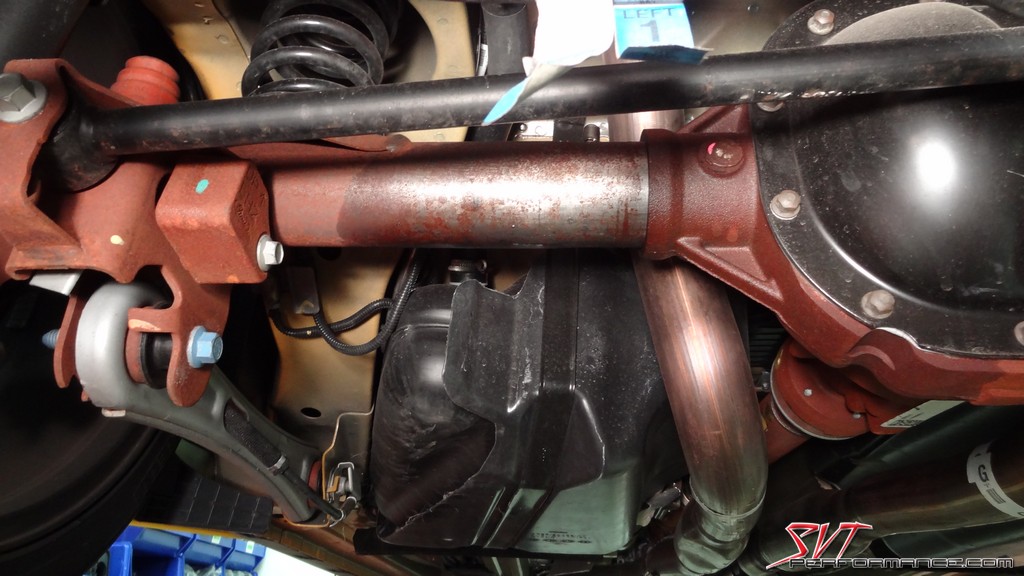
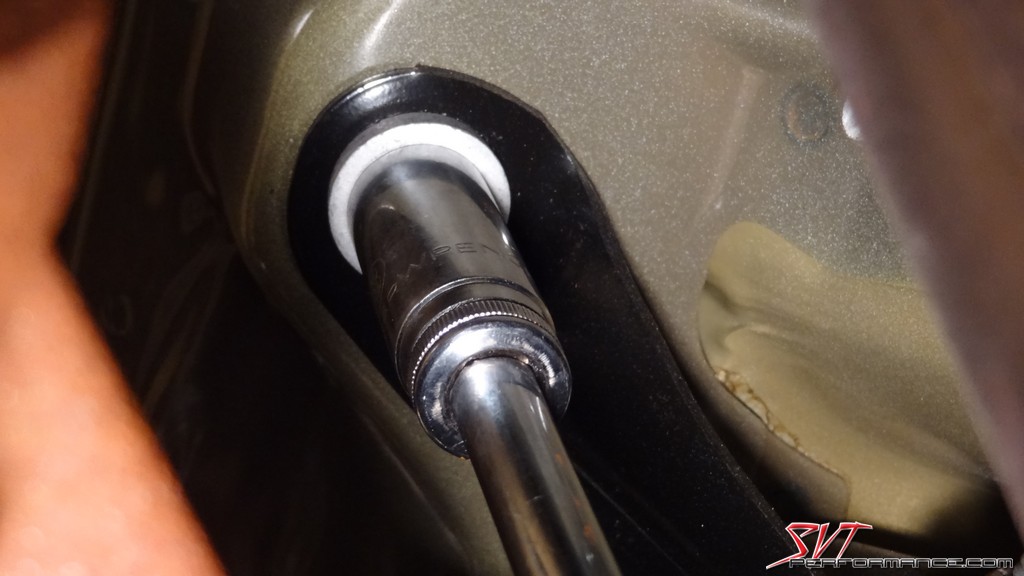
This is the culprit we are looking to relocate. This vent is located on top of the driver's side axle tube on the SVTP GT.
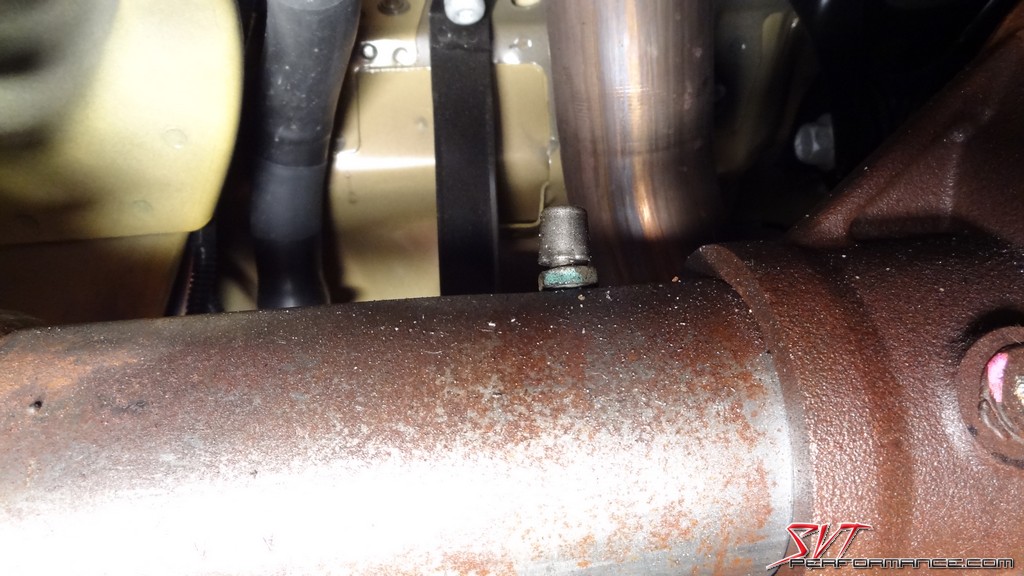
The stock vent is nothing more than a nipple with a stamped steel cap affixed to it to prevent debris from easily entering the differential.
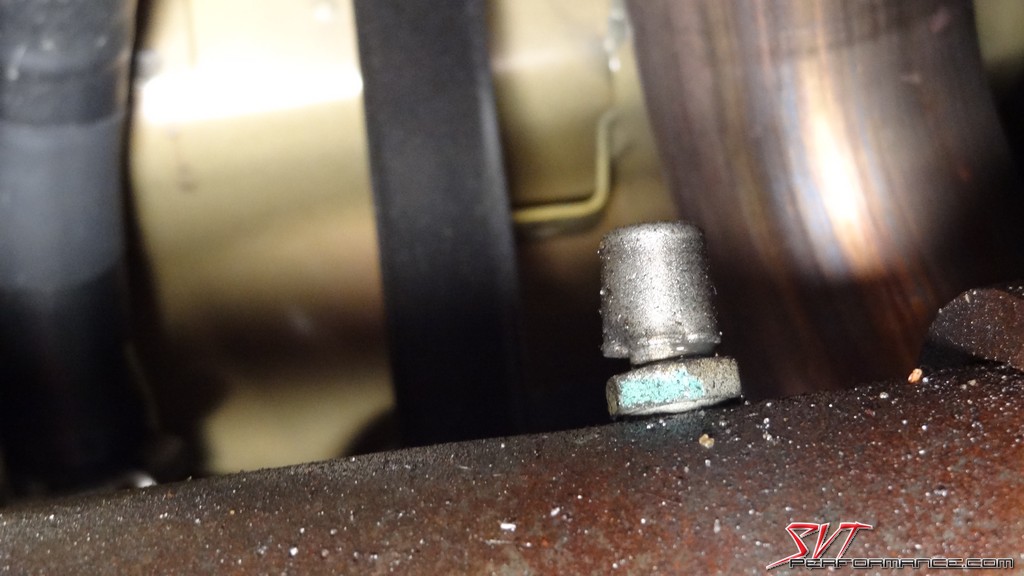
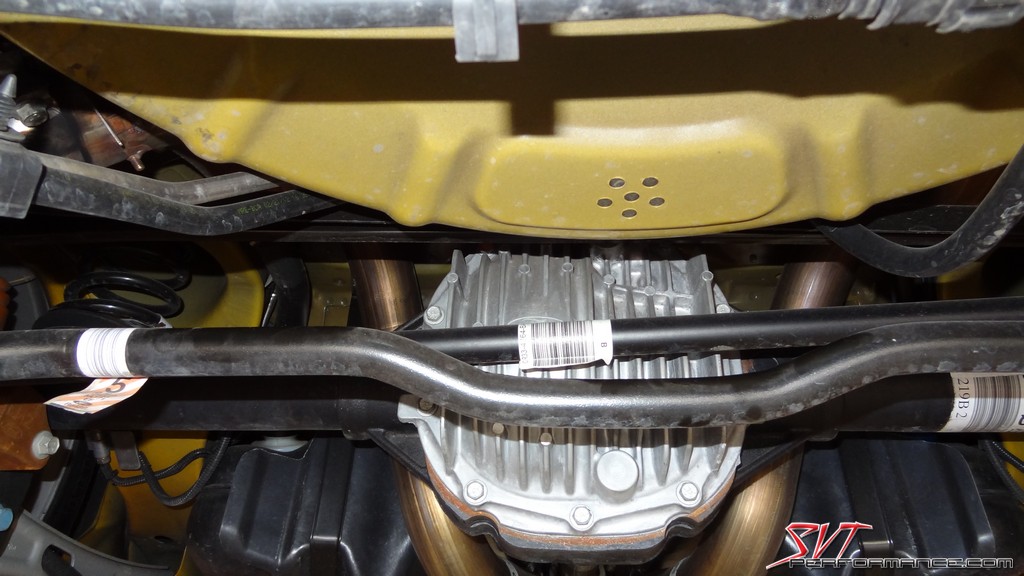
Here you can see how the axle has vented enough oil to cover the axle tube and differential. I hate this unpainted rusted surface. We'll be taking care of that in a few months.
Here you can see one of the two upper control-arm mounting bolts.

These two bolts will have to be removed to install the Bob's catch-can.

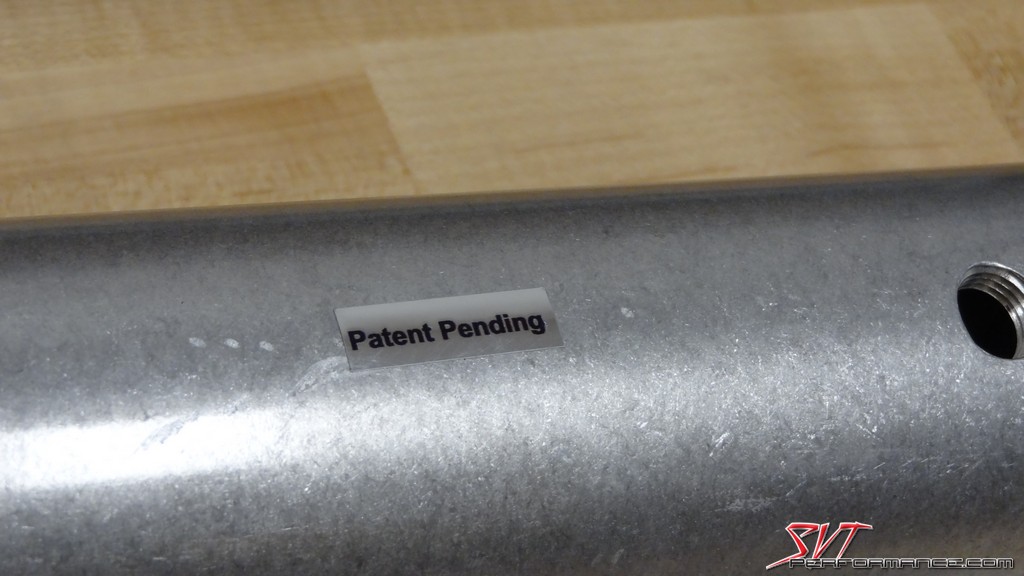
I always like seeing that a new product from an SVTP vendor is either patented or has a patent pending. It means that the product is innovative, and it will hopefully keep the knockoff artists at bay.
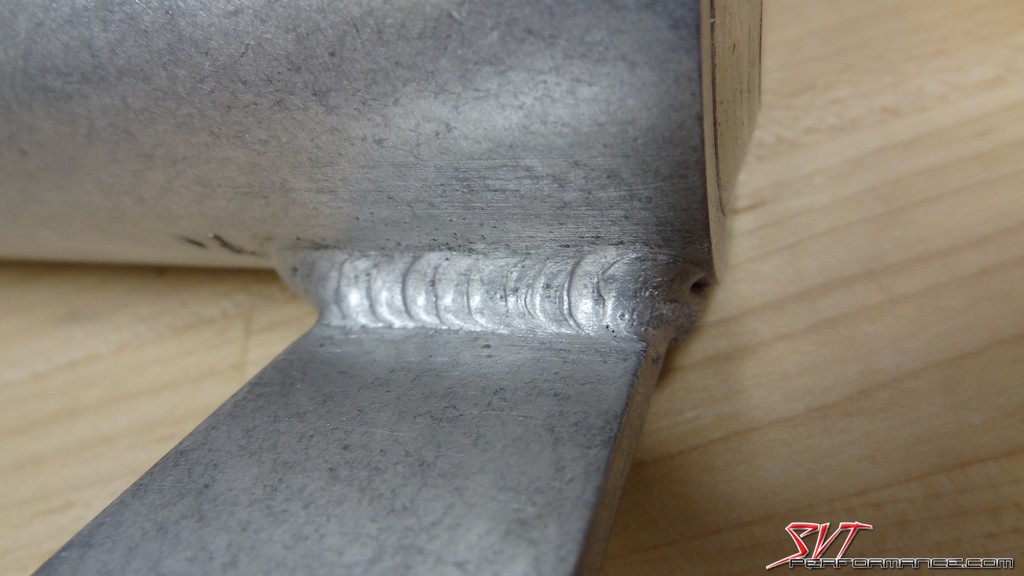
The welds on the catch can are very nice.
Here you can see just how thick the material is that composes the catch-can body. Also, we caused those scratches on the machined end cap while test fitting it.

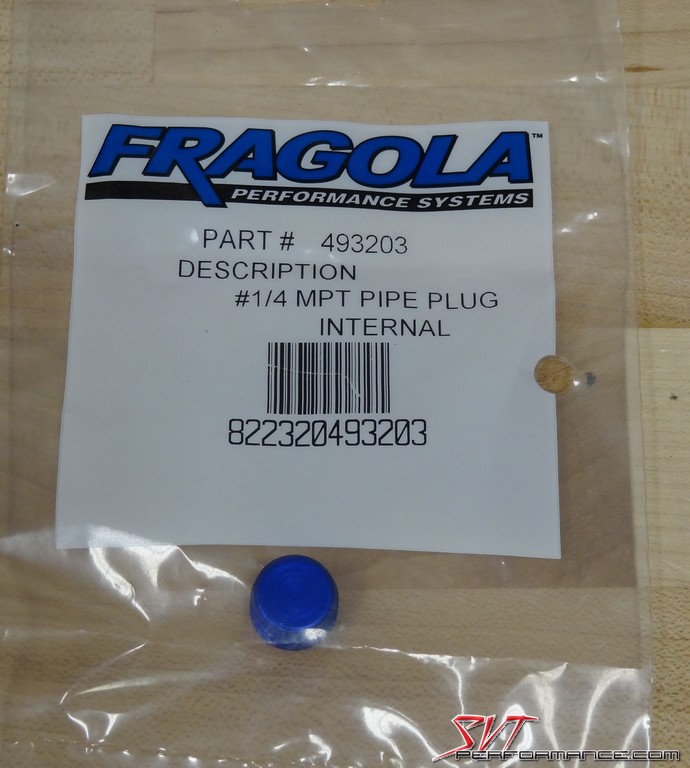
The kit comes with this pipe plug that has to be placed in a hole on the reservoir.
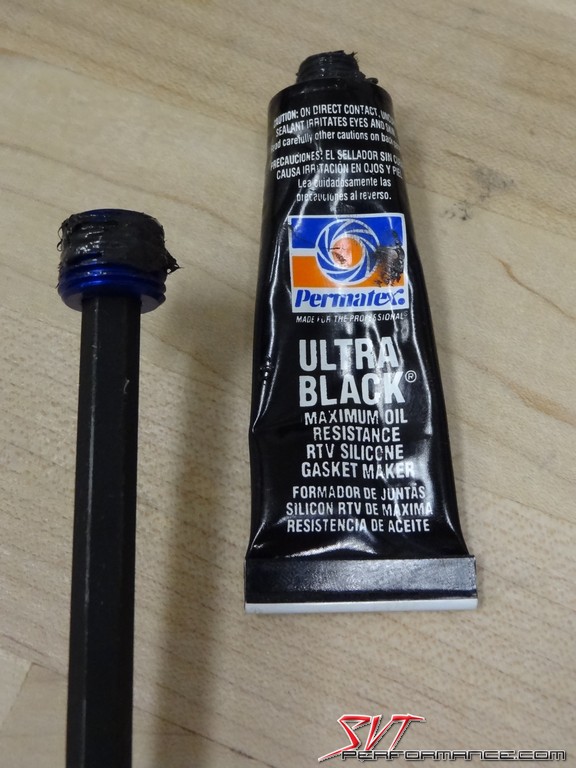
We coated the threads of all of the fittings with a little black RVT silicone to prevent any possible oil seepage.
Bob's includes a variety of fittings and mounting holes so you can best choose which hose routing path works best on your Mustang.

The stock vent has to be removed from the axle.
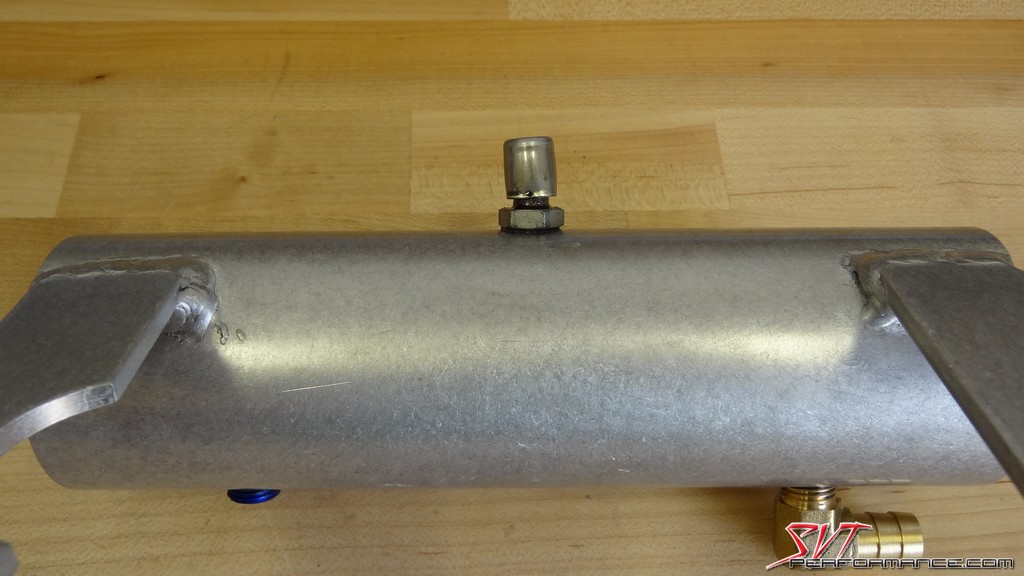
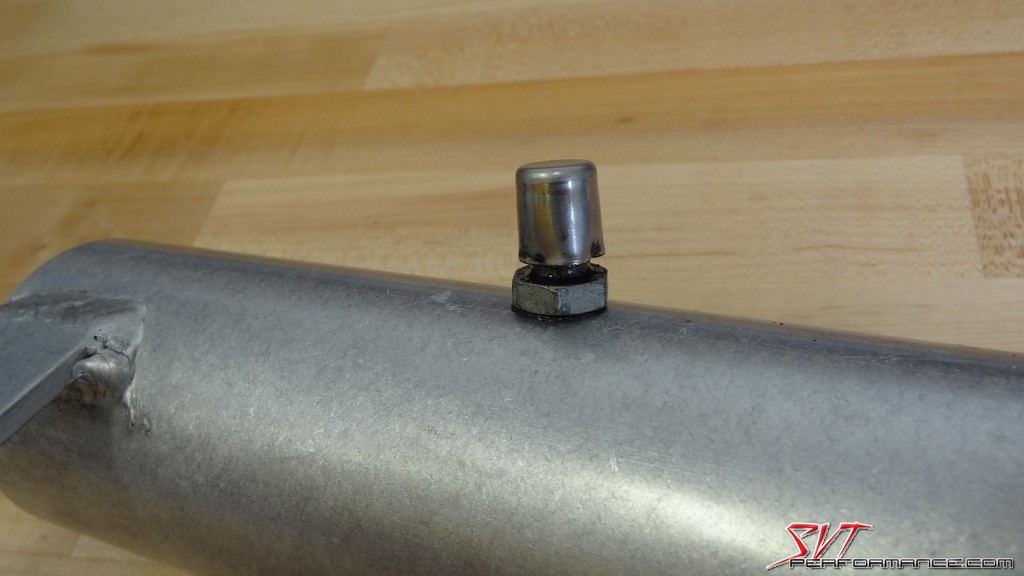
The vent is then mounted to the top of the tank.
If you manage to push oil through this vent now then you have more serious issues to worry about than a greasy undercarriage.
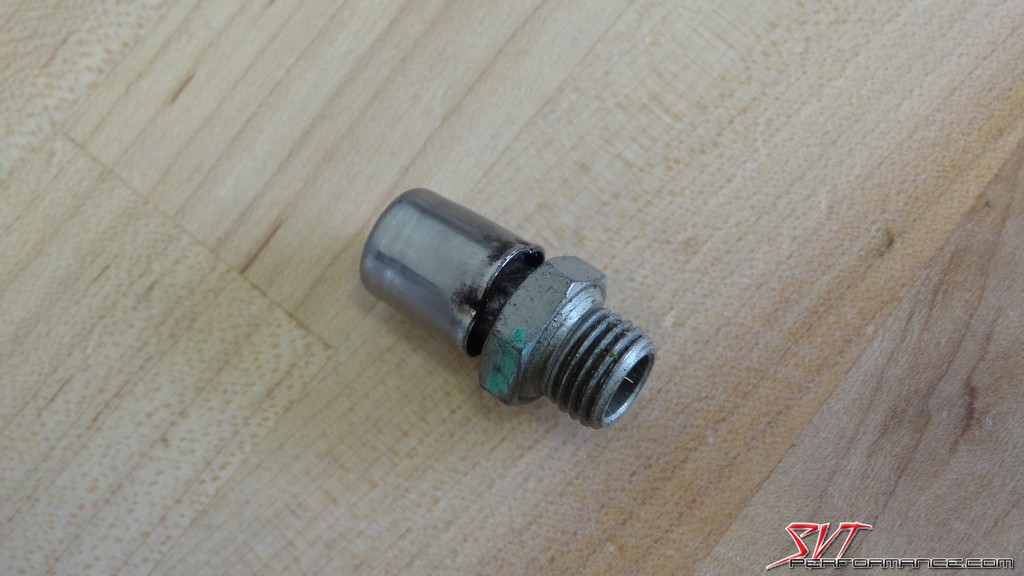
We then mounted the straight nipple fitting into the provided thread adapter fitting.
That assembly then gets mounted into the stock vent's former location.

As mentioned above, we have to remove the two upper control-arm bolts to mount the reservoir. We did this on a 4-post lift so the suspension remained fully loaded.
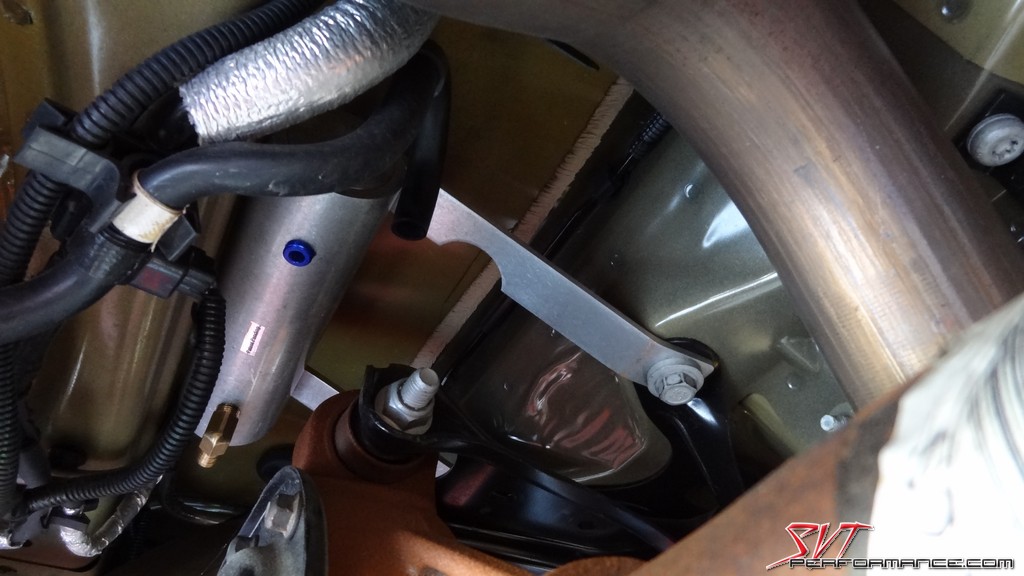
The Bob's reservoir then just mounts onto the upper control-arm with the use of the factory bolts.
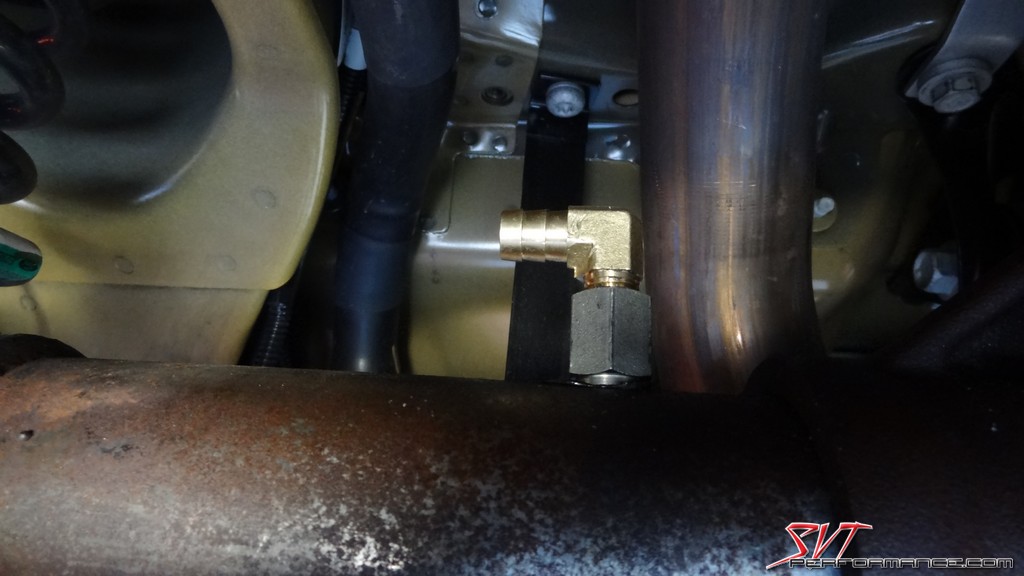
After messing around with the provided hose for a few minutes we changed our mind about using the straight fitting and opted to go with this 90 degree piece, which was also provided. That one of the great things about the BAS kit, they give you options to customize your install.
This allowed us to easily route the vent hose around the fuel filler neck.
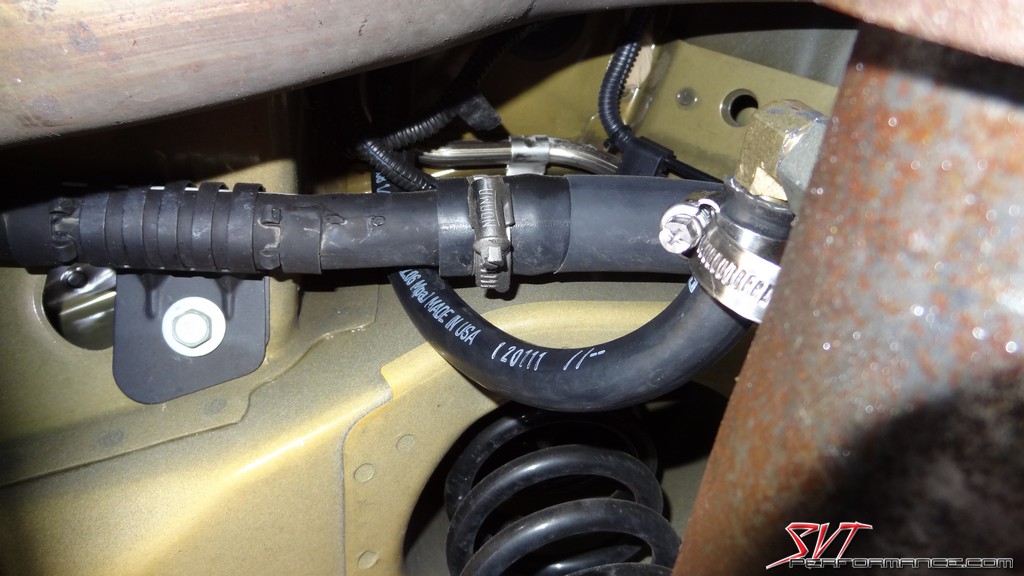
The vent hose then connects to the other 90 degree fitting mounted on the tank. as toy can see, we routed it safely away from the hot exhaust pipes. In my experience, a hot steel pipe and a rubber hose full of oil don't typically play well together.
Here you can see how the BAS Reservoir kit tucks in nicely and does not rub or interfere with anything around it. That's really all there is to the install, it's extremely simple. Since the install we haven't noticed an additional oil seepage on the SVTP GT.

This is George@MGW's 2013 Boss 302 LS. The Boss LS has a bit different axle venting setup than the SVTP GT.
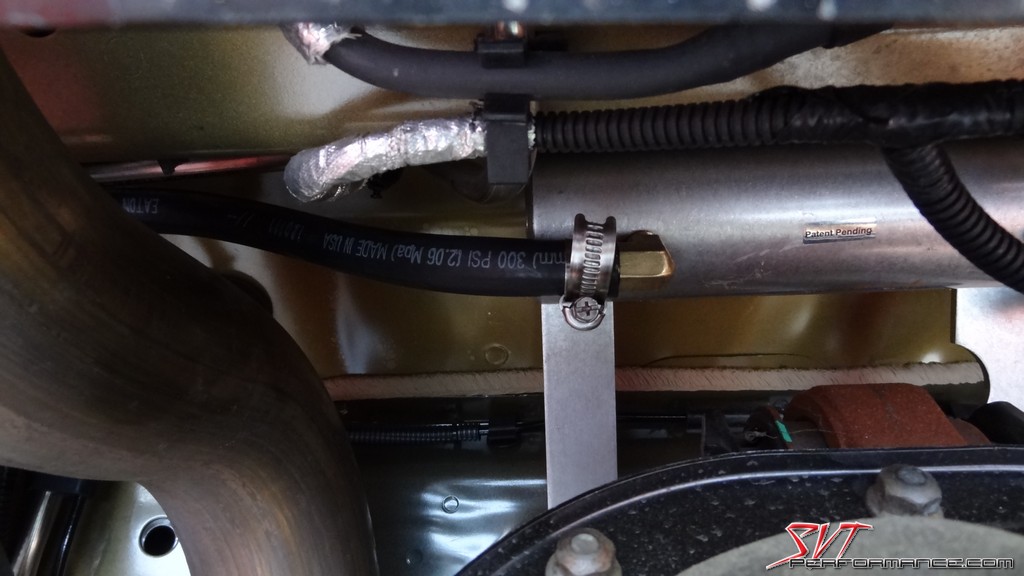
The Boss uses the same vent as the GT but instead of mounting it in the axle tube it is fitted to the top of the differential cover.
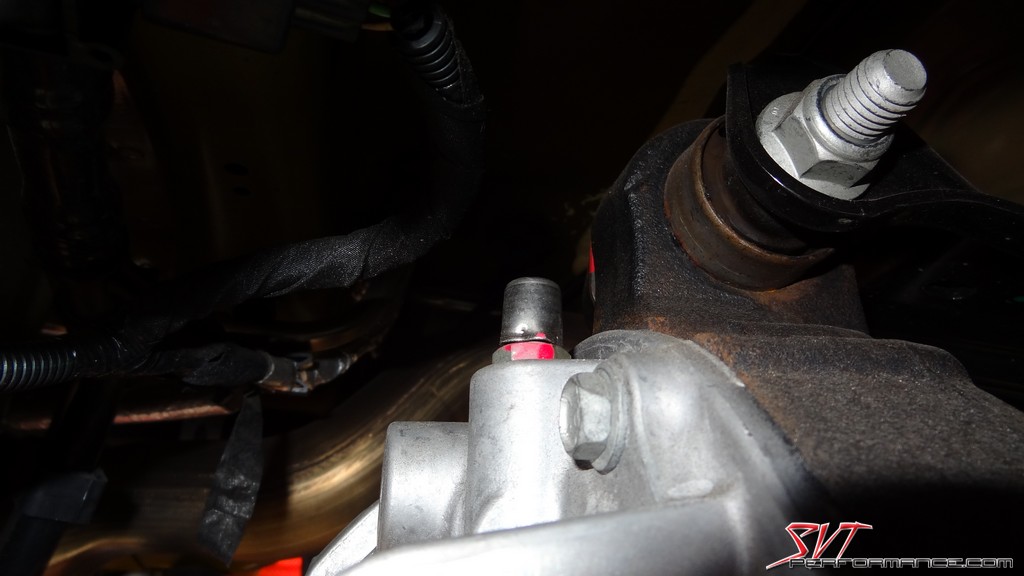
George's Boss didn't show any sign that the axle had been venting oil. It's good to see that the Bosses and Shelbys come with paint applied to the axle housing. In a future article we will cover painting the rear axle of the SVTP GT.
This is the culprit we are looking to relocate. This vent is located on top of the driver's side axle tube on the SVTP GT.
The stock vent is nothing more than a nipple with a stamped steel cap affixed to it to prevent debris from easily entering the differential.
Here you can see how the axle has vented enough oil to cover the axle tube and differential. I hate this unpainted rusted surface. We'll be taking care of that in a few months.
Here you can see one of the two upper control-arm mounting bolts.
These two bolts will have to be removed to install the Bob's catch-can.
I always like seeing that a new product from an SVTP vendor is either patented or has a patent pending. It means that the product is innovative, and it will hopefully keep the knockoff artists at bay.
The welds on the catch can are very nice.
Here you can see just how thick the material is that composes the catch-can body. Also, we caused those scratches on the machined end cap while test fitting it.
The kit comes with this pipe plug that has to be placed in a hole on the reservoir.
We coated the threads of all of the fittings with a little black RVT silicone to prevent any possible oil seepage.
Bob's includes a variety of fittings and mounting holes so you can best choose which hose routing path works best on your Mustang.
The stock vent has to be removed from the axle.
The vent is then mounted to the top of the tank.
If you manage to push oil through this vent now then you have more serious issues to worry about than a greasy undercarriage.
We then mounted the straight nipple fitting into the provided thread adapter fitting.
That assembly then gets mounted into the stock vent's former location.
As mentioned above, we have to remove the two upper control-arm bolts to mount the reservoir. We did this on a 4-post lift so the suspension remained fully loaded.
The Bob's reservoir then just mounts onto the upper control-arm with the use of the factory bolts.
After messing around with the provided hose for a few minutes we changed our mind about using the straight fitting and opted to go with this 90 degree piece, which was also provided. That one of the great things about the BAS kit, they give you options to customize your install.
This allowed us to easily route the vent hose around the fuel filler neck.
The vent hose then connects to the other 90 degree fitting mounted on the tank. as toy can see, we routed it safely away from the hot exhaust pipes. In my experience, a hot steel pipe and a rubber hose full of oil don't typically play well together.
Here you can see how the BAS Reservoir kit tucks in nicely and does not rub or interfere with anything around it. That's really all there is to the install, it's extremely simple. Since the install we haven't noticed an additional oil seepage on the SVTP GT.
This is George@MGW's 2013 Boss 302 LS. The Boss LS has a bit different axle venting setup than the SVTP GT.
The Boss uses the same vent as the GT but instead of mounting it in the axle tube it is fitted to the top of the differential cover.
George's Boss didn't show any sign that the axle had been venting oil. It's good to see that the Bosses and Shelbys come with paint applied to the axle housing. In a future article we will cover painting the rear axle of the SVTP GT.
Since installing the Bob's Auto Sports Axle Reservoir we haven't noticed any additional oil seepage from the differential. There's also no noise, vibration, or rubbing from it. Some may look at this mod as overkill, as there are other simpler and cheaper solutions to this problem, but I always felt that if you're going to fix something you should try to do it in the best way possible. Of the solutions I've seen for the axle venting issue the BAS Reservoir takes the prize for being the most complete. One thing seems certain with the Bob's Auto Sports kit, once it is installed your venting issues will be solved. If you do manage to get it to puke oil, chances are you have exploded the differential; and you should definitely send me pics of the carnage. That's something I'd have to see.
Special Thanks To:
Bob's Auto Sports
-SID297:beer:


