Going turbo, too many problems... need help

04yfzkid

New Member
Established Member
Joined
Jul 25, 2010
Messages
176
Location
Oceanside, CA
Just posting this here so I can find it tomorrow lol. I have a feeling my intake bolts are too long. I think they are right on the edge of being too long. I snapped one off today (seems to be a very common problem for the supercharged guys) and it got me thinking. Pretty sure I over torqued it too. Put my torque wrench at 12 ft/lbs because I had a two reducers (1/2 to 3/8 and 3/8 to 1/4) and a foot long extension with a deep socket. Not to mention I was using the lower 20% of the torque wrench which I know is no no. Anyways I was rushing and it showed, but I'm still going to look into slightly shorter bolts, especially ones that have no already been torqued who knows how many times lol.

m6x1.00x30mm at 89in pounds

0996b43f80208965.gif 0996b43f80208967.gif
 

04yfzkid

New Member
Established Member
Joined
Jul 25, 2010
Messages
176
Location
Oceanside, CA
With the little smaller 10.9 bolts on the lower intake manfiold, and both the upper and lower torqued to spec my idle is now at 1500. It was around 1600-1700 before. Makes me wonder.

Was getting a ton of pcv blowing out my 5/8's hoses attached to the valve covers. Sparked the thought on bad rings. Did a compression test. 190 on cylinders 1-5, 80 on cylinder 6, 50 on cylinder 7, and 180 on cylinder 8. Just can't catch a break!
 

svtshadow

Banned
Joined
Feb 6, 2013
Messages
1,521
Location
deadcity
All PVC caps etc in good condition. I have been having 1250rpm idles, took my tuner to located a cracked vacuum cap. Fixed it, now idles at 800rpms
 

ruthless

Turbo Terminator and TVS Terminator Vert
Established Member
Joined
Jun 2, 2007
Messages
1,439
Location
North of Pittsburgh, Pa
Sounds like you need to make a cap with a fitting on it so you can charge the intake system to find your leak. I have a PVC cap and a rubber connecter with a fitting to hook up the air compressor. I place it where the air filter goes and charge the cold side pipes up to 16lbs or so. If it doesn't build up then you have a leak. Track down any hissing with soapy water or just feel for them. I have doing this since my first turbo car (93 Stealth TT) and it works like a champ. It was either that or buy a smoke machine to track down these leaks.

I did develop an issue at the track one time. Turned out the lower throttle body bolt backed out and caused the gasket to blow out. It was a pita to find at the track but with a few of my buddies we found it.
 

static74

in the 9's
Established Member
Joined
Feb 19, 2009
Messages
804
Location
OH
With the little smaller 10.9 bolts on the lower intake manfiold, and both the upper and lower torqued to spec my idle is now at 1500. It was around 1600-1700 before. Makes me wonder.

Was getting a ton of pcv blowing out my 5/8's hoses attached to the valve covers. Sparked the thought on bad rings. Did a compression test. 190 on cylinders 1-5, 80 on cylinder 6, 50 on cylinder 7, and 180 on cylinder 8. Just can't catch a break!

Sorry to hear man, sounds like you have some work to do. Hopefully its nothing big.
 

04yfzkid

New Member
Established Member
Joined
Jul 25, 2010
Messages
176
Location
Oceanside, CA
Sounds like you need to make a cap with a fitting on it so you can charge the intake system to find your leak. I have a PVC cap and a rubber connecter with a fitting to hook up the air compressor. I place it where the air filter goes and charge the cold side pipes up to 16lbs or so. If it doesn't build up then you have a leak. Track down any hissing with soapy water or just feel for them. I have doing this since my first turbo car (93 Stealth TT) and it works like a champ. It was either that or buy a smoke machine to track down these leaks.

I did develop an issue at the track one time. Turned out the lower throttle body bolt backed out and caused the gasket to blow out. It was a pita to find at the track but with a few of my buddies we found it.

Forgot about that idea, I have a couple buddies with some laying around. Hoping if I charge it up too I can see if the intake tube will blow off again with my my new boot and clamp.

Sorry to hear man, sounds like you have some work to do. Hopefully its nothing big.

Tore it down to a short block today. Didn't see any scratches in the walls or anything obvious to me. Still going to drop it off at the machine shop and see what they come up with. Glad I did too because one side of the head studs (passenger side with all good compression) was significantly easier to break the torque then the other.

20140525_194725_zpsrmtnfg2l.jpg
 

04yfzkid

New Member
Established Member
Joined
Jul 25, 2010
Messages
176
Location
Oceanside, CA
wow sorry to hear OP but keep at it man it will be well worth it in the end! :beer:

Thanks man I am really hoping so. It'll be fun for a little while then hopefully the next owner will really enjoy it.

Dropped the motor off at the new machine shop about a month ago and they still haven't checked the block out yet. They are just super swamped and quality takes time! They did find that all of the pistons were burnt on the sides and several had collapsed ring lands. I never saw it get lean driving it around but then again I can't keep my eye on it 100% of the time. It did go lean twice on the dyno because of the pinched boost reference line. Going to make a couple changes.

Move the boost reference line
New maf housing built (will clamp better and hopefully that is where the intake leak was post maf)
Big battery in the trunk (it's a street car and big odyssey battery > weight savings)
Catch can mounted where the battery was
New plugs
The better total seal rings
Better bottom end bearings
May switch to a cometic head gasket for shits and giggles
Boost brace with 3/8" hiems bolted to the intake manifold and the charge pipe going to the throttle body
New race-part throttle body silicone boot
New bosch wideband o2

The new maf housing my buddy built me

20140624_100050_zpsjnb3qxfn.jpg


Powder coated upper intake manifold and cermaic coated manifolds. Didn't want to deal with taking either of these off when I got powder coat / cermaic coat the remaining items

20140627_133654_zpsjx2zrzep.jpg


And how the boost brace is going to work sort of. Ordered everything from Mcmaster-carr

20140627_133914_zpsmhkh8v2d.jpg


Painted the intercooler black. I had already wanted to because I don't want the attention of a sliver one. I was cautious that the paint would insulate the intercooler

20140624_151657_zpszj5xyolg.jpg


I watched this video from MCM and made my mind up lol

[video=youtube_share;f1QL9veQaNg]http://youtu.be/f1QL9veQaNg[/video]
 

MTBSully

Well-Known Member
Established Member
Joined
Sep 7, 2009
Messages
4,243
Location
Portsmouth, NH
funny you posted that. I watched the same MCM video a few weeks ago. I love my silver intercooler though haha
 

04yfzkid

New Member
Established Member
Joined
Jul 25, 2010
Messages
176
Location
Oceanside, CA
man this makes me nervous for my turbo build!

Don't be nervous just take the time to do a little research. My problem is I had no clue about motors when I bought this car. I pretty much listened to everyone else how to build this car. Now I'm to the point where I know how almost everything works and exactly what my changes are affecting.

funny you posted that. I watched the same MCM video a few weeks ago. I love my silver intercooler though haha

I love the look of silver intercoolers on most cars. Always grabs my attention to know they have something cool under the hood lol. California sucks so I'm trying to hide everything.

Talked to total performance in santee, ca. Bore is fine on the motor so that is good. Ordered a set of pistons from MMR with an 18cc dish to help lower compression. I want to make sure it's safe to run 16ish psi on 91 so I don't have to swap WG springs for e85. Also got a set of total seal AP steel rings instead of the moly rings I had in there before. Knowing what I do now I would not have put moly rings in there last time.

Also should get my 150amp marine circuit break in today so I can finish up my battery mount in the truck with 0 gauge wiring. Here is a quick picture of the battery box.

20140709_200333_zpsdsm3wbuu.jpg


20140428_211719_zpsagcbfotm.jpg
 

04yfzkid

New Member
Established Member
Joined
Jul 25, 2010
Messages
176
Location
Oceanside, CA
Heads are trashed. Cracks going to the spark plug holes. What's the going rate on some 9 thread heads? Also is there anywhere to buy them from a shop kind of deal? Already bought heads once with stage 2 cams for $1200 only to find out they were trashed.
 

Mystic03

Well-Known Member
Established Member
Joined
Apr 21, 2005
Messages
6,680
Location
tucson,az
that sucks buddie! hopefully things go smoother for you in the future! but where did you get all your cold side piping?
 

04yfzkid

New Member
Established Member
Joined
Jul 25, 2010
Messages
176
Location
Oceanside, CA
that sucks buddie! hopefully things go smoother for you in the future! but where did you get all your cold side piping?

It all came as a custom kit when we traded the whipple. Couple of the cold side pieces we had to have cut and welded to fit my car specifically.
 

04yfzkid

New Member
Established Member
Joined
Jul 25, 2010
Messages
176
Location
Oceanside, CA
Dropped the tank so I could bolt the battery bracket in place. Decided to mess with the fuel sender level while I was in there.

20140726_135725_zps2stfzkm1.jpg


20140726_141431_zpsbmwfxsjj.jpg


Soldered on a new wire and with a crimp and some heat shrink to the old wire. I really need to buy some better heat shrink, this harbor frieght / vatzone 2:1 stuff sucks. The stuff from waytek is cool, but the last stuff I bought was in 48" lengths, and they shipped it in a 4' box...

20140726_153059_zpso9ts3hs4.jpg


Battery all bolted in with grade and lock nuts (sadly nylon not stover). Power goes straight to a 175 amp marine grade circuit breaker that I can use to turn off power. Need to shape a piece of wood for the truck and cover it in carpet to finish the truck off.

20140726_163902_zpsfuvjkmwc.jpg


Used 1/0 welding wire with crimped ends

20140713_180850_zpsketpeem9.jpg


Ran the wire along the inside of the trunk "hidden" to the driver side then up to the firewall. The red wire goes over to the driver side rear relay for my fuel pumps

20140726_164007_zpswd76z9sn.jpg


And lastly a fuel pump cut off switch. I didn't have anywhere I wanted to mount it inside that didn't require drilling into the interior. It's really only for when I'm working on it and don't want to the fuel pumps circulating drawing 45amps or so.

20140726_163918_zpspgt4w4c4.jpg


Still have a little more to do. I'm running these up front so if I need to tap into power somewhere in the engine bay it's easy. I don't like the way it's wired up there now so I'm going to redo that little bit.

http://www.waytekwire.com/item/47213/JUNCTION-BLOCK-87-STUD-RED/
 

SecondhandSnake

Well-Known Member
Established Member
Joined
Jan 29, 2011
Messages
1,764
Location
Columbus, IN
I must have missed your tank setup. I see you're using the old GT style core for the sender. Do you have the GT basket spot welded to the bottom of the tank?

And I see a hose on the fuel outlet on the hat. Is that your return line?
 

04yfzkid

New Member
Established Member
Joined
Jul 25, 2010
Messages
176
Location
Oceanside, CA
I must have missed your tank setup. I see you're using the old GT style core for the sender. Do you have the GT basket spot welded to the bottom of the tank?

And I see a hose on the fuel outlet on the hat. Is that your return line?

From what I understand, the fuel system was purchased used. It's a glenns performance triple pump set up with the sumped tank. I wouldn't be surprised if this was a GT tank at one point but to be honest I don't know the difference. If the basket being welded to the tank is the what holds that orange housing into the tank then yes I have that. Just snaps on both sides.

It just get looped around to some other stuff on there. The factory lines are still on the along with a lot of the evap stuff, it's just not hooked up. You can see my return line (Braided SS -8) and my feed line (black -10) hanging in this picture

20140726_135907_zps5c4vsn4h.jpg
 

Mystic03

Well-Known Member
Established Member
Joined
Apr 21, 2005
Messages
6,680
Location
tucson,az
very clean install! soon ill be droppin my new built motor and starting fab work on the turbo pics will soon follow! :thumbsup:
 

04yfzkid

New Member
Established Member
Joined
Jul 25, 2010
Messages
176
Location
Oceanside, CA
very clean install! soon ill be droppin my new built motor and starting fab work on the turbo pics will soon follow! :thumbsup:

Thanks! Always cool to see more turbo builds going on out there :)


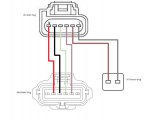
I don't have IAT 1 sensor. Besides drilling a hole in the filter and buying a new sensor, is this how everyone else is wiring their IAT 1 into the slot style maf?

sensorwiring-mustang.jpg
 

Mystic03

Well-Known Member
Established Member
Joined
Apr 21, 2005
Messages
6,680
Location
tucson,az
^ thats how ive been told to do it since if its ran into the cold side it could be an issue with it popping out under boost.
 

Users who are viewing this thread


Top