Re-Designing My 2V Valve Covers

KEVINS

Well-Known Member
Established Member
Joined
Jan 11, 2014
Messages
521
Location
EARTH
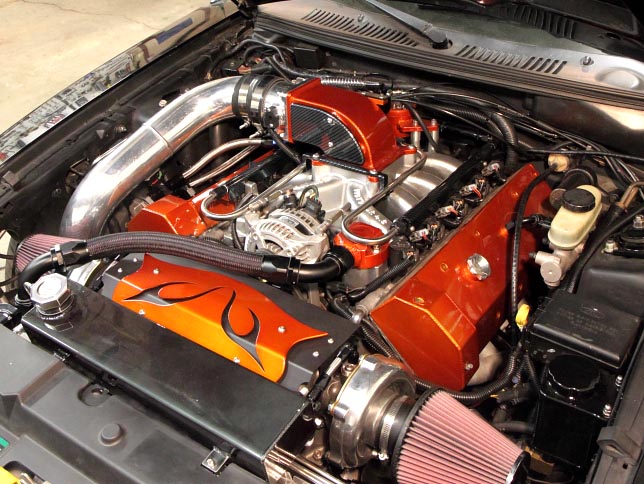
I'm not enjoying working with my 2V valve covers so I thought I would fire up the CAD station and see if I can come up with something that looks nice and something that can be made from sheet metal. The flange was going to be laser cut to keep things simple but decided to design it to be CNC’d to incorporate a Felpro gasket.

Below are pics of what I have done thus far and I’m just about done with the piece part designs. I hope to send the sheet metal parts out this week but still need to design the interior baffles.
I'll have templates made with the bolt pattern of each head so I can trial fit the templates before having the flanges made.
Once it’s all welded I’ll sand most of the welds smooth then have them powder coated.

ks
 

Attachments

  • 1.jpg
    1.jpg
    41.3 KB · Views: 310
  • 2.jpg
    2.jpg
    64.3 KB · Views: 294

StrayBullitt

Well-Known Member
Established Member
Joined
Aug 16, 2016
Messages
1,213
Location
Seattle (GO HAWKS!)
Very cool.

Are you planning to make them accept an oem gasket ? From my dealings with the BBK valve covers with a "flat" gasket they were super difficult to get the gasket aligned perfectly and to get them sealed up nicely. I slipped the gasket on the Drivers side back corner one time and was never able to get it seal after that.
 

KEVINS

Well-Known Member
Established Member
Joined
Jan 11, 2014
Messages
521
Location
EARTH
Very cool.

Are you planning to make them accept an oem gasket ? From my dealings with the BBK valve covers with a "flat" gasket they were super difficult to get the gasket aligned perfectly and to get them sealed up nicely. I slipped the gasket on the Drivers side back corner one time and was never able to get it seal after that.

Yea, there's a groove all around like the factory covers.

ks
 

sonicdan

Member
Established Member
Joined
Mar 4, 2014
Messages
94
Location
Jackson
Any update on this? Looks like a very cool idea, and better looking than any aftermarket offering.
 

KEVINS

Well-Known Member
Established Member
Joined
Jan 11, 2014
Messages
521
Location
EARTH
Any update on this? Looks like a very cool idea, and better looking than any aftermarket offering.

A little. Before machining the flanges I decided to laser cut some templates so I can verify the bolt pattern. There was a few things I needed to change so I sent off new files last night and hope to have the updated templates later this week. I'd like to get the actual parts ordered sometime next week so we can start making them.

ks
 

KEVINS

Well-Known Member
Established Member
Joined
Jan 11, 2014
Messages
521
Location
EARTH
I received the sheet metal parts today and they look good and the price was a lot cheaper than the original quote which always helps.
However, the gent that was going to CNC the flanges discovered this morning that the flanges are larger than his machine can make. I asked if he can machine them in multiple setups, which I'm sure he can, but I haven't heard back from him. In the meantime I sent files out for more quotes so I'll see what they come back like. Kinda bummed b/c I'd REALLY like to have parts over the xmas holiday since I'll have more time to work on them during that time.

ks
 

Attachments

  • IMG_8619.JPG
    IMG_8619.JPG
    115.3 KB · Views: 204

sonicdan

Member
Established Member
Joined
Mar 4, 2014
Messages
94
Location
Jackson
I hope you get something worked out. Would love to see a finished product!

I'm currently running stock valve covers with the ribs removed, and thinking about incorporating the "powered by ford" from the newer coyote coil covers into them...
 

KEVINS

Well-Known Member
Established Member
Joined
Jan 11, 2014
Messages
521
Location
EARTH
Just got a pic of the flanges after CNC'ing.
I'm looking forward to start assembling the pieces to see how it all fits.

ks
 

Attachments

  • 20170116_061427.jpg
    20170116_061427.jpg
    125.9 KB · Views: 162

KEVINS

Well-Known Member
Established Member
Joined
Jan 11, 2014
Messages
521
Location
EARTH
I received the flanges and did a test fit to get a feel for how things look and to discuss with Curtis the best process for assembling/welding them. Getting the top sheet metal surfaces over the studs will be a chore but we'll take our time. The gasket grooves are perfect! No need to stretch the gaskets to fit the slots and they're held in place w/o glue.

Today I need to finish making the rest of the bolt "posts".

ks

IMG_2572.JPG
IMG_2573.JPG
IMG_2579.JPG
 

KEVINS

Well-Known Member
Established Member
Joined
Jan 11, 2014
Messages
521
Location
EARTH
Making some great progress but still have a long way to go. Got the sheet metal tacked together for the drivers side and it looks really good. The screw bosses are just sitting in place to give us an idea how it will look and how to proceed.

ks
IMG_2615.JPG

IMG_2613.JPG

IMG_2617.JPG

IMG_2616.JPG

IMG_2620.JPG
 
Last edited:

KEVINS

Well-Known Member
Established Member
Joined
Jan 11, 2014
Messages
521
Location
EARTH
Ahh, I Love the Orange on Black under the hood. Almost ordered my JLT in comp orange just for that reason. Wanna sell those??

Yea, the old ones will be for sale when I'm done. They are all sheet metal so they can't use a gasket and they have been abused pretty good so they'll go pretty cheap.

ks
 

KEVINS

Well-Known Member
Established Member
Joined
Jan 11, 2014
Messages
521
Location
EARTH
Almost have one done but still along way tot go. Got it all welded except internal baffles and some AN fittings but started grinding the welds off to see how it'll come out. Still have more to grind then I'll hit it with the DA with some 30grit to smooth/contour the welds then probably finish with 180 or so.

ks
IMG_8641.JPG
IMG_8636.JPG
IMG_8637.JPG
 

FalkenXC

New Member
Joined
Mar 22, 2016
Messages
9
Location
KY
Any updates on these? Nice craftsmanship man! Can't wait to see these things under the hood on your machine.
 

KEVINS

Well-Known Member
Established Member
Joined
Jan 11, 2014
Messages
521
Location
EARTH
Any updates on these? Nice craftsmanship man! Can't wait to see these things under the hood on your machine.

Thank you! Unfortunately not much got accomplished last weekend. I worked on them a bit trying to sand the grinding marks with 40grit and then 80grit but some of the grinding marks went really deep so I bought a different type of sanding disc to try and remove the grinding marks. The new discs should be here today and I hope to be able to see how they work this week. The areas where I sanded with 80grit sure look nice tho!

ks
 

geoffmt

Well-Known Member
Established Member
Premium Member
Joined
Jul 30, 2015
Messages
2,024
Location
billings, mt
OH DAMN! Those are NICE! I bought the Moroso covers for my 2v and spent about 3 weeks shaving and grinding them to fit the trick flow heads. the cam journals are much larger than stock with the trick flows. I think the powdercoat I put on them will be the only thing holding in oil in some spots
 

KEVINS

Well-Known Member
Established Member
Joined
Jan 11, 2014
Messages
521
Location
EARTH
Yea, most of the seams are welded on both sides so I can grind all I need but there are a couple areas where the only weld is on the outside so I have to decide how deep can I actually grind before weakening the seam.

ks
 

Users who are viewing this thread


Top