Before: stock blower with 2.8 pulley, jlt in fender intake, accufab tb/plenum, o/r prochamber, afco dual pass h/e, bama mail tune. Never saw a dyno with the pulley, but made 420/390 on stock pulley.
To be installed: POSI #100 with 2.76 pulley, ported BF plenum, SCT 2600, KB BAP, 60 lb injectors.
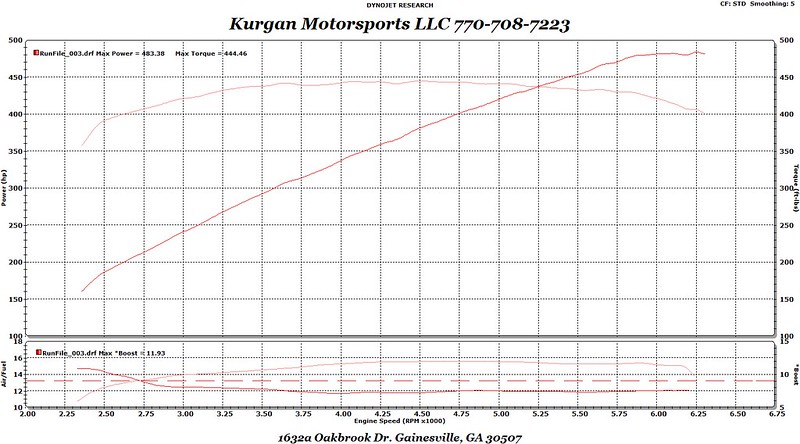
Cliff notes: made 486/444 at only 12 psi. Seems low to me, but it is just motivation to add a lower, bigger i/c tank, and better tb/plenum
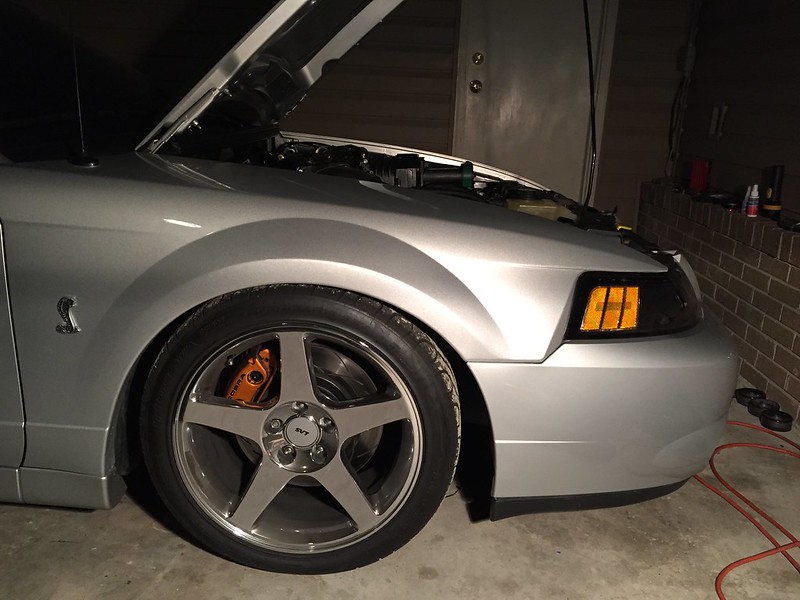
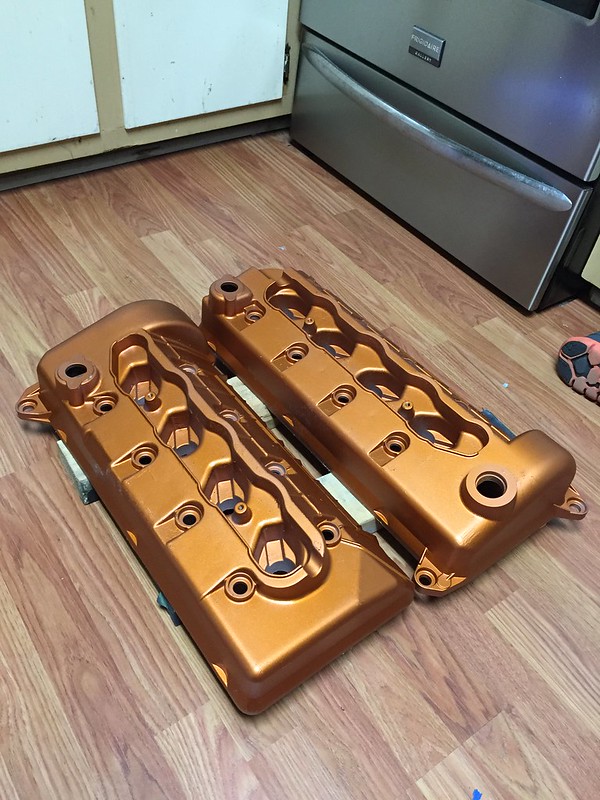
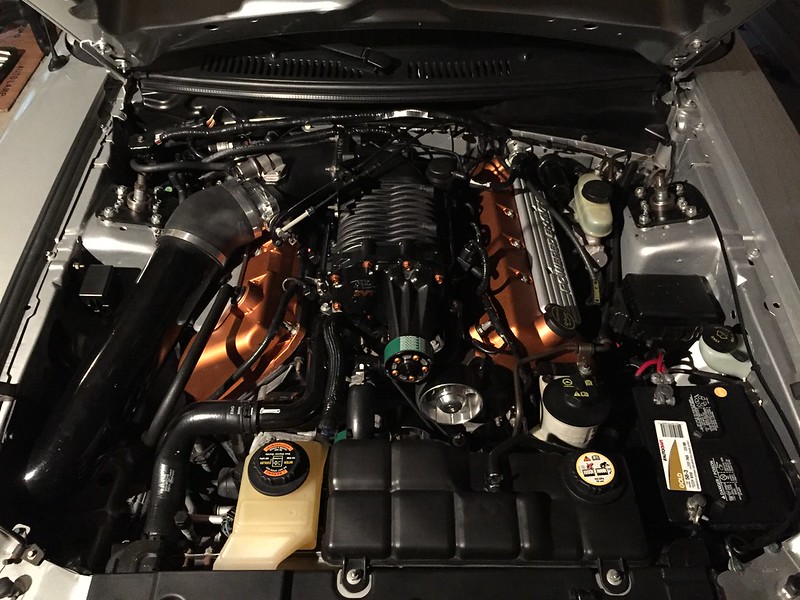
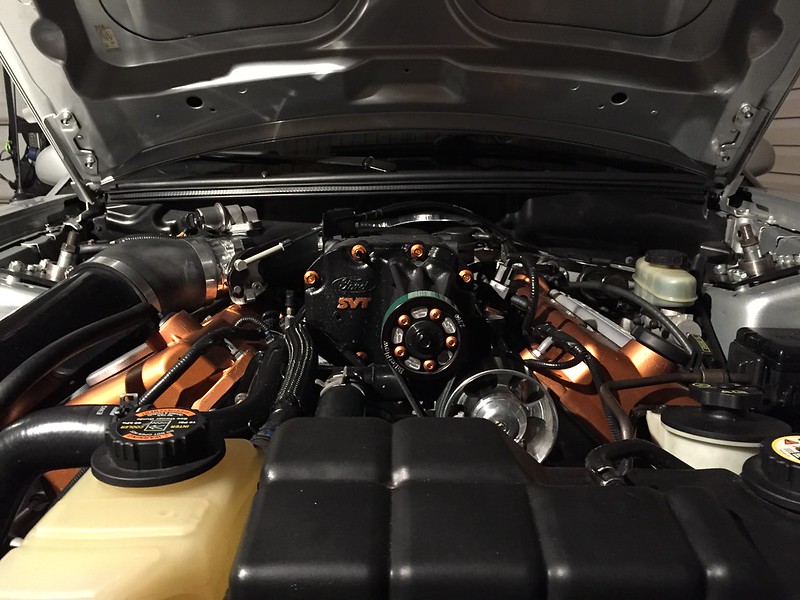
I wanted to paint the valve covers while I was at it, so I chose to match them to the burnt copper brake calipers.
 Untitled
I followed this thread for valve cover removal:
http://www.svtperformance.com/forums/showthread.php?677968-Valve-Cover-Removal
Everything went as planned. Big thanks to Red Poison for writing it up for all of us. :thumbsup:
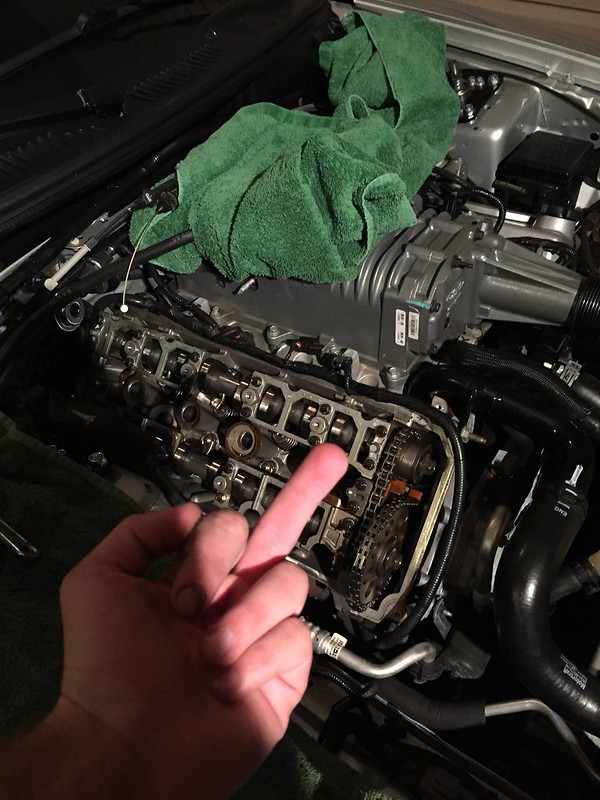
I started with removing the passenger valve cover. This was a PITA to get off. Yeah removing everything was easy, but wriggling the cover off took me almost 20 minutes.
 Untitled
The driver side went as expected. Pulling the brake booster was involved, but doable with the write up I mentioned earlier.
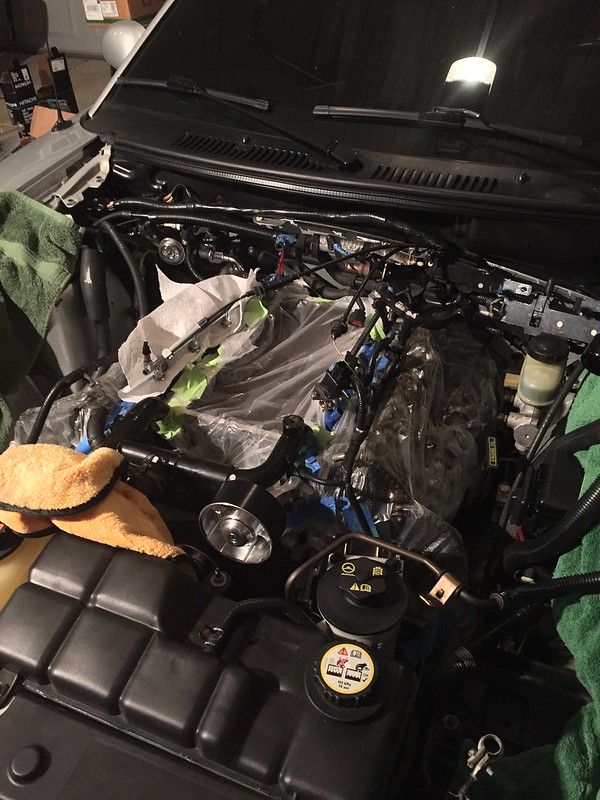
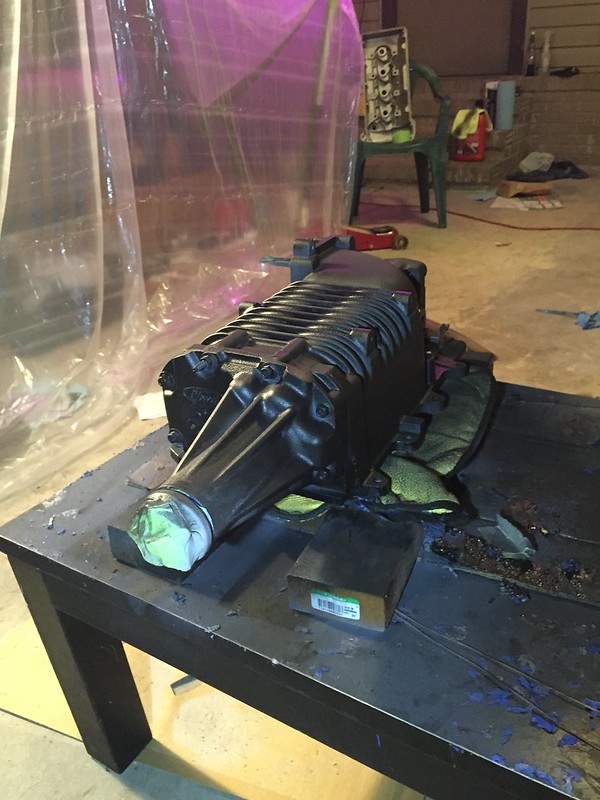
The blower removal was pretty easy. Luckily didn't break any bolts, but to be safe for re-installation, I replaced the intercooler bolts and the lower intake to head bolts with some from the local bolt supply store ($5.35).
 Untitled
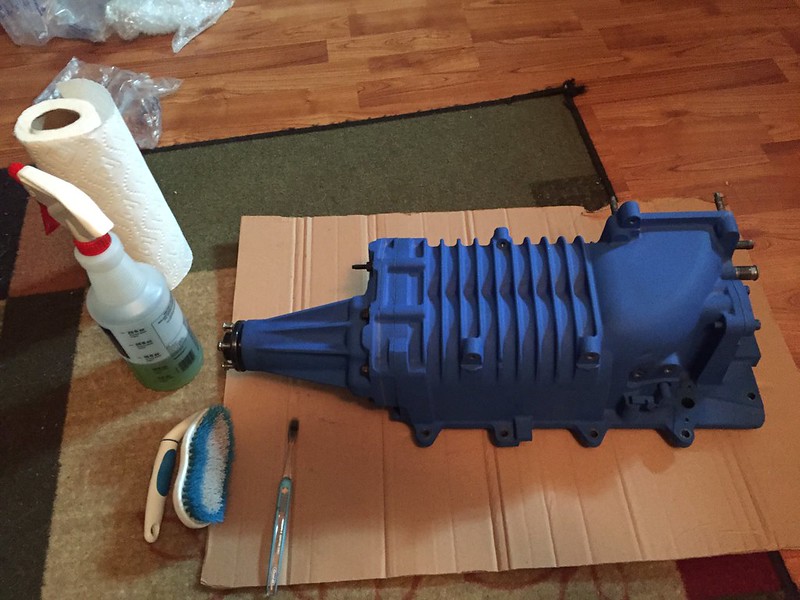
Time for painting")
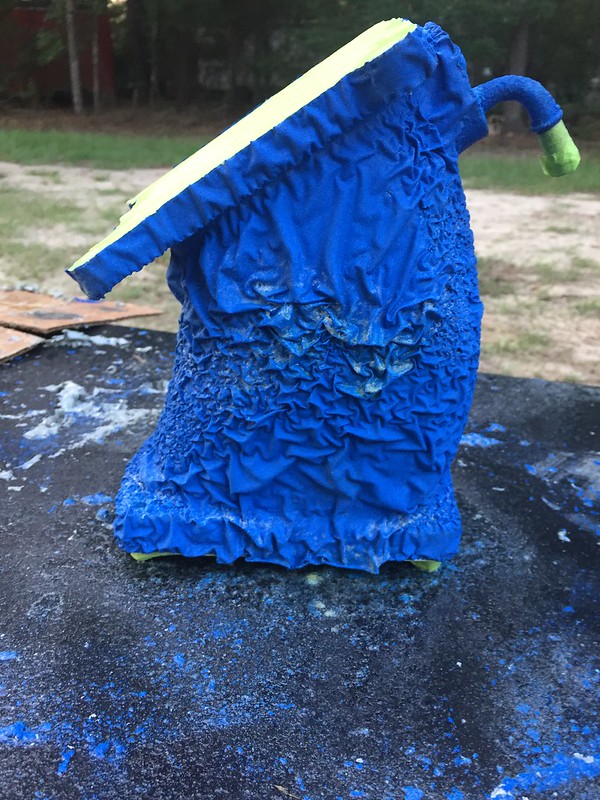
The blower and plenum were powder coated blue from the previous owner. Many like this look, but I think burnt copper metallic compliments silver metallic nicely. I used spray can aircraft remover and strypeez (gel form) to get the power coat off. The reason I had to get strypeez was aircrafter remover wasn't cutting it for factory paint on the valve covers. Is that stuff power coated or what?
 Untitled
 Untitled
 Untitled
 Untitled
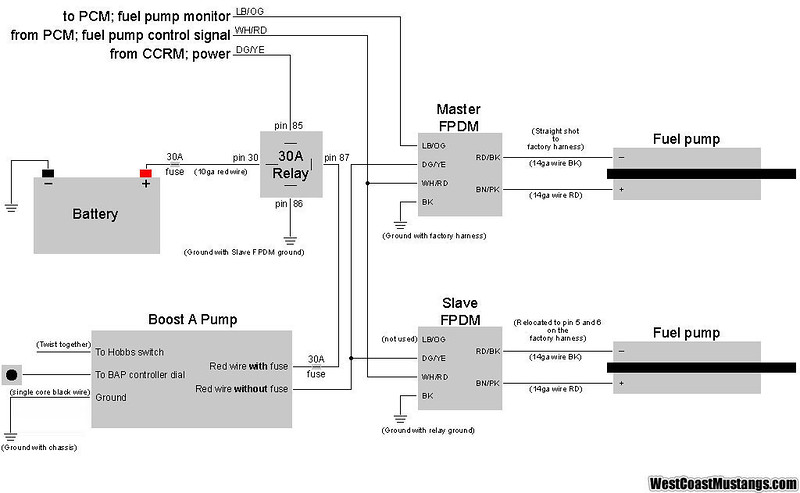
In the meantime, I installed the BAP with 8awg wire to battery. This was confusing at first because I went into this knowing next to nothing about simple wiring. I did my research, bought a solder tool, and practiced ALOT before I went into the trunk. The only thing I didn't solder was the wires from the CCRM and to FPDM. I put connectors on these in case I ever sell the BAP I can just pull it out. I plan to mount the dial on the driver side speaker amp support in the trunk.
I followed this diagram minus the slave FPDM: (I forgot where I got it from)
 Untitled
Finished(ish) product:
 Untitled
Back to the engine bay...
Installation was easy, and i had everything back together on Thursday ready to be tuned by Kurgan the next day.
 Untitled
 Untitled
Big thanks to Bob for being willing to fit me in even though I was over an hour late to the appointment. I hate Atlanta traffic with a passion.
Now for the numbers.. it was in the high 80's and Bob guessed I would make 485 before he even cranked it up. He did three runs, and the car ran great. The last run gave us 486/444 at 12 psi. The boost curve started low and built up almost like a turbo or centri. I was hoping for 500 hp, but I am happy with how the car is running. But of course, I will be upping the boost very shortly. Bob thinks a 4 lb lower would be perfect for me, and I agree.
Here is the dyno chart of the last run. Tell me what you guys think of the boost curve.
 Untitled
Thanks to Brian (Posi) for chatting with me on Facebook. I will be adding a bigger i/c tank to the mod list as well as a dragon tb/plenum to maximize this new blower.
To be installed: POSI #100 with 2.76 pulley, ported BF plenum, SCT 2600, KB BAP, 60 lb injectors.
Cliff notes: made 486/444 at only 12 psi. Seems low to me, but it is just motivation to add a lower, bigger i/c tank, and better tb/plenum
I wanted to paint the valve covers while I was at it, so I chose to match them to the burnt copper brake calipers.
UntitledI followed this thread for valve cover removal:
http://www.svtperformance.com/forums/showthread.php?677968-Valve-Cover-Removal
Everything went as planned. Big thanks to Red Poison for writing it up for all of us. :thumbsup:
I started with removing the passenger valve cover. This was a PITA to get off. Yeah removing everything was easy, but wriggling the cover off took me almost 20 minutes.
UntitledThe driver side went as expected. Pulling the brake booster was involved, but doable with the write up I mentioned earlier.
The blower removal was pretty easy. Luckily didn't break any bolts, but to be safe for re-installation, I replaced the intercooler bolts and the lower intake to head bolts with some from the local bolt supply store ($5.35).
UntitledTime for painting
The blower and plenum were powder coated blue from the previous owner. Many like this look, but I think burnt copper metallic compliments silver metallic nicely. I used spray can aircraft remover and strypeez (gel form) to get the power coat off. The reason I had to get strypeez was aircrafter remover wasn't cutting it for factory paint on the valve covers. Is that stuff power coated or what?
Untitled
Untitled
Untitled
UntitledIn the meantime, I installed the BAP with 8awg wire to battery. This was confusing at first because I went into this knowing next to nothing about simple wiring. I did my research, bought a solder tool, and practiced ALOT before I went into the trunk. The only thing I didn't solder was the wires from the CCRM and to FPDM. I put connectors on these in case I ever sell the BAP I can just pull it out. I plan to mount the dial on the driver side speaker amp support in the trunk.
I followed this diagram minus the slave FPDM: (I forgot where I got it from)
UntitledFinished(ish) product:
UntitledBack to the engine bay...
Installation was easy, and i had everything back together on Thursday ready to be tuned by Kurgan the next day.
Untitled
UntitledBig thanks to Bob for being willing to fit me in even though I was over an hour late to the appointment. I hate Atlanta traffic with a passion.
Now for the numbers.. it was in the high 80's and Bob guessed I would make 485 before he even cranked it up. He did three runs, and the car ran great. The last run gave us 486/444 at 12 psi. The boost curve started low and built up almost like a turbo or centri. I was hoping for 500 hp, but I am happy with how the car is running. But of course, I will be upping the boost very shortly. Bob thinks a 4 lb lower would be perfect for me, and I agree.
Here is the dyno chart of the last run. Tell me what you guys think of the boost curve.
UntitledThanks to Brian (Posi) for chatting with me on Facebook. I will be adding a bigger i/c tank to the mod list as well as a dragon tb/plenum to maximize this new blower.
Last edited:

