Mach1 Rebuild Saga: 28k miles. Start. Boom. Engine pulled. Toast. Need new one. Help!

wurd2

Bingo.
Established Member
Joined
Feb 24, 2004
Messages
3,932
Location
Garage
I received another tune revision from Jon Lund and captured some more data. He leaned the air/fuel ratio 20% across the board to get a cleaner reading. The tune is still in open loop mode with the o2 sensors disabled. Although Jon expected the engine to idle this time around, it didn't. So my dad had to manually work the throttle again to keep the engine alive during the data logging session. I was hoping for a successful idle because I'm anxious to get the car on the ground and put load on the engine. I'm starting to wonder if our idle issue isn't tune-related.

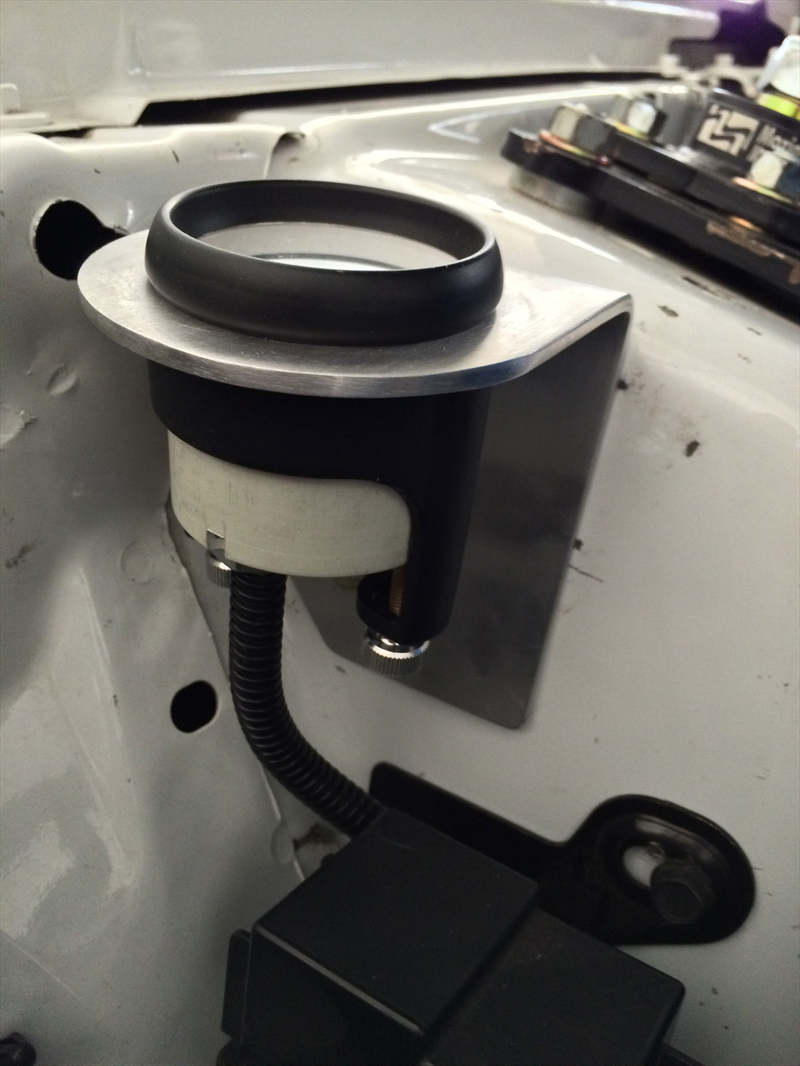
During this latest data logging session, the temperature in our shop was 116°F. I ran my intercooler bilge pump, but left the heat exchanger fans off. With the engine at operating temperature, my IAT2 reading was 106°F. In our first data logging session, I didn't have the intercooler pump or fans running. It was probably 95°F in our shop, and the IAT2 readings reached 140°F. I'm thinking the TigVision kit is pulling its own weight.

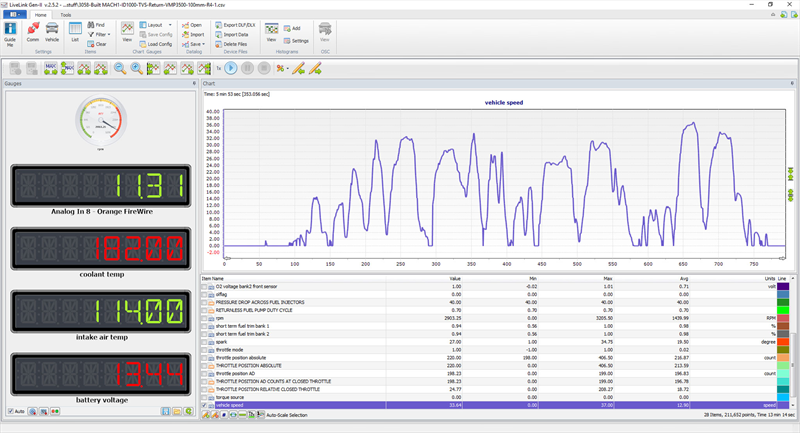
Here's a screenshot of my latest data, at a moment of interest. Our RPM here is roughly 2800, although the gauge shows red:

.png


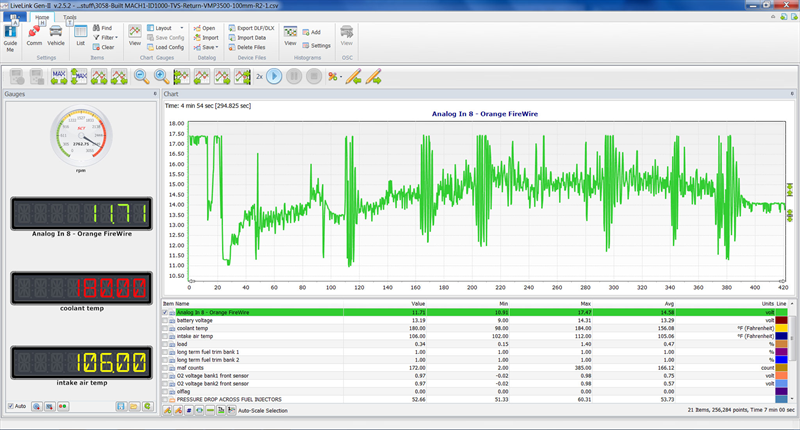
The SCT LiveLink Gen-II software is pretty cool.

I have another leak story, and this time there's actually a leak:

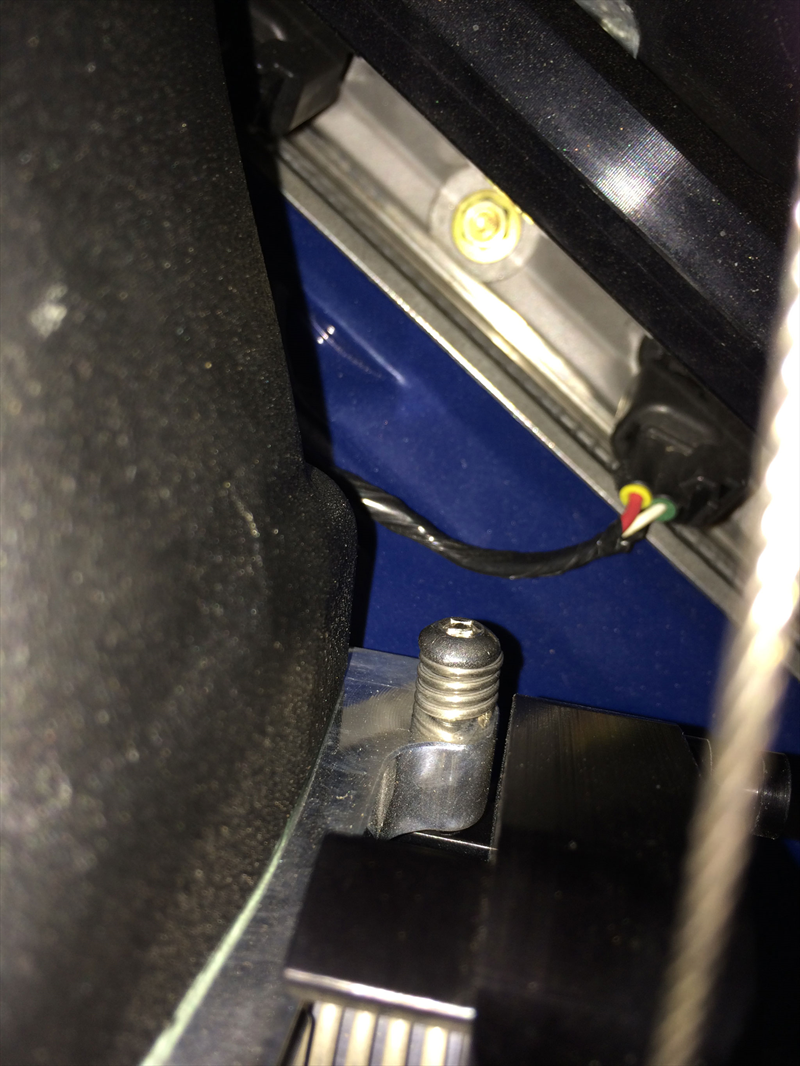
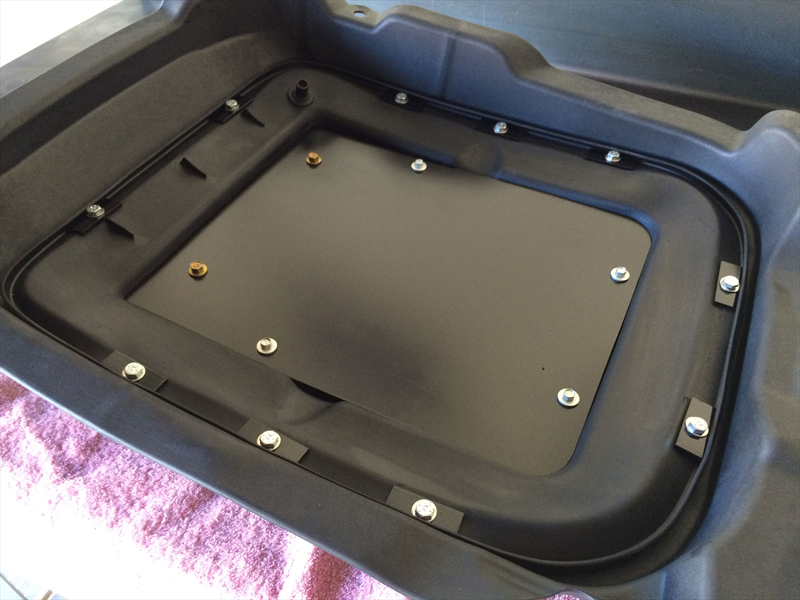
After we completed the 2nd data logging session, we sat down for a beer break. I glanced at the ground under the engine and, sure enough, I saw a small puddle of engine oil amounting to no more than half a shot. When I got under the car to investigate, I found that the bottom-most bolt for the MMR oil adapter plate on the side of the block was mostly covered with oil. Once again, I was disturbed and concerned. I checked the bolt and found it to be fully tightened. I figured if it was a gasket leak behind the plate, there would be oil all over the place. Then I considered that maybe the bolt hole isn't a blind hole in the side of the block, and is allowing oil to work itself down the threads.

I slept on the issue and didn't get much sleep. That night I decided that the leak likely wasn't coming from the oil adapter's bottom-most bolt, as it appeared to be.

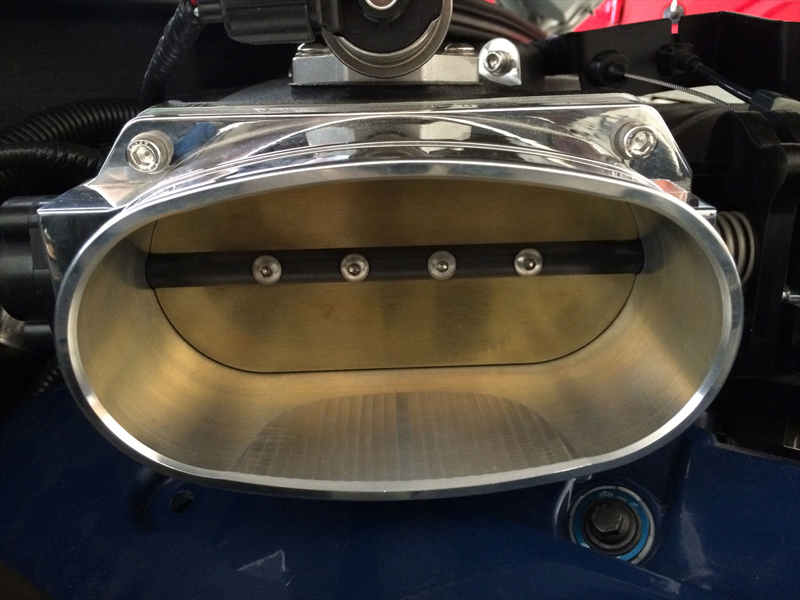
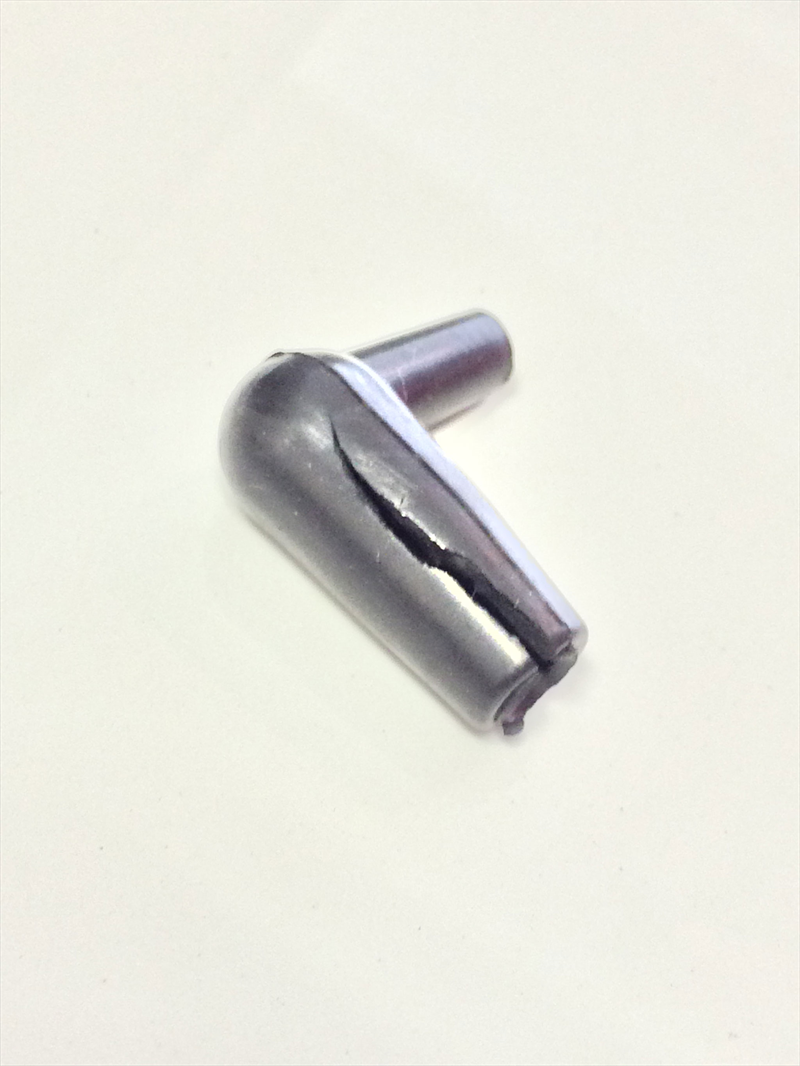
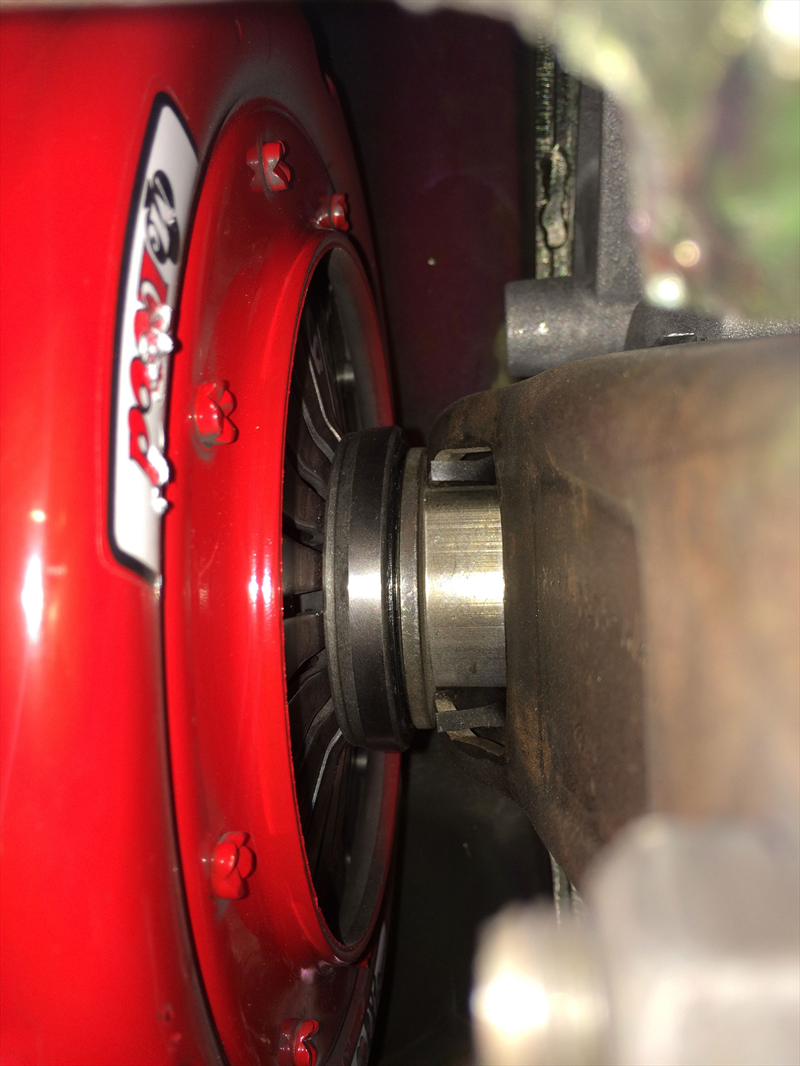
The next morning, I was relieved to find that no oil was coming from the driver side valve cover, or the timing cover. Eventually, I found the source of the leak. There's a very small hex plug along an edge of MMR's oil adapter plate, which wasn't fully tightened down and had no thread sealant. After the engine was warm, oil worked its way out of the plug threads and trickled downward towards the bottom-most plate bolt and soaked it. Thankfully it's possible to get to this small plug without removing any of the adapter lines, which is a pain.

I haven't fixed the plug issue yet, but I'm super stoked the oil leak isn't serious.

For the exhaust, I went to two muffler shops and asked about having single slip joints welded into place on our tailpipes, so that we can put the pipes up as separate pieces and work around the welded panhard chassis mount. One guy was polite in turning the job down, and made a few recommendations. The other guy was a dick about it, and was more concerned with offering criticism than listening to my problem.

So we're back to the drawing board on the exhaust, but we'll come up with something.

Let's hope the third tune is a charm with respect to a successful idle!
 
Last edited:

MachME

2V Power
Established Member
Joined
Dec 29, 2005
Messages
5,896
Location
Z
Lots of money and nice work.

I don't know if you've addressed this, holding the gas pedal down kills injectors....can't you crank it this way to build oil pressure before start?
 

DSG2003Mach1

Well-Known Member
Established Member
Premium Member
Joined
Apr 15, 2004
Messages
16,127
Location
Central Fl
Lots of money and nice work.

I don't know if you've addressed this, holding the gas pedal down kills injectors....can't you crank it this way to build oil pressure before start?

no, our engines will NOT build pressure just being spun by the starter. They went with the baller method, I bought a garden sprayer, some clear hose, a brass fitting (barbed on one end, threaded on the other), and 2 hose clamps. All total under $30. Its slow but itll push oil to where it needs to go
 

MachME

2V Power
Established Member
Joined
Dec 29, 2005
Messages
5,896
Location
Z
no, our engines will NOT build pressure just being spun by the starter. They went with the baller method, I bought a garden sprayer, some clear hose, a brass fitting (barbed on one end, threaded on the other), and 2 hose clamps. All total under $30. Its slow but itll push oil to where it needs to go

"our engines" applies to all mod motors? Do you have any information on this? For years I have thought this and read that it does build pressure this way a long time ago. I even use this method before starting car after it sits a long time.
 

DSG2003Mach1

Well-Known Member
Established Member
Premium Member
Joined
Apr 15, 2004
Messages
16,127
Location
Central Fl
"our engines" applies to all mod motors? Do you have any information on this? For years I have thought this and read that it does build pressure this way a long time ago. I even use this method before starting car after it sits a long time.

yes, as far as Im aware, all mod motors, the starter doesnt turn enough RPM to drive the pump. My startup/break in directions with my built motor even say it wont build pressure that way
 

coposrv

Well-Known Member
Established Member
Joined
Sep 4, 2007
Messages
5,030
Location
boston
The first few times I've had a new engine going in I used to pull the fuel pump fuse and spin the motor on the starter. It would never build pressure until a second after it fired up. I used a garden sprayer method 4 years ago and it definitely is the way to go. I never had any failures or issues but I won't try to prime the motor with the starter again.
 

wurd2

Bingo.
Established Member
Joined
Feb 24, 2004
Messages
3,932
Location
Garage
I'll start this update on a random note.

After having long wheel studs installed in the rear end, we got sick of looking at the short wheel studs up front. So we changed them out for long studs, and definitely like the look:

.png


The ABS rings on the hubs made the stud pressing process more challenging.

As for getting this car on the road, we fiddled with our throttle body adjustment and did a few more tune iterations with Jon Lund. Eventually we got the engine to idle, and threw up our hands in victory:

.png


Then came time for cruise and step data logging.

Off the lift we rolled...

.png


...and off the lift tore our low-hanging, driver-side muffler along the way...LOFL. Thankfully, there wasn't any real damage. We increased the ride height of the car and better positioned the muffler.

Then the cruise and step logging commenced with no major issues. I sent the data logs to Jon Lund, and he said the logs actually look good:

.png


The car drove for 15 minutes or so, in 119°F weather!

I was incredibly relieved the entire drivetrain seems fine, with the T-56 shifting smooth and effortless. The McLeod twin-disc clutch has a stock feel and seems perfectly street-friendly.

My one concern with the drivetrain is that my throw-out bearing is properly disengaging the clutch fingers, as we crossed our fingers and stuck with the pivot ball installed/adjusted by RPM Transmissions.

When I was done with the initial drive, I drove back to the shop and attempted to pull back up onto the lift. Not realizing that my suspension settled about 2" during the drive, I managed to get the car stuck half-on, half-off the lift by jamming up the exhaust.

Once we got the car off the lift, we parked the car under it, and readjusted the ride height for better ground clearance the following day. It wasn't any fun working on the ground:

.png


.png


In other news, we came up with a simple approach to hold all the Mach1 shaker components together, so we can mount the whole assembly on the hood:

.png


.png


I'll post more when I get the time!

:)
 
Last edited:

wurd2

Bingo.
Established Member
Joined
Feb 24, 2004
Messages
3,932
Location
Garage
At this point, I was hoping to bring this sloth of a build thread to a conclusion with a finalized tune and some suitable power numbers. Unfortunately, there's been a few minor setbacks to track down and resolve. One of these issues, while simple and accessible, was very difficult to find and caused us quite a bit of grief.

When we did our initial start, we couldn't get the engine to idle without maximizing the throttle body adjustment. Jon Lund made some tune tweaks that helped us achieve idle, but we still couldn't back off the throttle body adjustment without stalling. So obviously we were, and perhaps still are, over-compensating for something(s) wrong:

.png


.png


During a follow-up test drive, I got on the throttle and somewhere just north of 3000 RPM, the engine suddenly gave out, sputtered and stuttered a bit, and then continued to drive fine at lower RPMs. This issue was at least reproducible, as opposed to intermittent (hateful). I did some research, considered all sorts of various causes, and eventually settled on insufficient fuel pressure as the likely culprit: per ignorance, we didn't disconnect the vacuum line from the fuel regulator when we set the base pressure.

After correcting the base fuel pressure, I went for another drive. The power give-out at higher RPMs persisted. On the way home, the engine flat out stalled. I started it back up a few times, but realized that letting the clutch out and applying the slightest load on the engine would immediately stall it. Clearly, the problem worsened. After I put my tail between my legs, rounded up a few neighbors, and pushed the car back into my garage (seriously depressing), I did some digging around and came up empty. Once I confirmed my fuel pressure wasn't the problem, I turned my attention to the vacuum line setup I cooked up with McMaster-Carr and Dorman parts. Doubts swirled about it.

I inspected the vacuum lines and connections, and found no potential leaks. I considered that the inner diameter of my boost-source vacuum lines is 0.170", whereas the inner diameter of stock SVT Cobra lines is somewhere around 0.092" (stock outer diameter is 5/32"). I spoke with my dad about this, and he thought the diameter difference versus stock shouldn't make any noticeable difference, and it certainly wasn't the cause of my stalling. Unable to come up with anything else, I decided to switch my vacuum lines to stock diameter, since it's a quick, fun job with McMaster-Carr's push-to-connect fittings.

The Dorman soft vacuum elbow (47408) connected to the FRPS originally went on with some struggle, since it was smaller than the Ford OEM elbow, diameter-wise. I therefore expected it to come off with the same struggle, yet, to my welcome surprise, it readily fell off with the slightest tug. I took a close look at it and figured I found my vacuum leak:

.png

(face palm)

While I waited to get ahold of a proper OEM elbow for the FRPS, I decided to tackle another issue I noted during the first test drive: there was a brief hesitation in the engine, which only occurred once. This problem was actually present with my stock engine. Since I was still running my original coil over packs, I decided that one or more of them needed replacing. So I contacted SVTP member FORDSVTPARTS for an always-great deal on a brand new set:

.png


Once I got the new coil over packs installed, I saw a good photo opportunity for our Autometer Phantom Series 2 mechanical oil temperature gauge. Here's the bracket my dad fashioned for it:

.png


And here's a better, yet not-so-great, shot of where we located it:

.png


On a side note, we installed this gauge because I'm not running an oil cooler and want to know how hot my oil runs. Albeit, I'll have to pull over and pop the hood to check. The MMR oil cooler kit I bought has yet to be installed, but I am using the remote oil filter location parts. I was dead set on putting the oil cooler radiator inside the Mach1 hood scoop, but since that'll be a project in and of itself, it'll have to wait.

After I got the car back together, I fired the engine up. It ran rough for a brief moment, since the battery was disconnected and the ECM had reset. As it warmed up and smoothed out, I was quite thrilled to see my idle RPMs hang higher than before (1000 vs 700, roughly). I'm betting it was the tear in the FRPS vacuum elbow, rather than the vacuum line diameter decrease, that contributed to the idle RPM change. At the least, I was excited to finally witness some progress with my throttle body adjustment. It gave me some reassurance that I'll be able to follow BilletFlow's recommended process to properly set this adjustment without stalling.

The engine neared operating temperature and...stalled!

:cuss:

I turned the key a few times and it wouldn't fire back up. Thoroughly flummoxed and frustrated, I felt at a complete loss as to what the hell was happening. For once, I did something smart and took a break to think this over. Eventually, I concluded that this sudden stalling behavior, where the engine wouldn't even restart, had to be an air leak prior to the throttle body. This made sense, being that I just removed and reinstalled the JLT RAI kit. The next day, I looked the JLT inlet tube over and saw no problems. Then I removed it to find that one of the clamps didn't seat correctly on the underside:

.png


(face palm...again)

I haven't had a chance to reinstall the JLT RAI kit to confirm it was leaking, but I'm confident that it was.

In other news related to drivetrain, I learned that FRPP throw-out bearings are constant velocity bearings and are designed for constant contact with clutch fingers. Regarding my concern about my pivot ball adjustment and disengagement of the throw-out bearing, this was very welcome news. Since my clutch cable firewall adjuster would allow some disengagement at one extreme of adjustment, and too much bearing preload at the other extreme, I figured my pivot ball is just right. After adjusting the clutch cable to achieve a bit of preload on the throw-out bearing, I saw that my firewall adjuster is pretty much at its midpoint of adjustment:

.png


Hopefully my next test drive will end with me actually driving back into the garage.

Needless to say, I'm going to have a few friends with me for push rescue.

I have to say this build has taken a lot out of me.

:(
 

DSG2003Mach1

Well-Known Member
Established Member
Premium Member
Joined
Apr 15, 2004
Messages
16,127
Location
Central Fl
It gets old but you're getting there! While a pain in the ass it seems your gremlins have been minor in nature
 

smitty2919

Well-Known Member
Established Member
Joined
Dec 22, 2010
Messages
2,077
Location
Cincy, OH
Wow, that seems like a sensitive setup. Minor air leaks before the TB due to the clamp not seating causing it not to restart??
 

wurd2

Bingo.
Established Member
Joined
Feb 24, 2004
Messages
3,932
Location
Garage
I summarized a critical detail out of my post: the stalling issue I suspect the RAI leak of causing went completely away when the engine cooled after a few hours. The engine fired right up and supported load from clutch engagement. I just didn't bother to go out for another drive to retest the stall with the onset of heat (too discouraged). So, I think when the engine bay gets hot enough, that RAI leak goes from minor to not minor.
 

wurd2

Bingo.
Established Member
Joined
Feb 24, 2004
Messages
3,932
Location
Garage
Small update:

I carefully reinstalled the JLT RAI kit, making sure all the clamps seated properly as I tightened them down. This required positioning the RAI in such a manner that it doesn't clear the shock tower very well, but this conflict won't lead to it being dislodged from engine twist.

The car fired right up and drove just fine, albeit to the end of my driveway and back into the garage a few dozen times. It felt great driving the car into the garage under its own power for once. I'll have to wait for a few friends to join the fun before I'm willing to drive around the neighborhood and determine if I still have any stalling issues.

In the meantime, I decided to yank the Dorman soft vacuum elbows (part #47408) off the supercharger bypass valve actuator ports to inspect them. They looked fine to me, until I held them up close and squeezed them. Doing so revealed spider webs of small cracks! These things are made of heat-resistant vinyl, and they're very soft. I'm not sure if it's a quality issue on China's behalf, but I put them in the trash where I feel they belong.

As a substitute for these vacuum elbows on the bypass valve actuator, I ordered a couple feet of High-Temperature Soft Viton® Fluoroelastomer Tube from McMaster-Carr, which has an internal diameter of 3/16". This stuff isn't cheap, but it'll laugh at everything it gets exposed to, including oodles of time.

Once I finalize my vacuum lines and eliminate all the leaks, I'll be tackling the throttle body adjustment. And after that, there will probably be a tune revision or two. Then the path to the dynamometer should be clear.

Here's to no more gremlins, minor or otherwise!

:beer:
 

DSG2003Mach1

Well-Known Member
Established Member
Premium Member
Joined
Apr 15, 2004
Messages
16,127
Location
Central Fl
hoping you get there man, it definitely feels like an uphill battle sometimes...finally driving my car again today
 

Users who are viewing this thread


Top