Little update. I have been slacking on taking pics so I apologize.
Here is where we started
 IMG_3644_zpsejlmwgxo by |SK Photography|, on Flickr
Then this happened.
 IMG_3653_zps6dyah70o by |SK Photography|, on Flickr
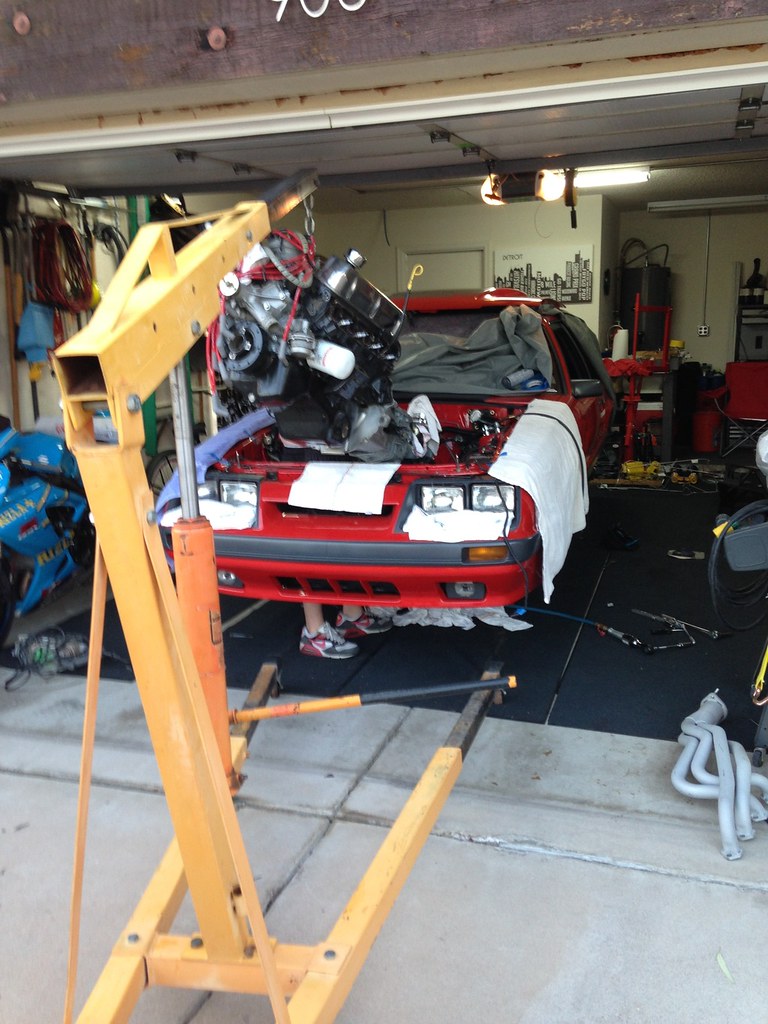
Eingine was out
 IMG_3767_zpskfaunvtf by |SK Photography|, on Flickr
Little bit of spillage
 IMG_3652_zpshfqwy9nl by |SK Photography|, on Flickr
Eingine and trans coming apart.
 IMG_3655_zpsiig71gvs by |SK Photography|, on Flickr
World class T5, this sold in a few hours.
 IMG_3672_zpspl36a8ad by |SK Photography|, on Flickr
Ready to go for the new owner.
 IMG_3683_zpsp7q7ljtp by |SK Photography|, on Flickr
 IMG_3684_zpsh6fmazm7 by |SK Photography|, on Flickr
I put the K member back in and mocked up the front end. I am measuring for backspacing. The 96 cobras are 17x8 and have 5.74" BS. This is without rotors.
 IMG_3772_zpsrr6awt2e by |SK Photography|, on Flickr
 IMG_3773_zpsvlgtxvwf by |SK Photography|, on Flickr
 IMG_3774_zps5jatghbx by |SK Photography|, on Flickr
 IMG_3775_zpszkmfalih by |SK Photography|, on Flickr
I am thinking that this looks like an almost perfect BS.
This is after I put the rotors on so I will end up adding on the thickness of the rotor to the backspacing to get them to fit like they did without the rotor.
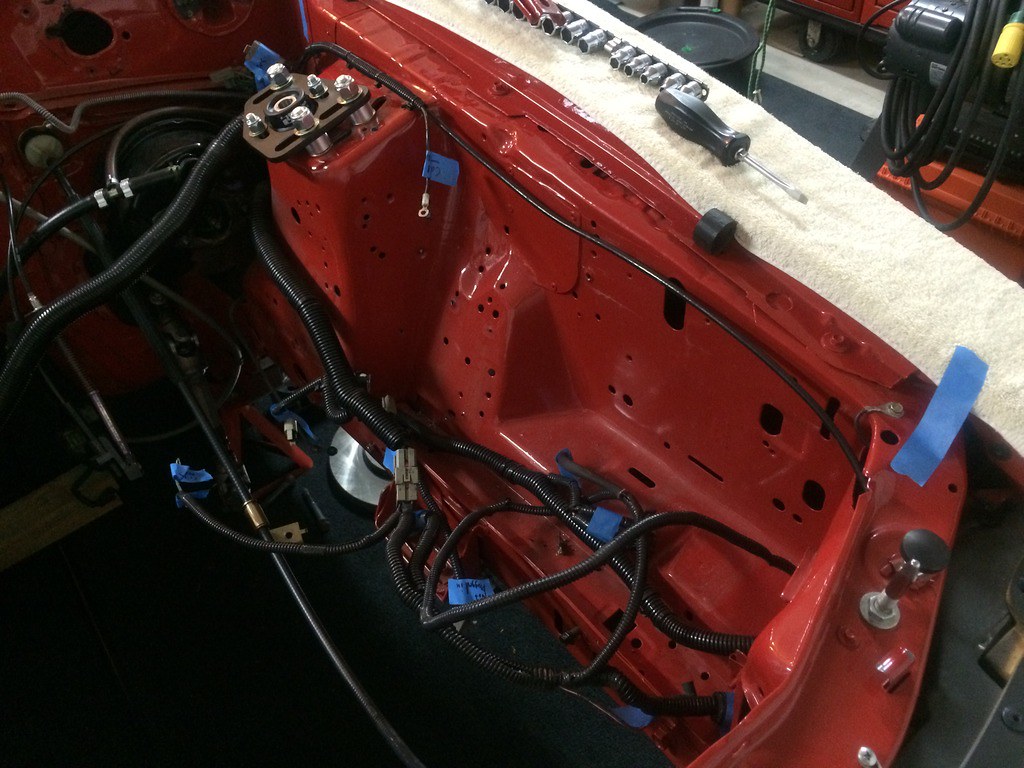
I then began to remove everything from the engine bay. I just decided to shave the engine bay and do a full wire tuck and will be doing a brake line tuck as well.
 IMG_3778_zpsbx5sgnpr by |SK Photography|, on Flickr
Labeling all the wires so I know what can go and what has to stay.
 IMG_3779_zpsvnhuwa47 by |SK Photography|, on Flickr
 IMG_3780_zpsmadmmrq8 by |SK Photography|, on Flickr
Just for the hell of it here is a pic of my new daily driver loaded up before it was delivered to me.
 IMG_3725_zpsaw9p4dog by |SK Photography|, on Flickr
Anyhow I will be removing the fenders and nose piece this weekend so I can get to stripping all this paint and start welding in body panels which should be exciting since I haven't welded in many years. Once I get all the filler in I will call my painter over to have him sign off on everything to make sure we are ready for paint.
Here is where we started
IMG_3644_zpsejlmwgxo by |SK Photography|, on FlickrThen this happened.
IMG_3653_zps6dyah70o by |SK Photography|, on FlickrEingine was out
IMG_3767_zpskfaunvtf by |SK Photography|, on FlickrLittle bit of spillage
IMG_3652_zpshfqwy9nl by |SK Photography|, on FlickrEingine and trans coming apart.
IMG_3655_zpsiig71gvs by |SK Photography|, on FlickrWorld class T5, this sold in a few hours.
IMG_3672_zpspl36a8ad by |SK Photography|, on FlickrReady to go for the new owner.
IMG_3683_zpsp7q7ljtp by |SK Photography|, on Flickr
IMG_3684_zpsh6fmazm7 by |SK Photography|, on FlickrI put the K member back in and mocked up the front end. I am measuring for backspacing. The 96 cobras are 17x8 and have 5.74" BS. This is without rotors.
IMG_3772_zpsrr6awt2e by |SK Photography|, on Flickr
IMG_3773_zpsvlgtxvwf by |SK Photography|, on Flickr
IMG_3774_zps5jatghbx by |SK Photography|, on Flickr
IMG_3775_zpszkmfalih by |SK Photography|, on FlickrI am thinking that this looks like an almost perfect BS.
This is after I put the rotors on so I will end up adding on the thickness of the rotor to the backspacing to get them to fit like they did without the rotor.
I then began to remove everything from the engine bay. I just decided to shave the engine bay and do a full wire tuck and will be doing a brake line tuck as well.
IMG_3778_zpsbx5sgnpr by |SK Photography|, on FlickrLabeling all the wires so I know what can go and what has to stay.
IMG_3779_zpsvnhuwa47 by |SK Photography|, on Flickr
IMG_3780_zpsmadmmrq8 by |SK Photography|, on FlickrJust for the hell of it here is a pic of my new daily driver loaded up before it was delivered to me.
IMG_3725_zpsaw9p4dog by |SK Photography|, on FlickrAnyhow I will be removing the fenders and nose piece this weekend so I can get to stripping all this paint and start welding in body panels which should be exciting since I haven't welded in many years. Once I get all the filler in I will call my painter over to have him sign off on everything to make sure we are ready for paint.
Last edited:
 IMG_3781_zpsgbt4qwse
 IMG_3782_zpscbdsioko
 IMG_3783_zpsj2zeq57k
 IMG_3784_zpsqmf2yfwu
 IMG_3785_zpshbntjyp5
 IMG_3786_zps4w5x5dba
 IMG_3787_zpsladwlfdz
 I think I'm about the only person who doesn't like the look of those.
 IMG_3810_zpscje9tcwd
 IMG_3854_zpseshklt1c
 IMG_3875_zpsf94wvncz
 IMG_3876_zpsxnnshptk
 IMG_3877_zpsrfjoe1gn
