So my JHR stainless steel braided clutch line came in last night. I decided to do a write up on how to do the install on my 2013 Mustang GT. This part fixes the lazy/mushy pedal issue most of us have in high RPM WOT driving. My pedal only comes up about half way when shifting around 7000rpm.
Info on how the clutch line actually works is here: JOE HECK RACING HIGH VOLUME CLUTCH LINE FOR 2011 2012 MUSTANG WITH GETRAG 6 SPEED MT-82 - YouTube Also some have said it is due to the fluid boiling. I have interesting data on that. I had Amsoil dot4 in my car prior to today and I feel like it helped the pedal some. It gave me about 10% more pedal. This JHR clutch line made a huge difference though. It gave me 100% of my pedal back. I can say that this is The Fix.
How-to:
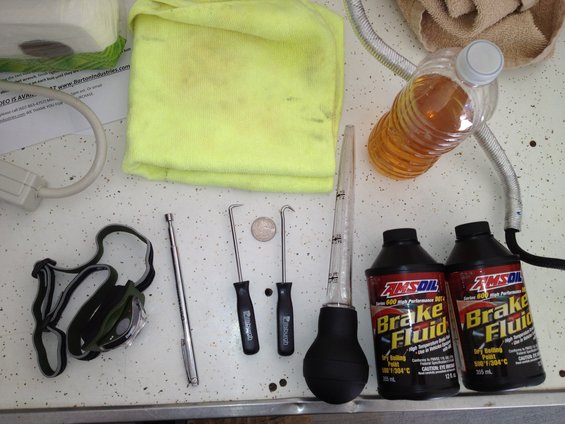
You will need these items. Go to Harbor Freight and pick up a set of these picks. They were $7-$8 and larger ones come with it too. I decided to use Amsoil DOT 4 Fluid. It has a boiling point of 580* so its a lot better than a standard dot 4 which has over 100* lower boiling point. I got a turkey baster from wal-mart $2. You need some container to put your old fluid in. You car has about 12 ounces of fluid. The quarter is a size reference. I used a head light (optional)
Step 1
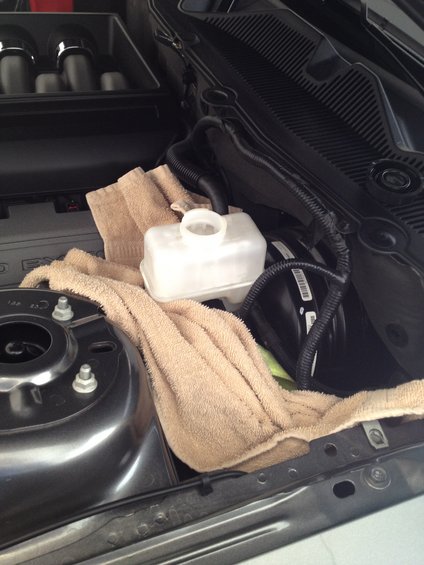
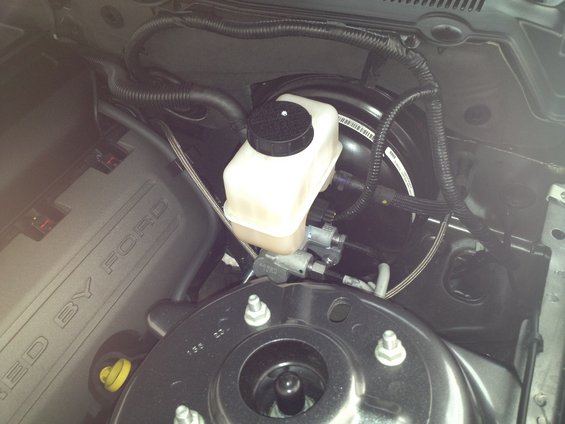
Put towels down under your reservoir. Don't want brake fluid on your paint.
Step 2
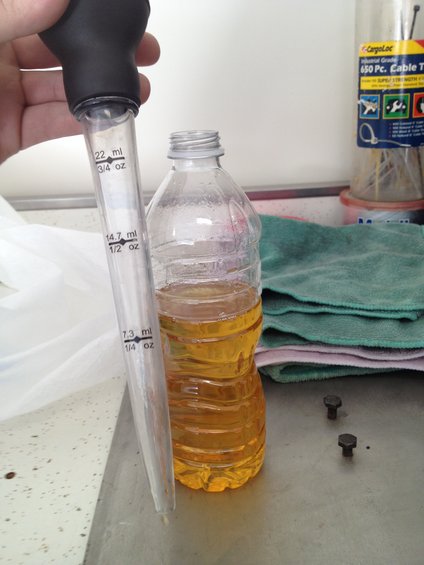
Suck all the fluid out with the baster. Your going to get about 12 ounces out.

This is what 400 mile old Amsoil dot4 looks like. Perfect, just the way it should. There is a small mix of the factory fluid in there as well which is giving it a slight tent.
Step 3
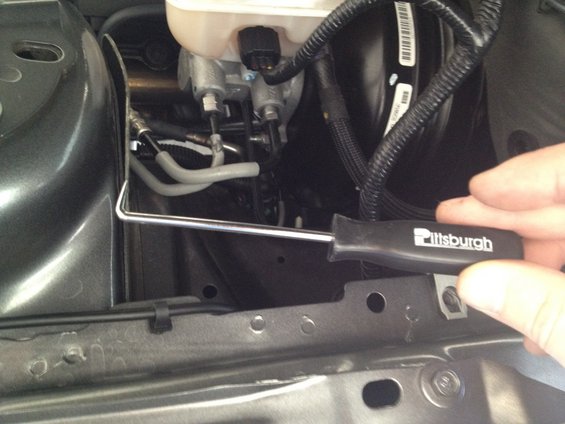
Use this tool to get the c-clips out of your lines.
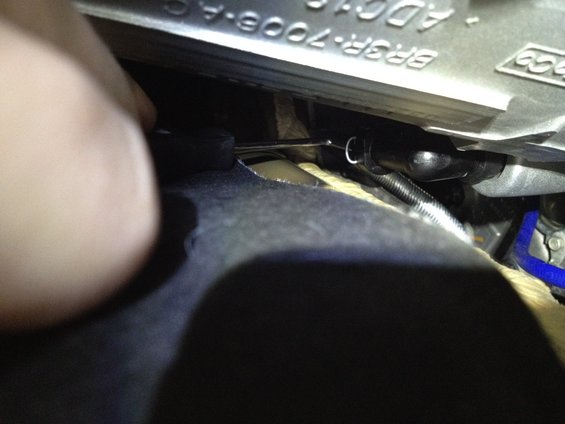
Start with the bottom end of the line. This black elbow is what your going to take off. It is on the bell housing, driver side at 10:00 or over half way up.

I tried to just leave the elbow on and just take the line off but don't do it lol. Its too hard so take the whole elbow off. Use the tip of your pick to get inbetween the c-clip and the body of the elbow. It's going to look like there is no room but just stick it in and it will get underneath. This pic is of me pulling the top c-clip off. Just leave this one on.
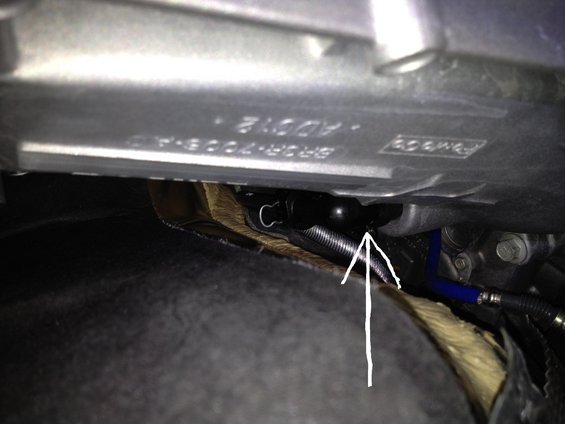
This arrow is pointing to the c-clip you do want to take off. I don't have a pic of the pick pulling this c-clip off but refer to above pic and instruction. This c-clip will come completely off the elbow so be careful when pulling it off. I used the telescoping magnet to catch it as it came off.
Once the c-clip is off. Pull the elbow out of the bell housing. About 2-3 ounces of fluid is going to come out.

Step 4
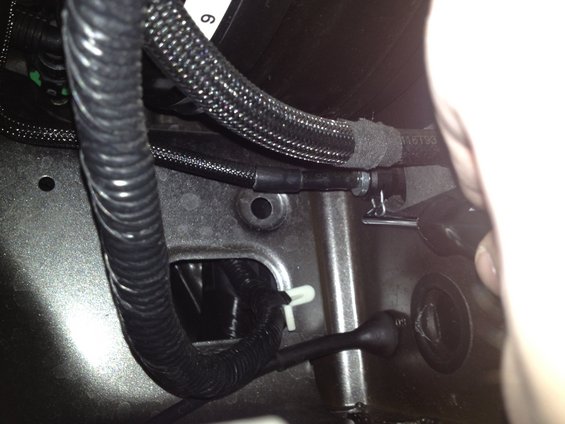
Were going to take the top part of the line off that goes into your firewall. Zoom out pic
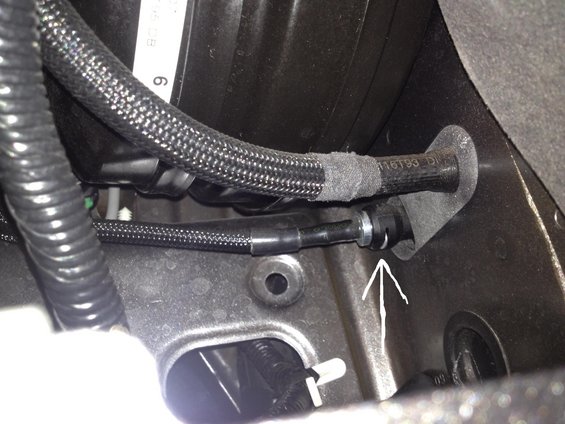
This is the line and the arrow is pointing to the c-clip you have to remove. This c-clip is just like the one underneath.
Just like underneath you need to stick the tip of the pick inbetween the metal c-clip and body of the line and it will come out completely. Use the magnet at the same time to catch the clip.
Before you pull it out put a rag under the line because 5-10 drops are going to come out. Next just simply pull the line out.
Step 5
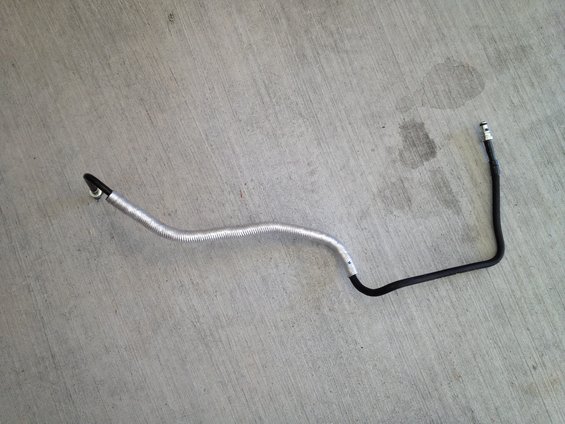
Pull the line completely off the car. I pulled it out from underneath. You might have to position it a little from up top before hand. Also take note of the route of the line. You want to copy that when putting the new one back in. Put elbow on new line here. Make sure fittings are tight to the line using a 9/16th on line and 1/2 on fittings.
Side Note: the c-clip from old line to elbow does not come completely off. it only pulls out.
Step 6
Route new line and connect it from the top first. Just plug it in and pop the clip back in.
Step 7
Put new fluid back in. Fill it about half way. You want the fluid to fill the line and slightly drip out of the bottom before you connect the bottom. Makes bleeding easier.

Step 8
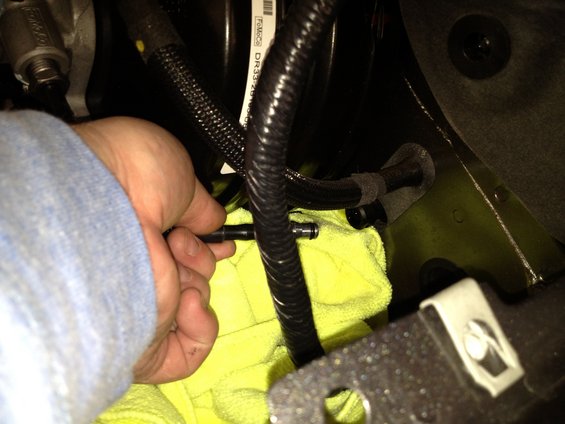
Now connect the bottom. I put the c-clip on my magnet to position it correctly onto the elbow. This was prob the toughest part. It was tedious. (don't mind the zip ties and elect tape)

Step 9
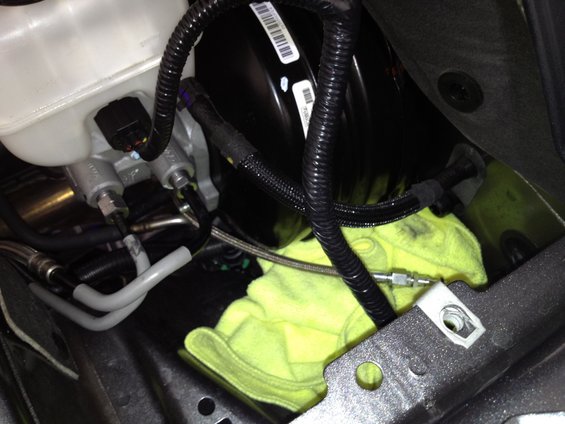
Fill the rest of the reservoir to the top. I made sure the line was as far way from the header as possible. Want to keep heat away. (no this is not an instagram)
Step 10 last step
Bleed the system. Our slave cylinder is a self-bleeding cylinder so leave the cap on but not tightened on your reservoir. Your pedal will go all the way to the floor. Pump it by hand about 50 times and it will get harder. Then pump it 100 more times by foot and it should come back to normal. Do all this with car off of course. Then put cap back on and start it up and do some more pumping with the car on. Then take for a test drive.
Mine is problem/leak free. The pedal feels strong at WOT. It was an instant fix. I recommend this to anyone that has the mushy pedal.
Info on how the clutch line actually works is here: JOE HECK RACING HIGH VOLUME CLUTCH LINE FOR 2011 2012 MUSTANG WITH GETRAG 6 SPEED MT-82 - YouTube Also some have said it is due to the fluid boiling. I have interesting data on that. I had Amsoil dot4 in my car prior to today and I feel like it helped the pedal some. It gave me about 10% more pedal. This JHR clutch line made a huge difference though. It gave me 100% of my pedal back. I can say that this is The Fix.
How-to:
You will need these items. Go to Harbor Freight and pick up a set of these picks. They were $7-$8 and larger ones come with it too. I decided to use Amsoil DOT 4 Fluid. It has a boiling point of 580* so its a lot better than a standard dot 4 which has over 100* lower boiling point. I got a turkey baster from wal-mart $2. You need some container to put your old fluid in. You car has about 12 ounces of fluid. The quarter is a size reference. I used a head light (optional)
Step 1
Put towels down under your reservoir. Don't want brake fluid on your paint.
Step 2
Suck all the fluid out with the baster. Your going to get about 12 ounces out.
This is what 400 mile old Amsoil dot4 looks like. Perfect, just the way it should. There is a small mix of the factory fluid in there as well which is giving it a slight tent.
Step 3
Use this tool to get the c-clips out of your lines.
Start with the bottom end of the line. This black elbow is what your going to take off. It is on the bell housing, driver side at 10:00 or over half way up.
I tried to just leave the elbow on and just take the line off but don't do it lol. Its too hard so take the whole elbow off. Use the tip of your pick to get inbetween the c-clip and the body of the elbow. It's going to look like there is no room but just stick it in and it will get underneath. This pic is of me pulling the top c-clip off. Just leave this one on.
This arrow is pointing to the c-clip you do want to take off. I don't have a pic of the pick pulling this c-clip off but refer to above pic and instruction. This c-clip will come completely off the elbow so be careful when pulling it off. I used the telescoping magnet to catch it as it came off.
Once the c-clip is off. Pull the elbow out of the bell housing. About 2-3 ounces of fluid is going to come out.
Step 4
Were going to take the top part of the line off that goes into your firewall. Zoom out pic
This is the line and the arrow is pointing to the c-clip you have to remove. This c-clip is just like the one underneath.
Just like underneath you need to stick the tip of the pick inbetween the metal c-clip and body of the line and it will come out completely. Use the magnet at the same time to catch the clip.
Before you pull it out put a rag under the line because 5-10 drops are going to come out. Next just simply pull the line out.
Step 5
Pull the line completely off the car. I pulled it out from underneath. You might have to position it a little from up top before hand. Also take note of the route of the line. You want to copy that when putting the new one back in. Put elbow on new line here. Make sure fittings are tight to the line using a 9/16th on line and 1/2 on fittings.
Side Note: the c-clip from old line to elbow does not come completely off. it only pulls out.
Step 6
Route new line and connect it from the top first. Just plug it in and pop the clip back in.
Step 7
Put new fluid back in. Fill it about half way. You want the fluid to fill the line and slightly drip out of the bottom before you connect the bottom. Makes bleeding easier.
Step 8
Now connect the bottom. I put the c-clip on my magnet to position it correctly onto the elbow. This was prob the toughest part. It was tedious. (don't mind the zip ties and elect tape)
Step 9
Fill the rest of the reservoir to the top. I made sure the line was as far way from the header as possible. Want to keep heat away. (no this is not an instagram)
Step 10 last step
Bleed the system. Our slave cylinder is a self-bleeding cylinder so leave the cap on but not tightened on your reservoir. Your pedal will go all the way to the floor. Pump it by hand about 50 times and it will get harder. Then pump it 100 more times by foot and it should come back to normal. Do all this with car off of course. Then put cap back on and start it up and do some more pumping with the car on. Then take for a test drive.
Mine is problem/leak free. The pedal feels strong at WOT. It was an instant fix. I recommend this to anyone that has the mushy pedal.

