My VMP GEN2 STG2 install on a 2014 GT auto

Zona14Stang

Member
Established Member
Joined
Apr 9, 2014
Messages
288
Location
Arizona
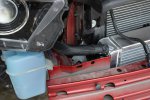
Just a place holder working on the pictures now. Have to finish the CAI and get the fluids in it , load the tune, and start it up.
Thanks to Justin at VMP and Sam (cb900f) for answering questions this weekend. Install pics soon.
 

Zona14Stang

Member
Established Member
Joined
Apr 9, 2014
Messages
288
Location
Arizona
You should be smelling rubber by now, lol.
Here is the progress so far will post pictures in order later this week. Will not be done until Tuesday Night
Xf9Dgk6.jpg
 

Zona14Stang

Member
Established Member
Joined
Apr 9, 2014
Messages
288
Location
Arizona
Here are some pictures of the dreaded grinding. Really was not that bad. I did some and my neighbor did a lot of the work too.

g9zIror.jpg

Vcf3bhI.jpg

uUADJxd.jpg

Oo8xxzV.jpg

ipg3AJ3.jpg
 

Zona14Stang

Member
Established Member
Joined
Apr 9, 2014
Messages
288
Location
Arizona
more pictures

here is some more

itmTOXG.jpg

UTMekGG.jpg

CBzCaiV.jpg

ePQQKp7.jpg
 

Attachments

  • PNpZTVw.jpg
    PNpZTVw.jpg
    712.4 KB · Views: 2,030
Last edited:

Zona14Stang

Member
Established Member
Joined
Apr 9, 2014
Messages
288
Location
Arizona
So how many hours do you think you have in the install when your done?
So far probably 9 -10 hours. There were a couple of places in the instructions that could use some pictures. I will add that info when I am done. I also spent time looking for my tools I swear they grow legs and walk away. I probably have only another hour to go but I also got the ROUSH front chin splitter so I am going to do that too.
I will let you know when it is done. Going to work on it again tomorrow night.
 

cb900f

Active Member
Established Member
Joined
Aug 26, 2013
Messages
1,006
Location
Fulshear, TX
It's nearly done! Woowoo!!

Snap some pics of the transmission cooler lines. I know people always have that question on how to handle it.
 

Zona14Stang

Member
Established Member
Joined
Apr 9, 2014
Messages
288
Location
Arizona
It's nearly done! Woowoo!!

Snap some pics of the transmission cooler lines. I know people always have that question on how to handle it.
Will do that tonight. Thanks again Hey did you install the ROUSH LED boost gauge? I have to figure out where to connect it for the vac line and also try and get the crazy blue lights to work when the headlights are on. I am thinking of trying to use an add a circiut to the fuse for the parking lights. If that is only hot when they are turned on that will work. I can not get it to work out of the headlight switch ( the 10 pin connector) I even wasted $99 at the dealer and it still does not work.
 

Zona14Stang

Member
Established Member
Joined
Apr 9, 2014
Messages
288
Location
Arizona
Thanks. I think if someone was used to working on the new cars / mustangs you could probably get it done in 8- 9 hours. I just went slow and had a lot of help. The instructions are good the transmission line is kind of a debacle. I will post pictures on that and also for mine the knock sensor lines still were touching the bottom of the intake so we cut away the electrical tape and extended out the "Y" and then re-taped the wires and all good. For some reason I had a hard time opening the stupid electrical connectors too my friend James had not problem getting them open so it was just an operator error on my part.
 

Zona14Stang

Member
Established Member
Joined
Apr 9, 2014
Messages
288
Location
Arizona
It's nearly done! Woowoo!!

Snap some pics of the transmission cooler lines. I know people always have that question on how to handle it.

Here are the transmission lines when they are in the way. I will get some pictures of the after ones up in the next couple of days. We ended up bending them ever so carefully.

mvQkVZh.jpg

BNneyB5.jpg

This is the location where the big FEAD or pulley assembly goes.
Will get more pics up later
 
Last edited:

cb900f

Active Member
Established Member
Joined
Aug 26, 2013
Messages
1,006
Location
Fulshear, TX
Here are the transmission line when they are in the way I way get some pictures of the after ones up in the next couple of days. We ended up bending them ever so carefully.

View attachment 27786

View attachment 27787

This is the location where the big FEAD or pulley assembly goes.
Will get more pics up later

The hose on the right is the one I cut at the connector. Took a while, but it worked.
 

Users who are viewing this thread


Top