For the first time ever I decided to remove my clutch cable and lube it. I went to my local motorcylce shop and picked up brake cable lube that doesn't attract dust. Just remove clutch cable, slide the boot back and squeeze it through the line until it starts to come out the other side. Let it drain some and re-install.
 Untitled
This winter with me upping boost and switching to E85 I chose to go with ID1300's. I picked up a set of the new ID1300x2's
My tuner told me that I should be good with my ID1000's but I didnt want to chance it mid way through the tune.
 Untitled
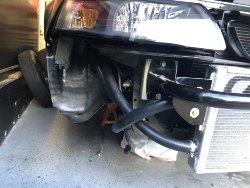
I replaced my billet Mechman with one of J2 fabs new high ouput alternators. I did this because Mechamn didnt know when they would get different size pulleys in. With switching to a 4lb lower i wanted to run a 3.2" pulley so as to not overspin the alternator and ruin it. I sold the mechman but thinking about it I really should have kept it....
 Untitled
Its hard to take a pic but man am I glad i picked up a dayco laser belt alignment tool.
Using J2 fabs provided washers following their instructions did not net me with a perfectly aligned pulley. I think most cars would be slightly different so no big deal. Anyway using different thickness washers and tightening down the bolts with the laser on worked perfectly.
 Untitled
This winter with me upping boost and switching to E85 I chose to go with ID1300's. I picked up a set of the new ID1300x2's
My tuner told me that I should be good with my ID1000's but I didnt want to chance it mid way through the tune.
I replaced my billet Mechman with one of J2 fabs new high ouput alternators. I did this because Mechamn didnt know when they would get different size pulleys in. With switching to a 4lb lower i wanted to run a 3.2" pulley so as to not overspin the alternator and ruin it. I sold the mechman but thinking about it I really should have kept it....
Its hard to take a pic but man am I glad i picked up a dayco laser belt alignment tool.
Using J2 fabs provided washers following their instructions did not net me with a perfectly aligned pulley. I think most cars would be slightly different so no big deal. Anyway using different thickness washers and tightening down the bolts with the laser on worked perfectly.