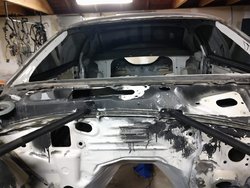
97 Cobra Restomod - Snow Pony

2DXTRM

Pushrod 5.0
Established Member
Joined
Sep 17, 2008
Messages
2,422
Location
Some time zone
Here's a screenshot from the development for clarity. basically uses all the stock mounting points so since the weight of the car is riding on the frame instead of the rear shock tower I won't need to reinforce that. Of course things could change but welding up that stuff won't be an issue since I'm using POR15 on the inside of the car. if I have to grind anything away to weld anything in the future i'll just brush some of that on when I'm done.

View attachment 1592170

and no, i won't be going as low as this guy in the video.

here's the video


Yes, KW's V3 kit also puts the rear spring in the stock location. Nice to see BC doing the same.

I have the KW V3 setup on my car. I had the usual MM stuff (Koni's AND Bilstein's), coil-over all the way around. Let me tell you, no business to have a coilover on the rear of an IRS for a street driven car. Separate shock and coil setup like factory on the rear is the way to go. Look at the FR500 prototype from FORD, and what they did on the rear IRS, stock location shock and spring. Front end was a whole different story.
 

wkornf

Active Member
Established Member
Joined
Mar 10, 2016
Messages
108
Location
PBG
just so you know other options exist.

I have the Feal coilovers on front and rear of my 99 irs cobra. no issues on the track with my setup. drives fine on the street too, adjustable damper. 8k front, 10k rear springs.

rear setup is true coilover configuration


Sent from my SM-G930V using Tapatalk
 

Makobra

Mostly Peaceful
Established Member
Joined
Nov 17, 2018
Messages
1,353
Location
Texas
I had no idea about the feal coils, those look nice! pricey too :D

Today I shaved the hood prop stuff. This concludes my known wishlist for the bay so now I'll just be getting it all ready for primer and making sure the wire tuck stuff all goes smoothly. I'm keeping the stock fuse box and washer reservoir locations, I really just don't think I can improve on that. the battery will go in the trunk, of course.

hp1.jpg
hp2.jpg
hp3.jpg
 

shurur

Well-Known Member
Established Member
Joined
Jan 2, 2011
Messages
3,760
Location
Lutz, FL
Pressing you again,,,but info on battery relocate and schematic would be nice when you get to that point in the build..Please..

I plan on doing one with fuseable links..as simple as possible ..."someday."
 

Makobra

Mostly Peaceful
Established Member
Joined
Nov 17, 2018
Messages
1,353
Location
Texas
I'll document everything but presently I have no idea on how im gonna do it. I found a sweet billet optima mount and I'm thinking of putting it between the strut towers.
 

Makobra

Mostly Peaceful
Established Member
Joined
Nov 17, 2018
Messages
1,353
Location
Texas
when I said everything is getting done... i meant everything. relooming the engine bay. but not before I make some improvements for the wire situation.

1.jpg


I added a lip and some tabs on this side to protect the wire loom in case of rubbing.

4.jpg

5.jpg

6.jpg


this side is slightly different because this is the material I had on hand.

3.jpg


2.jpg


this will all be loomed in nylon mesh like everything else.

7.jpg
 

Makobra

Mostly Peaceful
Established Member
Joined
Nov 17, 2018
Messages
1,353
Location
Texas
I decided on an official fusebox location. the stock place was fine but it had 2 issues.

1. moving the battery left that big open spot
2. the wiring harness.

while not the worst thing in the world (because I'm going to make the harness look really nice) its just unnecessary so i fiddled around and came up with this routing that puts all the wires in a hole I made in the car.

fusebox.jpg


reroute.jpg


notice how you don't see edges in the hole. thats because i hammer and dollied the edge to make it round. the last thing you want is your car eating into your wiring harness.

fbhole.jpg


This is the underside where you can see the edge rolled.
fbhole2.jpg
 

Makobra

Mostly Peaceful
Established Member
Joined
Nov 17, 2018
Messages
1,353
Location
Texas
wiring harness is sorted enough to know where I needed to put some new holes.
I did the same rolling with the hole on the passenger side. Monday my 99 cobra strut brace should be in.

I'm test fitting all this stuff now to make sure I don't weld up or cut off something I actually need later on.
I got the 99 strut brace because I have a mach 1 intake and a base mustang hood so I'll be installing that with the hood while the car is in the air to verify my theory that it'll clear and if it doesn't hopefully I can just carefully tweak it a smidge.

bracketdone.jpg
dr1.jpg
passhole.jpg
passhole2.jpg
passhole3.jpg
 

Makobra

Mostly Peaceful
Established Member
Joined
Nov 17, 2018
Messages
1,353
Location
Texas
Got my MM strut tower brace in today. as you all probably know nobody makes one for a 96-98 cobra so after careful consideration I decided to roll the dice on a 99 cobra one since I have a mach 1 intake. it actually latches on the safety latch so its pretty close already.

I knew it wouldn't just fit so no worries at all. What you see here is my figuring out exactly how it won't fit and me deciding if I need to notch the hood or the bar. right now im choosing the hood. I think I can get another half inch out of the bar if I need to but that can all happen after the engine is in the car.

the test fitting underway is mainly so I can go ahead and install the holes/brackets for the STB so I'm not drilling holes AFTER paint.


stb1.jpg


the blue tape is where the hood hits.
bump1.jpg

bump2.jpg


the plan is after I get the clearance I need fiberglass the hole to make it look factory before paint.
notch1.jpg
 

Makobra

Mostly Peaceful
Established Member
Joined
Nov 17, 2018
Messages
1,353
Location
Texas
a few reasons.

1. i'm using the GT/v6 hood so that could have the same clearance issue there
2. i have a 99 cobra engine and i'm really more concerned about the engine clearing than the body stuff.
3. this one gives more clearance for a larger intake which is why I suspect I'm having to clearance the hood.

I can tweak the STB pretty easily and if notching the hood a little gets me more intake clearance I'm happy with that.
 

Makobra

Mostly Peaceful
Established Member
Joined
Nov 17, 2018
Messages
1,353
Location
Texas
theory confirmed! all of the bolt holes do not line up but this sucker fits like a glove. hood clearance? oh you're gonna have to notch the underside bracing but nothing that wasn't superfluous to begin with.

so why this? that big loop on the passenger side (the reason you have to notch the hood) gives a lot more room for an intake pipe.

now i KNOW the STB will clear my 99 intake 4v and the best news is my stock GT/V6 hood clears ALL of this. barely but barely is close enough.

stb2.jpg


that bar looks really high but i test fit the hood without the bumpers and it clears even with the hood bottomed out. I plan on adding some padding to the bottom of the hood once its all painted to keep the hood from going flippity floppity at speed.

stb1.jpg
 

Makobra

Mostly Peaceful
Established Member
Joined
Nov 17, 2018
Messages
1,353
Location
Texas
I didn't like the idea of having to fiddle with nuts behind this huge motor someday so I welded some square nuts in place.
still test fitting, i'll clean it all up and make it pretty when paint time comes.

bstb4.jpg

bstb2.jpg

bstb3.jpg
 

Attachments

  • backstb1.jpg
    backstb1.jpg
    224.4 KB · Views: 238
Last edited:

Users who are viewing this thread


Top