Looks like a real nice restoration project. I maybe wrong, but it looked like you MM camber/caster plates were on the wrong side. I believe the center oval hole should favor towards the rear.
You are using an out of date browser. It may not display this or other websites correctly.
You should upgrade or use an alternative browser.
You should upgrade or use an alternative browser.
1985 GT build thread.
- Thread starter suicidekings
- Start date
Looks like a real nice restoration project. I maybe wrong, but it looked like you MM camber/caster plates were on the wrong side. I believe the center oval hole should favor towards the rear.
Thanks! The plates were installed correctly however as soon as they were installed they were removed anyhow. They were just set in place then I decided to do the engine swap before the suspension went back together.
I was sent some numbers and I decided to put them into a spreadsheet to see what torque curve looked like. This is why I went to option #2, the torque curve doesnt fall off and remains above 400 for quite some time. I was told that with a single plane intake this would have dropped off significantly. I was happy that the HP numbers kept climbing over 500 however im not sure why he stopped at 6350 (still waiting to hear back from him), all the way up to this point the HP kept climbing and believe it probably would have kept doing so all the way to 6800-7000rpm.

wow nice project! cant wait to see more!
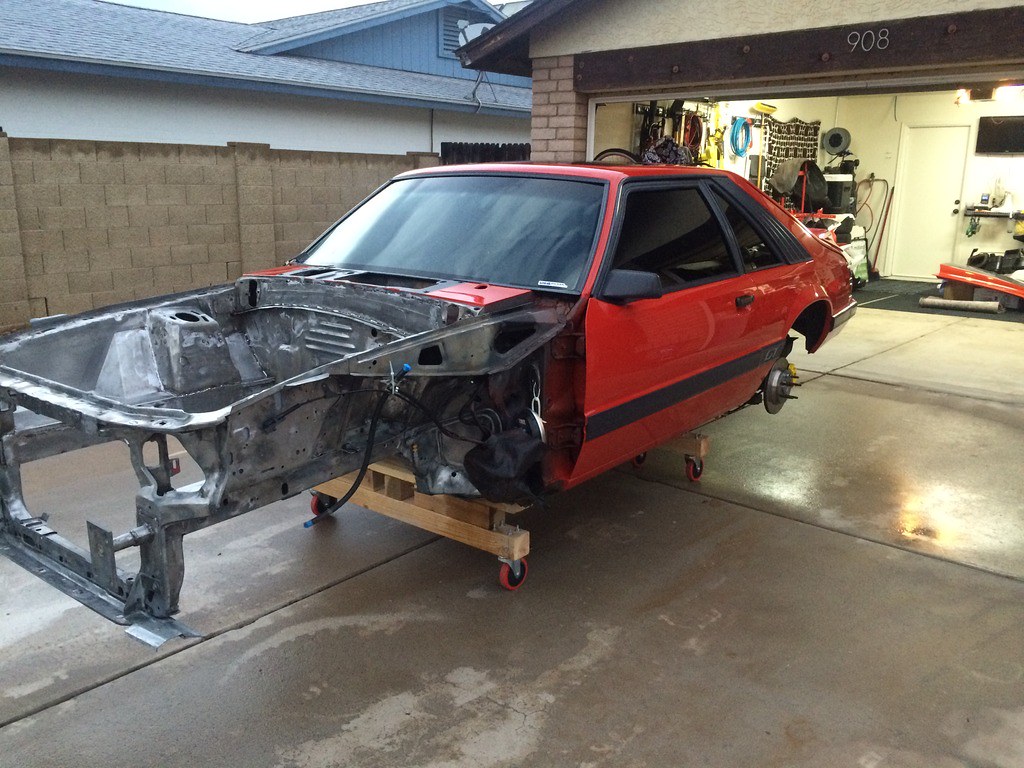
I got the front end glass blasted this weekend. This process has a mixture of water and rust inhibitor combined with the glass in order to create a dustless blasting. Pretty messy either way, I'm going to be cleaning for the next week to come.


In other news my engine is completed and ready for delivery!!!


so lets hear the #'s what did it dyno on this engine dyno? did it break the magic 500+ hp
Love this car! Nice to see a super clean 4 eye car
Thanks man, I caught some flack for tearing apart a clean 4 eye but overall I'm glad I started with a clean slate.
wow nice project! cant wait to see more!
Thanks sir!
so lets hear the #'s what did it dyno on this engine dyno? did it break the magic 500+ hp
I was sent some numbers and I decided to put them into a spreadsheet to see what torque curve looked like. This is why I went to option #2, the torque curve doesnt fall off and remains above 400 for quite some time. I was told that with a single plane intake this would have dropped off significantly. I was happy that the HP numbers kept climbing over 500 however im not sure why he stopped at 6350 (still waiting to hear back from him), all the way up to this point the HP kept climbing and believe it probably would have kept doing so all the way to 6800-7000rpm.

So in short, yes. She did break the 500 mark.
This weekend I was able to surface prep the engine bay, we are now ready to prime the back sides of the panels as well as the areas that will be covered by the panels. That is taking place today, once that is done I will be welding in the panels and welding in any holes.... This should be fun.
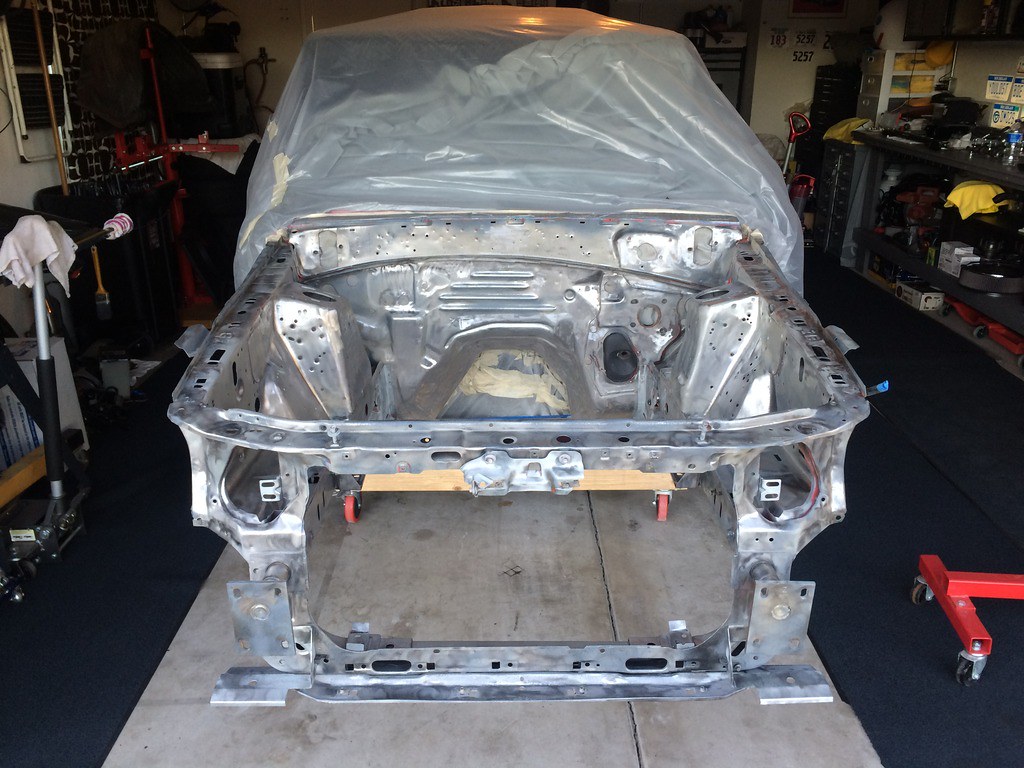 94240490-B2B8-4BA5-9AA7-9A7F0FE8AC25_zpsooaywvas by |SK Photography|, on Flickr
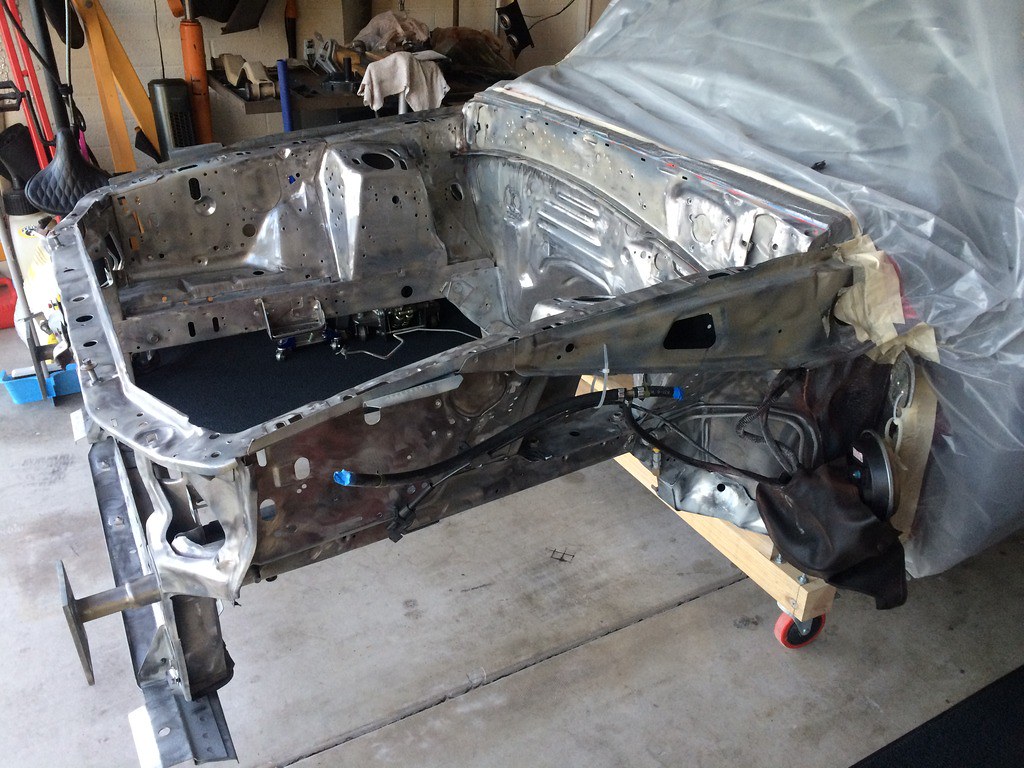 68A102A9-E3E4-4DEA-83A8-7EDC99A440AD_zpshyxg8cbp by |SK Photography|, on Flickr
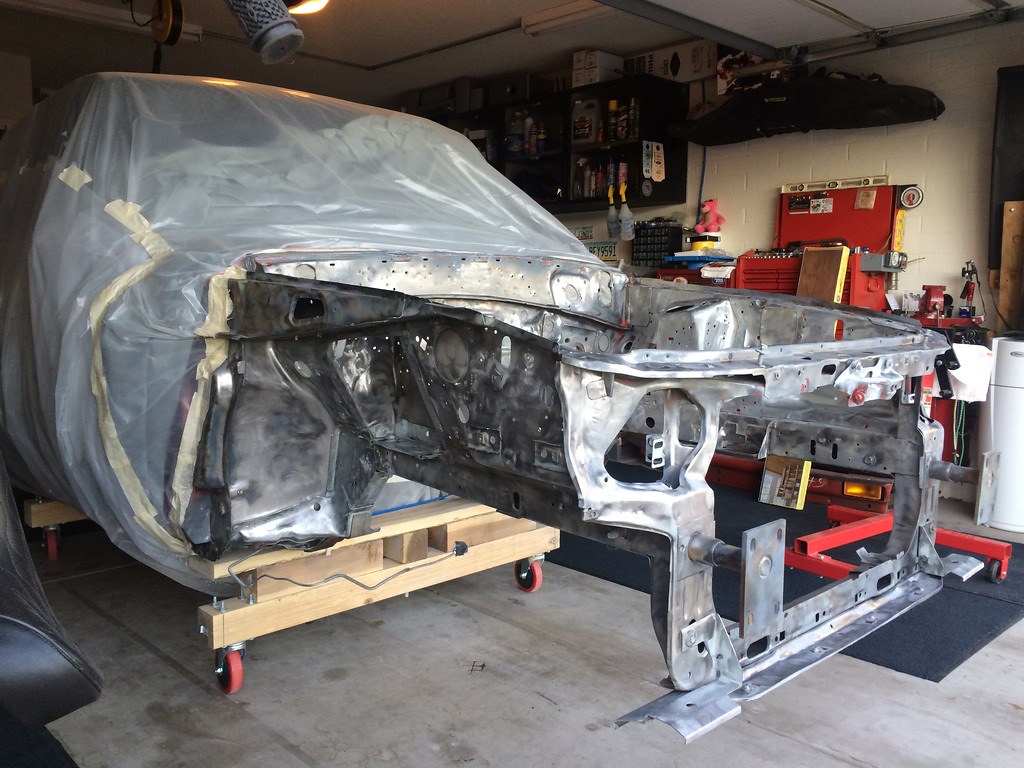 666676C5-66EF-4219-8F97-FD91B1B42F76_zpsr7wvjx2l by |SK Photography|, on Flickr
Additionally the Engine was shipped out on Friday so I should see it mid week.... Cant wait!
94240490-B2B8-4BA5-9AA7-9A7F0FE8AC25_zpsooaywvas by |SK Photography|, on Flickr
68A102A9-E3E4-4DEA-83A8-7EDC99A440AD_zpshyxg8cbp by |SK Photography|, on Flickr
666676C5-66EF-4219-8F97-FD91B1B42F76_zpsr7wvjx2l by |SK Photography|, on FlickrAdditionally the Engine was shipped out on Friday so I should see it mid week.... Cant wait!
Last edited:
Dupe from merged thread
Last edited:
Dupe from merged thread
Last edited:
Been a little bit since my last update....
So my engine arrived. The shipping crate was really nice and very sturdy.


I received more goodies for the engine.
New trans mount, and trans hump bushings.

Quicktime bell housing


I bought a 1G to 3G alternator upgrade... Problem is I was sent a used alternator, LMR was on top of it and another one is on its way.


Started making progress tacking in the body panels.


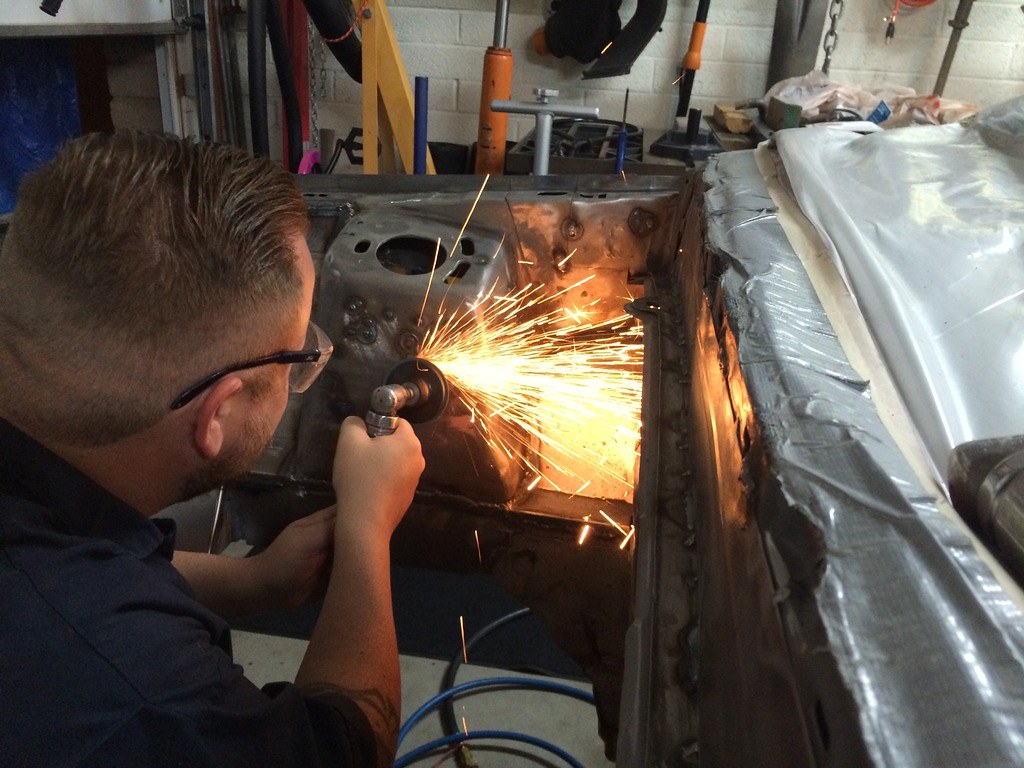
Coming along and finishing the welds up. Lots of little holes -__-


This is the part I cut out to clearance for the brake booster, I had to modify it a tad and welded it back in. Some grinding and body filler should make this area look back to good.

I put in MM sway bar mount braces in then made these caps to cover everything smooth.


I just need to finish up welding all of the holes on the firewall then I will begin grinding away. Once the grinding is done I will uncover the car to wash it down and wrap it up again to get ready for body filler and sand it all down. I am hoping to have the bay painted shortly after Thanksgiving and start putting the interior back together by Christmas.
Hope you all are enjoying!
So my engine arrived. The shipping crate was really nice and very sturdy.
I received more goodies for the engine.
New trans mount, and trans hump bushings.
Quicktime bell housing
I bought a 1G to 3G alternator upgrade... Problem is I was sent a used alternator, LMR was on top of it and another one is on its way.
Started making progress tacking in the body panels.
Coming along and finishing the welds up. Lots of little holes -__-
This is the part I cut out to clearance for the brake booster, I had to modify it a tad and welded it back in. Some grinding and body filler should make this area look back to good.
I put in MM sway bar mount braces in then made these caps to cover everything smooth.
I just need to finish up welding all of the holes on the firewall then I will begin grinding away. Once the grinding is done I will uncover the car to wash it down and wrap it up again to get ready for body filler and sand it all down. I am hoping to have the bay painted shortly after Thanksgiving and start putting the interior back together by Christmas.
Hope you all are enjoying!
Looking good man.
Thanks man. Was good seeing you the other day, car sounded great as you guys left.
Indeed we areHope you all are enjoying!
 op:
op:Quick question, are you going with the factory starter motor when you bolt everything back together?
Looks like grueling work ahead of Thanksgiving..
Indeed we are
Quick question, are you going with the factory starter motor when you bolt everything back together?
Looks like grueling work ahead of Thanksgiving..
Stock starter is for sale on crapslist, I have a feeling I will be taking it to the scrap yard though. I am looking into high torque mini starters at the moment. I have my eyes on a PA Performance piece but still have some research to do.
From now till Christmas its going to be dirty work really, all that grinding and all that sanding of body filler just makes a mess. Luckily I can roll the car out now. When it comes time to drop the engine in I will most likely need a hand..... **ahem.... scottL, hyvltge, 2011 GTCS** Dont want to scratch up the pretty paint.
Was going to say you might have to "massage" those longtubes with a BFH to fit if you're going to use a factory size starter. I got one of these for minehttp://www.summitracing.com/parts/fms-m-11000-b51/overview/
Not the best reviews or cheapest price but it's been working fine for 2 years without issues.
Let me know when you're getting closer on your motor, if I'm in town I'd love to come down and give you a hand. Was thinking of cruising by last weekend to show off the new exhaust actually..
Not the best reviews or cheapest price but it's been working fine for 2 years without issues.
Let me know when you're getting closer on your motor, if I'm in town I'd love to come down and give you a hand. Was thinking of cruising by last weekend to show off the new exhaust actually..
Was going to say you might have to "massage" those longtubes with a BFH to fit if you're going to use a factory size starter. I got one of these for minehttp://www.summitracing.com/parts/fms-m-11000-b51/overview/
Not the best reviews or cheapest price but it's been working fine for 2 years without issues.
Let me know when you're getting closer on your motor, if I'm in town I'd love to come down and give you a hand. Was thinking of cruising by last weekend to show off the new exhaust actually..
I went with Doug's Headers, ceramic coated. They said to run a powermaster mini starter and it will clear no problem, I will research that one you linked. I will avoid massaging headers at all costs!
Last weekend I was so busy working on the car, I saw your text in the morning but forgot to respond. Lets plan for after Thanksgiving to meet up, I want a ride in your notch!
Not a lot to update but moving along.
I spent the weekend grinding away at all the ugly welds.
 CECBA404-D2D0-43EF-9B37-CBA9AA17F9A3_zpsdyrvn6wf by |SK Photography|, on Flickr
After all the grinding was done I ended up taking it out of the garage and unwrapping it. I had a car cover on the car, then blankets over the cowl area and windshield, then the entire car wrapped with some thick sheeting. Even with all of these preventive measures I still found the car was dirty, dusty and found residue from the blasting so I decided to wash her.
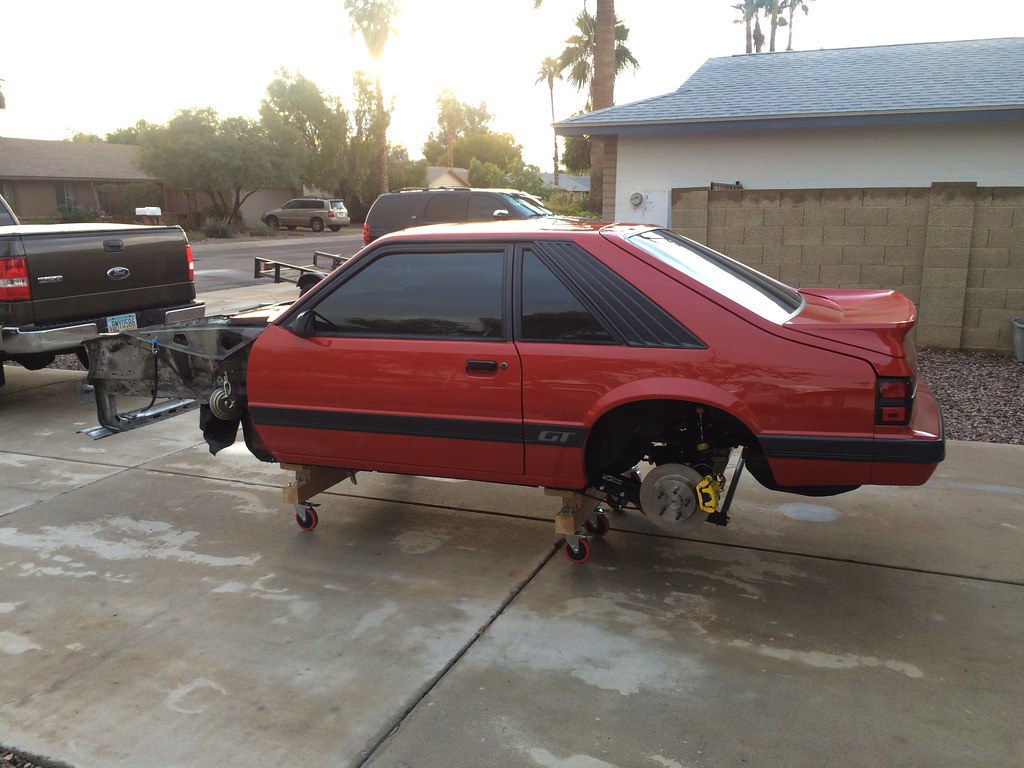 D507B8F7-4784-4E2F-8F1B-28D25DC7E842_zpsswxf2ybl by |SK Photography|, on Flickr
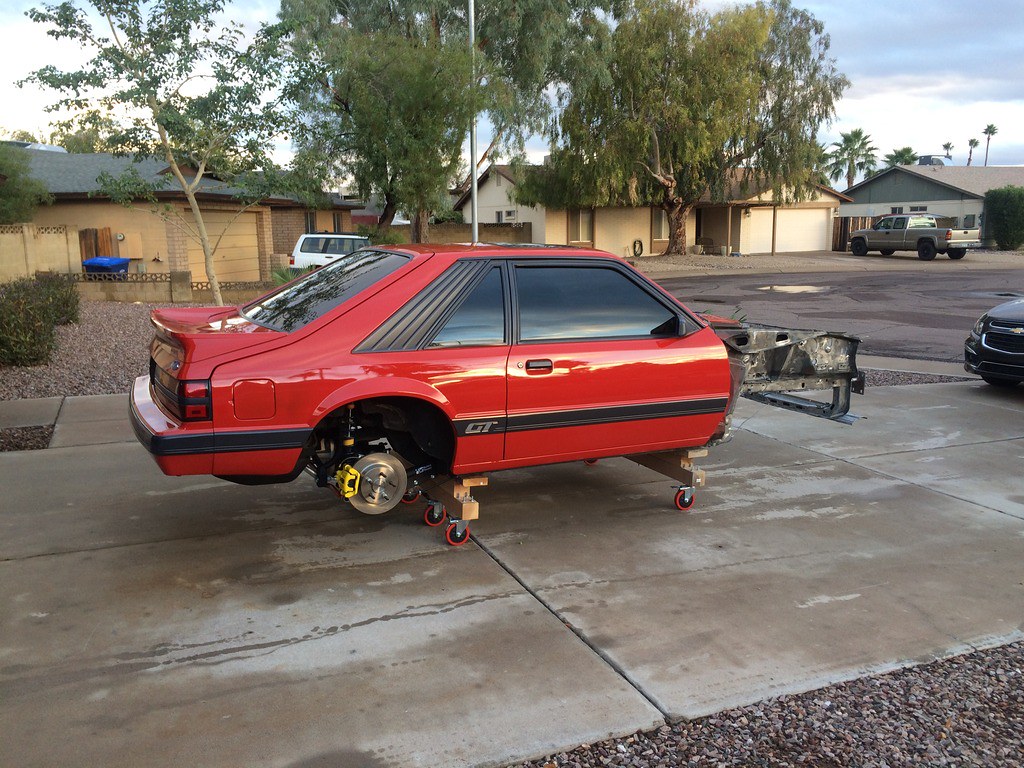 80EB8EC2-F175-4558-9AA9-3A58293D5382_zps8vv5qlhr by |SK Photography|, on Flickr
 9D221B8E-0D1B-40E3-B60C-7A4A60EB9C64_zpsmnptoj8r by |SK Photography|, on Flickr
Now its back under a different car cover and will be wrapped up again so I can get to prepping and start applying body filler. This should be real fun.... not.
I spent the weekend grinding away at all the ugly welds.
CECBA404-D2D0-43EF-9B37-CBA9AA17F9A3_zpsdyrvn6wf by |SK Photography|, on FlickrAfter all the grinding was done I ended up taking it out of the garage and unwrapping it. I had a car cover on the car, then blankets over the cowl area and windshield, then the entire car wrapped with some thick sheeting. Even with all of these preventive measures I still found the car was dirty, dusty and found residue from the blasting so I decided to wash her.
D507B8F7-4784-4E2F-8F1B-28D25DC7E842_zpsswxf2ybl by |SK Photography|, on Flickr
80EB8EC2-F175-4558-9AA9-3A58293D5382_zps8vv5qlhr by |SK Photography|, on Flickr
9D221B8E-0D1B-40E3-B60C-7A4A60EB9C64_zpsmnptoj8r by |SK Photography|, on FlickrNow its back under a different car cover and will be wrapped up again so I can get to prepping and start applying body filler. This should be real fun.... not.
Last edited:
Dupe from merged thread
Last edited:
Users who are viewing this thread
Total: 2 (members: 0, guests: 2)

